background image

9 Maintenance and service

Installer and user reference guide

40

RXYTQ8~16T7YF

VRV IV system air conditioner

4P388989-1B – 2016.02

NOTICE

Be  sure  to  turn  on  the  power  6  hours  before  operation  in
order  to  have  power  running  to  the  crankcase  heater  and
to protect the compressor.

4

Make  sure  the  default  (idle)  situation  is  existing;  see 

"7.2.4  To

access  mode  1  or  2"  on  page  32

.  Push  BS2  for  5  seconds  or

more. The unit will start test operation.

Result: 

The  test  operation  is  automatically  carried  out,  the

outdoor unit display will indicate "

" and the indication "Test

operation"  and  "Under  centralised  control"  will  display  on  the
user interface of indoor units.

Steps during the automatic system test run procedure:

Step

Description

Control before start up (pressure equalisation)

Cooling start up control

Cooling stable condition

Communication check

Stop valve check

Pipe length check

Refrigerant amount check

Pump down operation

Unit stop

Note: 

During  the  test  operation,  it  is  not  possible  to  stop  the  unit

operation  from  a  user  interface.  To  abort  the  operation,  press  BS3.
The unit will stop after ±30 seconds.

5

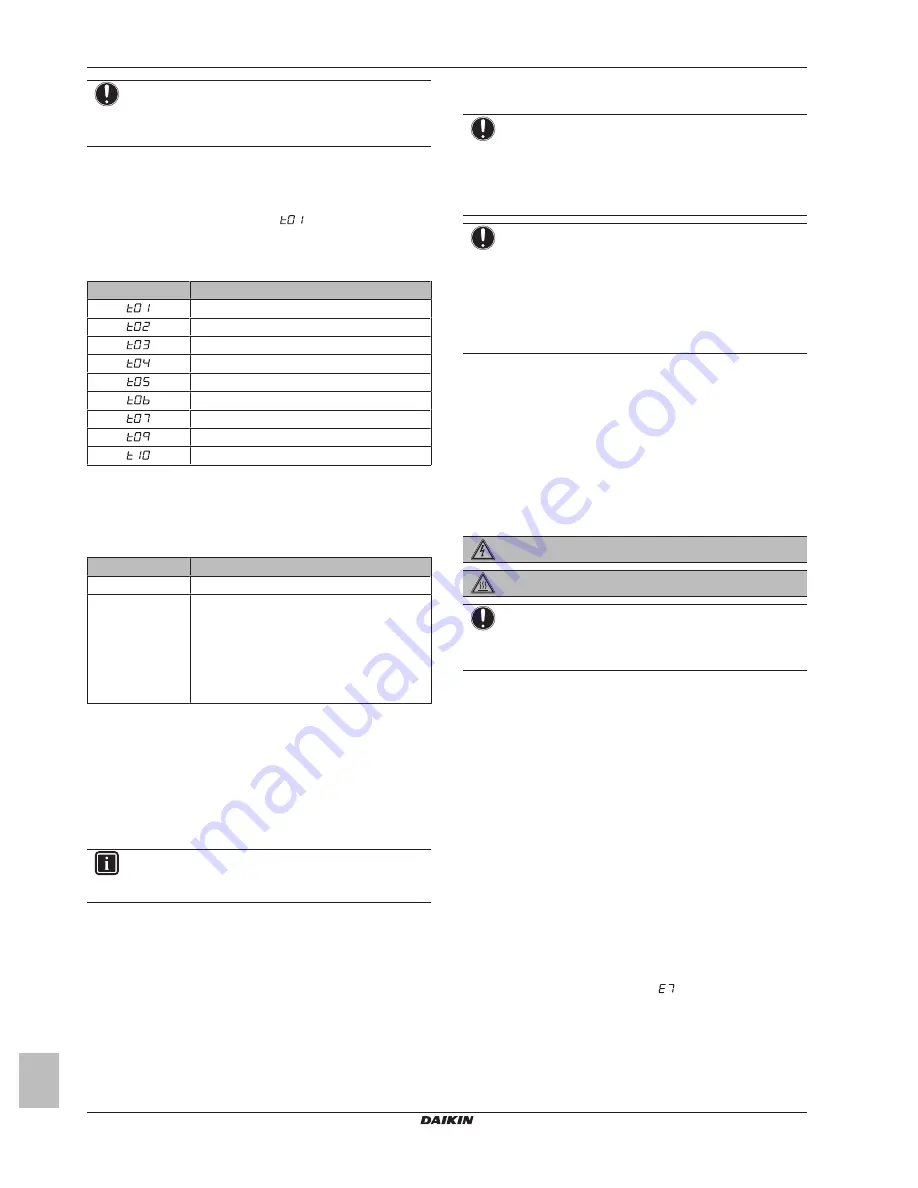
Check the test operation results on the outdoor unit 7‑segment
display.

Completion

Description

Normal completion No indication on the 7‑segment display (idle).

Abnormal
completion

Indication of malfunction code on the
7‑segment display.

Refer to 

"8.6 Correcting after abnormal

completion of the test run" on page 40

 to take

actions for correcting the abnormality. When
the test operation is fully completed, normal
operation will be possible after 5 minutes.

8.6

Correcting after abnormal
completion of the test run

The test operation is only completed if there is no malfunction code
displayed on the user interface or outdoor unit 7‑segment display. In
case of a displayed malfunction code, perform correcting actions as
explained in the malfunction code table. Carry out the test operation
again and confirm that the abnormality is properly corrected.

INFORMATION

Refer to the installation manual of the indoor unit for other
detailed malfunction codes related to indoor units.

8.7

Operating the unit

Once  the  unit  is  installed  and  test  operation  of  outdoor  unit  and
indoor units is finished, the operation of the system can start.

For  operating  the  indoor  unit,  the  user  interface  of  the  indoor  unit
should be switched ON. Refer to the indoor unit operation manual for
more details.

9

Maintenance and service

NOTICE

Maintenance  must  be  done  by  an  authorised  installer  or
service agent.

We  recommend  to  do  maintenance  at  least  once  a  year.
However,  applicable  legislation  might  require  shorter
maintenance intervals.

NOTICE

In  Europe,  the 

greenhouse  gas  emissions

  of  the  total

refrigerant  charge  in  the  system  (expressed  as  tonnes
CO

2

-equivalent)  is  used  to  determine  the  maintenance

intervals. Follow the applicable legislation.

Formula  to  calculate  the  greenhouse  gas  emissions:

GWP value of the refrigerant × Total refrigerant charge [in
kg] / 1000

9.1

Overview: Maintenance and
service

This chapter contains information about:

▪ Preventing  electrical  hazards  when  maintaining  and  servicing  the

system

▪ The refrigerant recovery operation

9.2

Maintenance safety precautions

DANGER: RISK OF ELECTROCUTION

DANGER: RISK OF BURNING

NOTICE: Risk of electrostatic discharge

Before performing any maintenance or service work, touch
a metal part of the unit in order to eliminate static electricity
and to protect the PCB.

9.2.1

To prevent electrical hazards

When performing service to inverter equipment:

1

Do not open the electrical component box cover for 10 minutes
after the power supply is turned off.

2

Measure  the  voltage  between  terminals  on  the  terminal  block
for power supply with a tester and confirm that the power supply
is  shut  off.  In  addition,  measure  points  as  shown  in  the  figure
below, with a tester and confirm that the voltage of the capacitor
in the main circuit is less than 50 V DC.

3

To  prevent  damaging  the  PCB,  touch  a  non-coated  metal  part
to  eliminate  static  electricity  before  pulling  out  or  plugging  in
connectors.

4

Pull  out  junction  connectors  X1A,  X2A  (X3A,  X4A)  for  the  fan
motors  in  the  outdoor  unit  before  starting  service  operation  on
the inverter equipment. Be careful not to touch the live parts. (If
a  fan  rotates  due  to  strong  wind,  it  may  store  electricity  in  the
capacitor or in the main circuit and cause electric shock.)

5

After the service is finished, plug the junction connector back in.
Otherwise  the  malfunction  code 

  will  be  displayed  on  the

user  interface  or  on  the  outdoor  unit  7‑segment  display  and
normal operation will not be performed.

For  details  refer  to  the  wiring  diagram  labelled  on  the  back  of  the
electrical component box cover.

Summary of Contents for RXYTQ8T7YF

Page 1: ...Installer and user reference guide VRV IV system air conditioner English Installer and user reference guide VRV IV system air conditioner RXYTQ8T7YF RXYTQ10T7YF RXYTQ12T7YF RXYTQ14T7YF RXYTQ16T7YF...

Page 2: ...To protect against contamination 19 6 4 9 To braze the pipe end 20 6 4 10 Using the stop valve and service port 20 6 4 11 To remove the pinched pipes 21 6 5 Checking the refrigerant piping 21 6 5 1 Ab...

Page 3: ...are not air conditioner troubles 68 19 2 1 Symptom The system does not operate 68 19 2 2 Symptom Cool Heat cannot be changed over 68 19 2 3 Symptom Fan operation is possible but cooling and heating do...

Page 4: ...how to install or operate the unit contact your dealer NOTICE Improper installation or attachment of equipment or accessories could result in electric shock short circuit leaks fire or other damage to...

Page 5: ...e is no oxygen in the system Refrigerant may only be charged after performing the leak test and the vacuum drying In case re charge is required refer to the nameplate of the unit It states the type of...

Page 6: ...electric noise to avoid unnecessary opening of the earth leakage protector NOTICE Precautions when laying power wiring Do not connect wiring of different thicknesses to the power terminal block slack...

Page 7: ...D FOR AFTER SALE SERVICES REQUESTFORTHEINDICATIONOFINSTALLATIONINFORMATION 1 RECORD OF INDOOR UNIT MODELAND INSTALLATION SITE 2 RECORD FOR SETTINGS CONTENTS SEE INSTALLATION MANUAL SETTING 40 30 10 20...

Page 8: ...d options you can combine the outdoor units Which outdoor units have to be used as standalone units and which outdoor units can be combined 4 2 Identification label Outdoor unit Location 10 16 HP 8 HP...

Page 9: ...branching kit Description Model name Refnet header KHRQ22M29H KHRQ22M64H KHRQ22M75H Description Model name Refnet joint KHRQ22M20T KHRQ22M29T9 KHRQ22M64T KHRQ22M75T For the selection of the optimal b...

Page 10: ...s suitable for installation in a commercial and light industrial environment When installing take strong winds typhoons or earthquakes into account improper installation may result in the unit turning...

Page 11: ...the maximum concentration of refrigerant is directly related to the humanly occupied space in to which it could leak The unit of measurement of the concentration is kg m3 the weight in kg of the refri...

Page 12: ...otection against harmful ultraviolet radiation R410A can contribute slightly to the greenhouse effect if it is released Therefore we should take special attention to check the tightness of the install...

Page 13: ...l thickness t mm 6 4 9 5 12 7 0 80 15 9 0 99 19 1 22 2 0 80 28 6 0 99 34 9 1 21 41 3 1 43 In case the required pipe sizes inch sizes are not available it is also allowed to use other diameters mm size...

Page 14: ...G p b c d e f 1 2 3 4 5 6 7 8 g H1 H2 Single outdoor Branch with refnet joint Example 1 2 a b c d e f i k j g h A B 1 2 3 4 5 6 7 8 H1 H2 Single outdoor Branch with refnet joint and refnet header Exa...

Page 15: ...iping length between all indoor to the nearest branch kit is 40 m Example h i j p 40 m b It is necessary to increase the pipe size of the gas and liquid piping if the pipe length between the first and...

Page 16: ...slation based on the information mentioned in the table below Model Minimum circuit ampacity Recommended fuses RXYTQ8 16 1 A 20 A RXYTQ10 22 0 A 25 A RXYTQ12 24 0 A 32 A RXYTQ14 27 0 A 32 A RXYTQ16 31...

Page 17: ...mponent box cover make sure that the sealing material on the lower back side of the cover is not caught and bend towards the inside a b c d e a Electrical component box cover b Front side c Power supp...

Page 18: ...nstallation Only use phosphoric acid deoxidised seamless copper NOTICE After all the piping has been connected make sure there is no gas leak Use nitrogen to perform a gas leak detection 6 4 2 About c...

Page 19: ...l length of the piping connected to the joint is absolute straight for more than 500 mm Only if a straight field piping of more than 120 mm is connected more than 500 mm of straight section can be ens...

Page 20: ...sing the stop valve and service port To handle the stop valve Make sure to keep all stop valves open during operation The figure below shows the name of each part required in handling the stop valve T...

Page 21: ...10A N2 b c e a f g d A B a Pressure reducing valve b Nitrogen c Weighing scales d Refrigerant R410A tank siphon system e Vacuum pump f Liquid line stop valve g Gas line stop valve A Valve A B Valve B...

Page 22: ...bsolute NOTICE Make sure the pump oil does not flow oppositely into the system while the pump is not working NOTICE Do not purge the air with refrigerants Use a vacuum pump to evacuate the installatio...

Page 23: ...an withstand a temperature of 70 C for liquid piping and polyethylene foam which can withstand a temperature of 120 C for gas piping Reinforce the insulation on the refrigerant piping according to the...

Page 24: ...erant charge For factory charge refer to the unit name plate Additional refrigerant to be charged R kg R should be rounded off in units of 0 1 kg R X1 22 2 0 37 X2 19 1 0 26 X3 15 9 0 18 X4 12 7 0 12...

Page 25: ...l refrigerant charge label Go to test run Step 3b Close valves C and B R Q R Q R Q Continued on next page p p R410A N2 C A B Charging refrigerant Step 5 Proceed with manual charge Step 6 Activate fiel...

Page 26: ...port and charge the remaining additional refrigerant through this port Open all outdoor unit stop valves At this point valve A must remain closed p p R410A a c d b A a Weighing scales b Refrigerant R4...

Page 27: ...med in accordance with the wiring diagram supplied with the product NEVER squeeze bundled cables and make sure they do not come in contact with the piping and sharp edges Make sure no external pressur...

Page 28: ...the field piping Field piping can be routed from front or bottom of the unit going left or right Refer to 6 4 3 To route the refrigerant piping on page 18 Be sure to follow the limits below If the un...

Page 29: ...2 b c a d e TO IN D UNIT TO OUT D UNIT TO MULTI UNIT A1P a Outdoor unit PCB A1P b Use the conductor of sheathed wire 2 wire no polarity c Terminal board field supply d Indoor unit e Outdoor unit In ca...

Page 30: ...supply stress relief and the terminal block itself must be as such that the current carrying wires are tautened before the earth wire is in case the power supply is pulled loose from the stress relief...

Page 31: ...rough a personal computer interface for this option EKPCCAB is required The installer can prepare the configuration off site on PC and afterwards upload the configuration to the system See also 7 2 9...

Page 32: ...g should be checked at first Access BS1 is used to change the mode you want to access Access Action Mode 1 Push BS1 one time 7 segment display indication changes to Mode 2 Push BS1 for at least 5 seco...

Page 33: ...he sound generated by the unit compared to nominal operating conditions 1 1 Description 0 Unit is currently not operating under low noise restrictions 1 Unit is currently operating under low noise res...

Page 34: ...o 1 41 3 43 2 9 Tc target C 6 46 For more information and advice about the impact of these settings see 7 3 Energy saving and optimum operation on page 36 2 12 Enable the low noise function and or pow...

Page 35: ...80 6 85 7 90 8 95 2 31 Power consumption limitation level step 2 via the external control adaptor DTA104A61 62 If the system needs to be running under power consumption limitation conditions when an...

Page 36: ...r ambient conditions E g when your system is operating in cooling you do not need as much cooling under low outdoor ambient temperatures e g 25 C as under high outdoor ambient temperatures e g 35 C Us...

Page 37: ...conjunction with setting 2 9 Mild Overshoot during heating operation or undershoot during cooling operation is allowed compared to the requested refrigerant temperature in order to achieve the requir...

Page 38: ...bliged to verify correct operation Therefore a test run must be performed according to the procedures described below This chapter describes what you have to do and know to commission the system after...

Page 39: ...ectrical components Pipe size and pipe insulation Be sure that correct pipe sizes are installed and that the insulation work is properly executed Stop valves Be sure that the stop valves are open on b...

Page 40: ...For operating the indoor unit the user interface of the indoor unit should be switched ON Refer to the indoor unit operation manual for more details 9 Maintenance and service NOTICE Maintenance must...

Page 41: ...It contains information about Solving problems based on error codes 10 2 Solving problems based on error codes In case of a displayed malfunction code perform correcting actions as explained in the ma...

Page 42: ...e sensor malfunction R22T short circuit A1P X29A Check connection on PCB or actuator Compressor casing temperature sensor malfunction R8T open circuit A1P X29A Check connection on PCB or actuator Comp...

Page 43: ...ecuted system operation not possible Execute system test run Faulty wiring to Q1 Q2 or indoor outdoor Check Q1 Q2 wiring Faulty wiring to Q1 Q2 or indoor outdoor Check Q1 Q2 wiring System test run abn...

Page 44: ...2 Auto address malfunction inconsistency Check if transmission wired unit amount matches with powered unit amount by monitor mode or wait till initialisation is finished Stop valve closed or wrong dur...

Page 45: ...data 12 1 Overview Technical data This chapter contains information about Dimensions Service space Components Piping diagram Wiring diagram Technical specifications Capacity table 12 2 Dimensions Outd...

Page 46: ...f 900 mm a 50 mm b 500 mm c 50 mm d 500 mm e 100 mm f 600 mm h1 h2 1500 500 F mm ABCD Sides along the installation site with obstacles F Sides along the installation site with obstacles Suction side...

Page 47: ...o g l m h e a Compressor M1C b Heat exchanger c Fan d Fan motor M1F e Accumulator f Expansion valve main Y1E g Expansion valve subcool heat exchanger Y2E h Subcool heat exchanger i Oil separator j Sol...

Page 48: ...ompressor M1C b Heat exchanger c Fan d Fan motor M1F M2F e Accumulator f Expansion valve main Y1E g Expansion valve subcool heat exchanger Y2E h Subcool heat exchanger i Oil separator j Solenoid valve...

Page 49: ...mpressor M2C c Heat exchanger d Fan e Fan motor M1F M2F f Accumulator g Expansion valve main Y1E h Expansion valve subcool heat exchanger Y2E i Subcool heat exchanger j Oil separator k Solenoid valve...

Page 50: ...ain terminal block which allows easy connection of field wiring for power supply c Terminal X1M on main PCB terminal block for transmission wiring d Cable tie mountings the cable tie mountings allow t...

Page 51: ...HPS R8T b d c c d M M1F M M2F R1T a Compressor M1C b Heat exchanger c Fan d Fan motor M1F M2F e Accumulator f Expansion valve main Y1E g Expansion valve subcool heat exchanger Y2E h Subcool heat exch...

Page 52: ...2 X2A V1R F101U R24 X5A X3A N1 X4A X1A P1 5 5 X2A X1A S2S S1S V W U M1C F1 F2 F2 F1 X28A X31A X22A X30A X32A X42A X18A X4A X20A X2A X29A X21A X23A X3A ON OFF ON OFF SEG1 1234 DS2 BS2 SEG3 SEG2 BS1 12...

Page 53: ...r current limiting A3P S1NPH Pressure sensor high S1NPL Pressure sensor low S1PH S2PH Pressure switch discharge SEG1 SEG3 7 segment display A1P V1R Power module A3P A4P X1A X2A Connector M1F X3A Conne...

Page 54: ...of M1C A1P Printed circuit board main A2P Printed circuit board noise filter A3P Printed circuit board inv A4P A5P Printed circuit board fan BS1 BS3 Push button switch A1P mode set return C47 C48 Capa...

Page 55: ...the optional adapter refer to the installation manual of the optional adapter Note 4 For connection wiring to indoor outdoor transmission F1 F2 Note 5 How to use BS1 BS3 switch Refer to the service p...

Page 56: ...Cool heatselector Electrical component box Outer shell Note 3 Heat Fan Heat Cool Note 3 Cool Terminal of M1C M2C A1P Printed circuit board main A2P A5P Printed circuit board noise filter A3P A6P Print...

Page 57: ...the optional adapter refer to the installation manual of the optional adapter Note 4 For connection wiring to indoor outdoor transmission F1 F2 Note 5 How to use BS1 BS3 switch Refer to the service p...

Page 58: ...7 47 kW 9 68 kW 12 4 kW 14 0 kW Cooling T3 a Capacity 20 2 kW 25 2 kW 28 5 kW 32 0 kW 35 1 kW EER 2 72 2 90 2 85 2 77 2 69 Pi 7 43 kW 8 69 kW 10 0 kW 11 6 kW 13 0 kW Cooling T2 a Capacity 16 8 kW 22...

Page 59: ...es g Sound pressure level is a relative value depending on the distance and acoustic environment For more details refer to sound level drawings in the technical data book Electrical specifications Spe...

Page 60: ...maximum CR 8 100 200 260 10 125 250 325 12 150 300 390 14 175 350 455 16 200 400 520 18 225 450 585 20 250 500 650 22 275 550 715 24 300 600 780 26 325 650 845 28 350 700 910 30 375 750 975 32 400 800...

Page 61: ...CAUTION Never touch the internal parts of the controller Do not remove the front panel Some parts inside are dangerous to touch and appliance problems may happen For checking and adjusting the intern...

Page 62: ...s and the system needs to go into defrost operation to be able to deliver enough heat to the indoor units If Then RXYTQ outdoor unit is installed The indoor unit will stop fan operation the refrigeran...

Page 63: ...de selector button on the user interface several times and select program dry operation 3 Press the ON OFF button of the user interface Result The operation lamp lights up and the system starts operat...

Page 64: ...djust the room temperature properly for a comfortable environment Avoid excessive heating or cooling Prevent direct sunlight from entering a room during cooling operation by using curtains or blinds V...

Page 65: ...ay fall and result in injury NOTICE Do not wipe the controller operation panel with benzine thinner chemical dust cloth etc The panel may get discoloured or the coating peeled off If it is heavily dir...

Page 66: ...ir from fan heaters gas cookers etc is present Always have qualified service personnel confirm that the point of leakage has been repaired or corrected before resuming operation 18 4 3 Recommended mai...

Page 67: ...obstacles Remove any obstacle and make it well ventilated Check if the user interface display shows time to clean the air filter Refer to 18 Maintenance and service on page 65 and Maintenance in the i...

Page 68: ...ON again in case it was turned OFF just before The same starting delay occurs after the operation mode selector button was used If Under Centralized Control is displayed on the user interface pressing...

Page 69: ...out of the unit When the unit is used for the first time in a long time This is because dust has gotten into the unit 19 2 13 Symptom The units can give off odours The unit can absorb the smell of ro...

Page 70: ...roduct and that need to be installed according to the instructions in the accompanying documentation Optional equipment Equipment made or approved by Daikin that can be combined with the product accor...

Page 71: ......

Page 72: ...4P388989 1B 2016 02 Copyright 2015 Daikin...

Reviews: