6 Preparation
Installer reference guide
26
ERGA04~08DAV3(A) + EHVH/X04+08S18+23DA
Daikin Altherma – Low temperature split
4P495248-1 – 2017.12
M
M
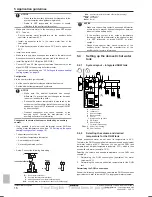
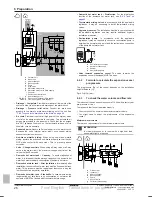
FCU1
FCU2
FCU3
FHL1
FHL2
FHL3
a
b
c
d
e
f
g
f
h
i
i
i
i
j
k
89°C
75°C
a
Outdoor unit
b
Indoor unit
c
Heat exchanger
d
Backup heater
e
Pump
f
Stop valve
g
Motorised 3-way valve
h
Motorised 2-way valve (field supply)
i
Collector
j
Domestic hot water tank
k
Heat exchanger coil
FCU1...3
Fan coil unit (optional) (field supply)
FHL1...3
Floor heating loop (field supply)
▪
Drainage – Low points.
Provide drain taps at all low points of the
system in order to allow complete drainage of the water circuit.
▪
Drainage – Pressure relief valve.
Connect the drain hose
properly to the drain to avoid water dripping out of the unit. See
"7.8.5 To connect the drain hose to the drain" on page 40
.
▪
Air vents.
Provide air vents at all high points of the system, which
must also be easily accessible for servicing. Two automatic air
purges are provided in the indoor unit. Check that the air purges
are NOT tightened too much, so that automatic release of air in
the water circuit is possible.
▪
Zn-coated parts.
Never use Zn-coated parts in the water circuit.
Because the unit's internal water circuit uses copper piping,
excessive corrosion may occur.
▪
Non-brass metallic piping.
When using non-brass metallic
piping, insulate the brass and non-brass properly so that they do
NOT make contact with each other. This to prevent galvanic
corrosion.
▪
Valve – Change‑over time.
When using a 2-way valve or a 3-way
valve in the water circuit, the maximum change-over time of the
valve must be 60 seconds.
▪
Domestic hot water tank – Capacity.
To avoid stagnation of
water, it is important that the storage capacity of the domestic hot
water tank meets the daily consumption of domestic hot water.
▪
Domestic hot water tank – After installation.
Immediately after
installation, the domestic hot water tank must be flushed with fresh
water. This procedure must be repeated at least once a day the
first 5 consecutive days after installation.
▪
Domestic hot water tank – Standstills.
In cases where during
longer periods of time there is no consumption of hot water, the
equipment MUST be flushed with fresh water before usage.
▪
Domestic hot water tank – Disinfection.
For the disinfection
function of the domestic hot water tank, see
"8.4.6 Tank" on
page 63
.
▪
Thermostatic mixing valves.
In accordance with the applicable
legislation, it may be necessary to install thermostatic mixing
valves.
▪
Hygienic measures.
The installation must be in compliance with
the applicable legislation and may require additional hygienic
installation measures.
▪
Recirculation pump.
In accordance with the applicable
legislation, it may be required to connect a recirculation pump in
between the hot water end point and the recirculation connection
of the domestic hot water tank.
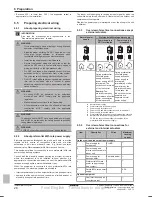
c
d
a
b
a
Recirculation connection
b
Hot water connection
c
Shower
d
Recirculation pump
▪
Valve towards expansion vessel.
The valve towards the
expansion vessel (if equipped) MUST be open.
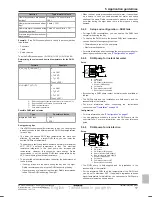
6.4.2
Formula to calculate the expansion vessel
pre-pressure
The pre-pressure (Pg) of the vessel depends on the installation
height difference (H):
Pg=0.3+(H/10) (bar)
6.4.3
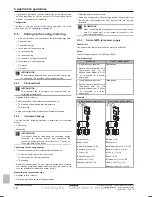
To check the water volume and flow rate
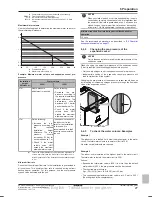
The indoor unit has an expansion vessel of 10 litre with a factory-set
pre-pressure of 1 bar.
To make sure that the unit operates properly:
▪ You must check the minimum and maximum water volume.
▪ You might need to adjust the pre-pressure of the expansion
vessel.
Minimum water volume
There are no requirements for the minimum water volume.
INFORMATION
In critical processes, or in rooms with a high heat load,
extra water might be required.
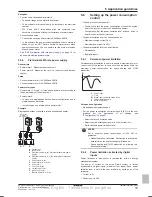
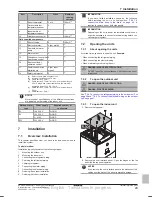
FHL1
FHL2
FHL3
M1
T1
M2
T2
M3
T3
f
d
c
b
a
f
g
h
e
a
Outdoor unit
b
Indoor unit
c
Heat exchanger
d
Backup heater
e
Pump
f
Shut-off valve
g
Collector (field supply)
Final English - Tanslations in progress

