background image

13 Configuration

Installer and user reference guide

14

BK+S

Wired remote controller

4P513689-1 – 2018.02

3

Press 

 to confirm.

Result: 

The screen adjusts its brightness and the controller returns

to the installer menu.

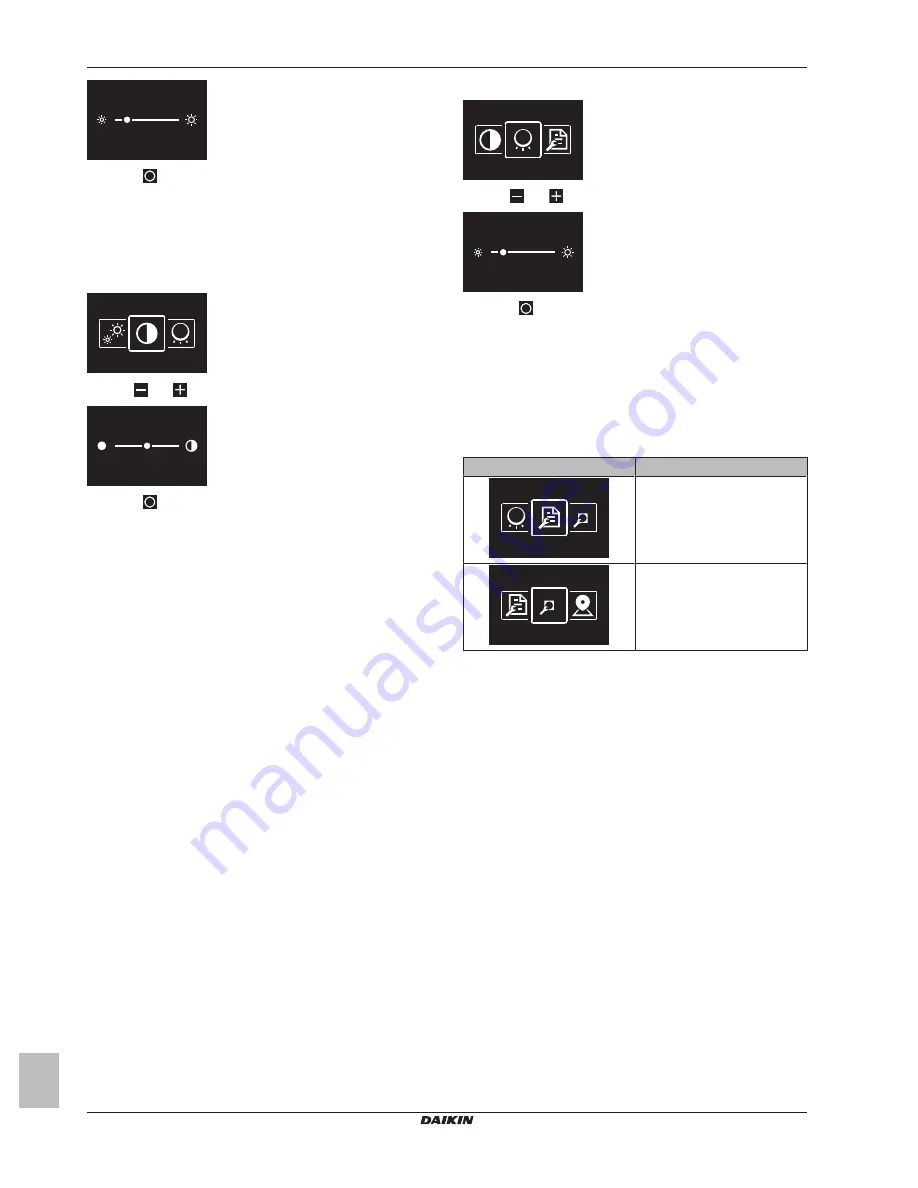
To set screen contrast

Prerequisite: 

You are in the installer menu.

1

Navigate to the screen contrast menu.

2

Use 

 and 

 to adjust screen contrast.

3

Press 

 to confirm.

Result: 

The screen adjusts its contrast and the controller returns to

the installer menu.

13.1.3

Status indicator settings

About status indicator settings

In  the  installer  menu,  you  can  set  status  indicator  intensity  and
behaviour.

Intensity

For instructions on how to set status indicator intensity, see 

"To set

status indicator intensity" on page 14

.

Behaviour

Status indicator behaviour is changed through remote controller field
settings.  For  instructions  on  how  to  make  field  settings,  see

"13.1.4  Field  settings"  on  page  14

.  For  an  overview  of  remote

controller  field  settings,  see 

"Remote  controller  field  settings"  on

page 18

.

To set status indicator intensity

Prerequisite: 

You are in the installer menu.

1

Navigate to the status indicator intensity menu.

2

Use 

 and 

 to adjust status indicator brightness.

3

Press 

 to confirm.

Result: 

The  status  indicator  adjusts  its  intensity  and  the  controller

returns to the installer menu.

13.1.4

Field settings

About field settings

The  controller  allows  for  making  field  settings  related  to  the  indoor
unit, and to the controller itself.

Screen

Field settings

Indoor unit

Remote controller

In both case, the setting procedure is the same. For instructions, see

"Setting procedure" on page 14

.

Setting procedure

Field settings are composed of the following components:

1

Modes ("Mode"),

2

Units ("Unit"),

3

Settings ("SW"), and

4

Values for those settings.

The field settings menus have two levels. You set modes and units
in the first level, and settings and values in the second.

Summary of Contents for BRC1H51W

Page 1: ...Installer and user reference guide Wired remote controller English Installer and user reference guide Wired remote controller BRC1H51W BRC1H51K BRC1H51S...

Page 2: ...Information 12 12 4 1 Information screen 12 12 4 2 Information menu 13 13 Configuration 13 13 1 Installer menu 13 13 1 1 About the installer menu 13 13 1 2 Screen settings 13 13 1 3 Status indicator s...

Page 3: ...ls In places with temperatures 10 C and 50 C In places where the relative humidity is 95 In places where there is machinery that emits electromagnetic waves Electromagnetic waves may disturb the contr...

Page 4: ...ng with a mobile device for use with the Daikin Control Assistant app Centralised control Indicates that the system is controlled by central control equipment optional accessory and that control of th...

Page 5: ...g or cooling Dry In this mode the air humidity will be lowered with a minimal temperature decrease The temperature and fan speed are controlled automatically and cannot be controlled by the controller...

Page 6: ...unit fan will automatically operate until the indoor temperature of the system rises to a certain level When hot air stays under the ceiling and your feet feel cold it is recommended to include a cir...

Page 7: ...to confirm Result The indoor unit changes its fan speed and the controller returns to the home screen 6 4 Ventilation INFORMATION Ventilation settings can ONLY be made for heat reclaim ventilation un...

Page 8: ...ntroller only allows for basic operation For advanced operation use the Daikin Control Assistant app 6 5 1 To make a Bluetooth connection Prerequisite You have a mobile device on which the Daikin Cont...

Page 9: ...nsists of the following stages 1 Determining how you want to route the electrical wiring and nipping away a piece of the rear casing accordingly 2 Mounting the rear casing to the wall 3 Connecting the...

Page 10: ...included NOTICE When wiring run the wiring away from the power supply wiring in order to avoid receiving electric noise external noise INFORMATION P1 and P2 have no polarity 10 3 2 To connect the ele...

Page 11: ...ill cause the adapter to go in error The controller gets its power from the indoor unit It will start up as soon as it is connected For the controller to be operable therefore make sure the indoor uni...

Page 12: ...de c Setpoint temperature Home screen mode is set with remote controller field setting R1 7 Home screen For more information see Remote controller field settings on page 18 Backlight The screen backli...

Page 13: ...instructions on how to enter the information menu see 13 1 Installer menu on page 13 and Information on page 25 13 Configuration 13 1 Installer menu 13 1 1 About the installer menu In the installer m...

Page 14: ...ons on how to make field settings see 13 1 4 Field settings on page 14 For an overview of remote controller field settings see Remote controller field settings on page 18 To set status indicator inten...

Page 15: ...In the field settings tables find the mode numbers that apply to individual indoor units between brackets in the Mode column Second level Setting SW A setting is a settable parameter These are the se...

Page 16: ...ng component 3 Use and to change the value of that field setting component 4 Press to confirm that value 5 In the first level select to move to the second level 6 In the second level navigate and sele...

Page 17: ...tenant 02 Thermostat differential if the system contains a remote sensor set the increase decrease increments 1 C 0 5 C 13 23 00 High air outlet velocity set in case of high ceiling applications h 2...

Page 18: ...ed 1 Standard 1 8 Backlight no operation timer 0 5 seconds 1 10 seconds 2 20 seconds 0 9 Status indicator faintness 0 0 OFF 1 1 2 2 3 3 4 5 5 7 6 9 7 11 8 13 9 15 10 17 11 20 9 10 Backlight faintness...

Page 19: ...fine groups and or units in the first level and set or release addresses for those groups and or units in the second Address Description First level Group Group A group is a group of indoor units When...

Page 20: ...utdoor units O U The Group address and AirNet address menu has two levels You define groups and or units in the first level and set and release an address for those groups and or units in the second A...

Page 21: ...tal input adapter see the installation manual of the digital input adapter In case the digital input adapter does not function properly the external input interlock menu is not available in the instal...

Page 22: ...ndoor unit s setpoint range and setpoint range limitation 22 C Reset Heat SP Default Reset Setting heating setpoint See indoor unit s setpoint range and setpoint range limitation 22 C INFORMATION When...

Page 23: ...n the delay timer will start running When the delay timer expires the reset timer will start running When the reset timer expires the previous state is updated to the Default Reset Setting state Examp...

Page 24: ...a controller displays Then NO status icon The indoor unit connected to that controller is Cooling Heating master a CONSTANT status icon The indoor unit connected to that controller is slave to a Cool...

Page 25: ...indoor unit is released from its masterhood Result The controllers of all indoor units display a blinking changeover under centralised control icon Information About the information menu In the infor...

Page 26: ...le cleaning the controller soak the cloth in neutral detergent diluted with water squeeze the cloth tightly and clean the surface Afterwards wipe dry with a dry cloth 14 2 About maintenance When the i...

Page 27: ...is available on the regional Daikin website publicly accessible The full set of latest technical data is available on the Daikin extranet authentication required 16 1 Connection diagram 16 1 1 Typical...

Page 28: ...eference guide 28 BRC1H51W K S Wired remote controller 4P513689 1 2018 02 Group control controller digital inputs adapter BRP7A5 0 1 2 P1 P2 P1 P2 P1 P2 P1 P2 P1 P2 16 1 3 Controller DIII central cont...

Page 29: ......

Page 30: ......

Page 31: ......

Page 32: ...4P513689 1 2018 02 Copyright 2018 Daikin...

Reviews: