


10
C
URRENT
SETTING
Adjusting the current settings
Operation method
D
UST
COLLECTION
FROM
D
UST
B
OX
Dust collection sign display
Sign for collecting dust from the dust box will appear when the time
comes.
Promptly collect the dust when the sign is confirmed.
* The dust collection sign will appear after 1 month (factory setting).
The intervals can be selected shorter if the product is used in places
with excessive dust. Intervals can be set to: no indication, 672h, 168h
and 24h.
6
Select "Day" with
buttons.
Input the day with
buttons.
Holding down the button causes the number to
change continuously.
Days of the week change automatically.
7
Select "Hour" with
buttons.
Input the hour with
buttons.
Holding down the button causes the number to
change continuously.
8
Select "Minute" with
buttons.
Input the minute with
buttons.
Holding down the button causes the number to
change continuously.
Press Menu/Enter button.
The settings confirmation screen will appear.
9
Press
button to select
Yes
on the settings
confirmation screen.
Press Menu/Enter button to set the clock and return
to the basic screen.
While making filter auto cleaning settings, the display will
return to the screen for designating a period for filter auto
clean. (See page 8.)
Date & Time
Year 2011
Month 10
Day
07
Thursday
12:00
Return
Setting
Date & Time
Year 2011
Month 10
Day 07
Thursday
12
:00
Return
Setting
Date & Time
Year 2011
Month 10
Day 07
Thursday
12:
21
Return
Setting
Save the settings?
Date & Time
Yes
No
Return
Setting
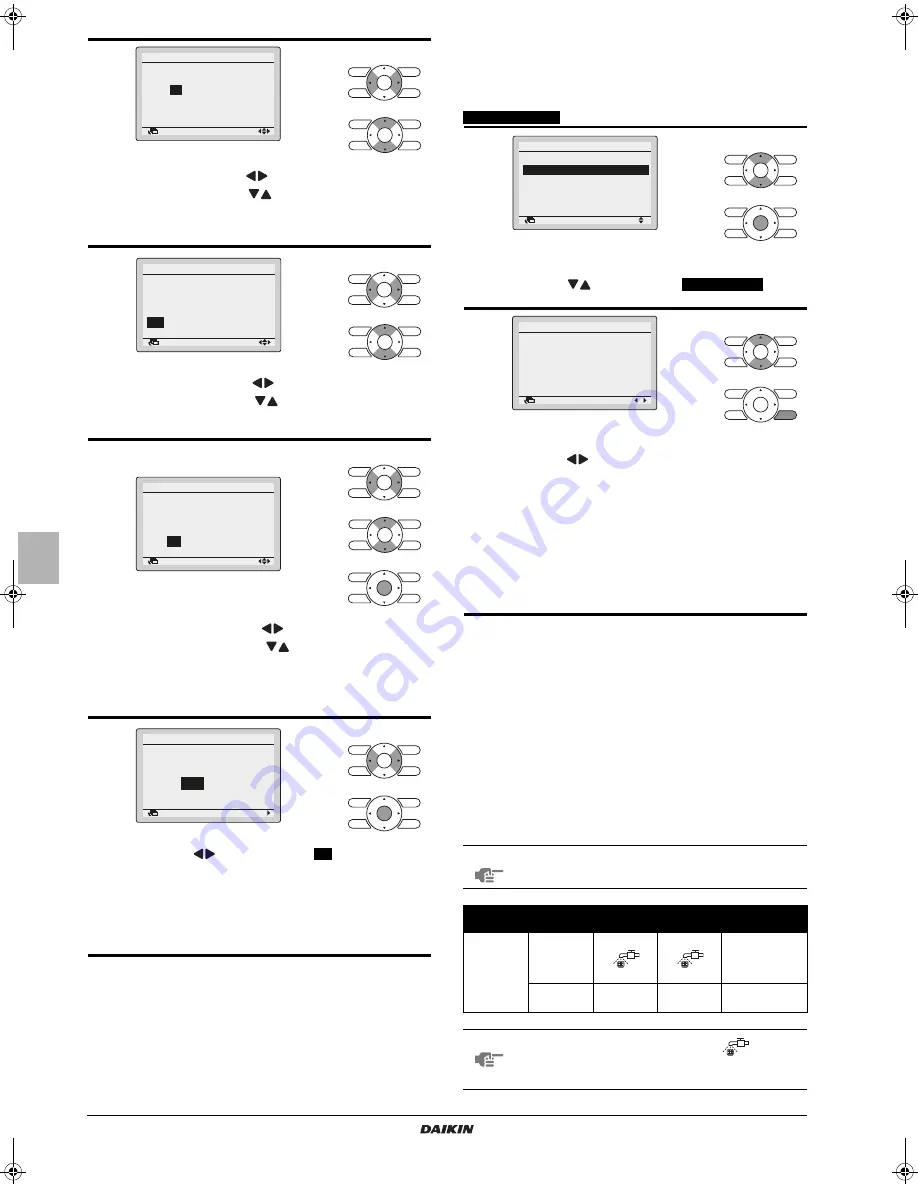
1
Display the main menu screen. (See page 8.)
Press
buttons to select
Current Settings
on the
main menu screen and press Menu/Enter button.
2
A list showing the current setting status will appear.
Press
buttons to go to the next item.
Pressing Cancel button takes you back to the main
menu screen.
Display items may differ depending on the model.
Only the items that can be set are displayed.
Refer to the displayed "Filter auto clean" settings for the
present set condition of filter auto cleaning.
Example: A period from 12:00 to 15:00 is set for filter auto
cleaning.
Filter auto clean 12-15
NOTE
Contact your Daikin installer to change the factory
set appearance interval of dust collection sign.
Place of display
Collection
sign 1
Collection
sign 2
Collection sign 3
Remote
controller
LCD
Sign
appears
Sign
appears
"AH-05"
(error sign)
will appear
Operation
lamp
Lights
Blinking
Blinking
NOTE
Collect the dust in the box when
appears.
If the dust will not be removed, the unit may
malfunction.
Return
Setting
Main Menu
Configuration
Current Settings
Clock & Calendar
Language
2/2
Return
Setting
Current Settings
Ventilation rate
Low
Ventilation mode
Auto
Schedule Disable
Display Mode
Standard
Display Item
Outside
Filter auto clean
00-03
4PEN470901-1B.book Page 10 Thursday, September 7, 2017 3:17 PM


