


Local Configurations
114
No.
Function
Description
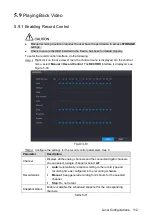
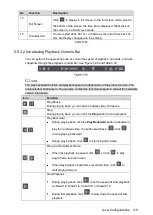
Click on the colored area to start playback from a certain time.
In the situation when you are configuring the settings, rotate
the wheel button on the time bar, the time bar is zooming in
from 0. In the situation when playback is ongoing, rotate the
wheel button on the time bar, the time bar is zooming from the
time point where the playback is located.
Time bar colors: Green indicates general type; Red indicates
external alarm; Yellow indicates motion detection; Blue
indicates intelligent events; Purple indicates POS events.
For some models, when you are clicking on the blank area in
the time bar, the system automatically jumps to the next time
point where there is a recorded video located.
4
Play Status
Includes two playback status:
Play
and
Stop
.
5
Sync
Select the
Sync
check box to simultaneously play recorded videos
of different channels in the same period in multi-channel view.
6
Record type
Select the check box to define the recording type to search for.
7
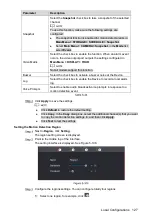
Search type
Select the content to play back:
Record
,
PIC
,
Splice Playback
.
For details about the selecting search type, see "5.9.3.3 Selecting
Search Type."
8
Calendar
Click the date that you want to search, the time bar displays the
corresponding record.
The dates with record or snapshot have a small solid circle under
the date.
9
View Layout and
Channel
Selection
In the
CAM NAME
list, select the channel(s) that you want to play
back.
The window split is decided by how you select the channel(s).
For example, if you select one channel, the playback is
displayed in the single-channel view; if you select two to four
channels, the playback is displayed in the four-channel view.
The maximum is eight channels.
Click
to switch the streams.
indicates main
stream, and
indicates sub stream.
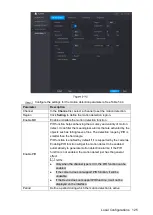
10
Video Splice
Splice a section of recorded video and save it. For details about
splicing a recorded video, see "5.9.3.4 Clipping Recorded Video."
11
Backup
Back up the recorded video files. For details, see "5.9.3.5 Backing
up Recorded Video."
12
List Display
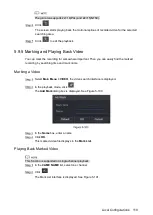
This area includes
Mark List
and
File List
.
: Click the
Mark List
button, the marked recorded video
list is displayed. Double-click the file to start playing.
: Click the
File List
button,
the searched recorded video
list is displayed. You can lock the files. For details, see "5.9.8
Using the File List."
Summary of Contents for Smart 1U
Page 1: ...DIGITAL VIDEO RECORDER User s Manual V1 0 0...
Page 30: ...Connecting Basics 20...
Page 80: ...Local Configurations 70 No Icon Description...
Page 181: ...Local Configurations 171 Select the Enable check boxes to enable IoT function See Figure 5 152...
Page 234: ...Local Configurations 224...
Page 280: ...Glossary 270 Abbreviations Full term VGA Video Graphics Array WAN Wide Area Network...
Page 298: ...Earthing 288...