background image

  18 


Pole-Mounted Bracket Installation 

 Dimension 

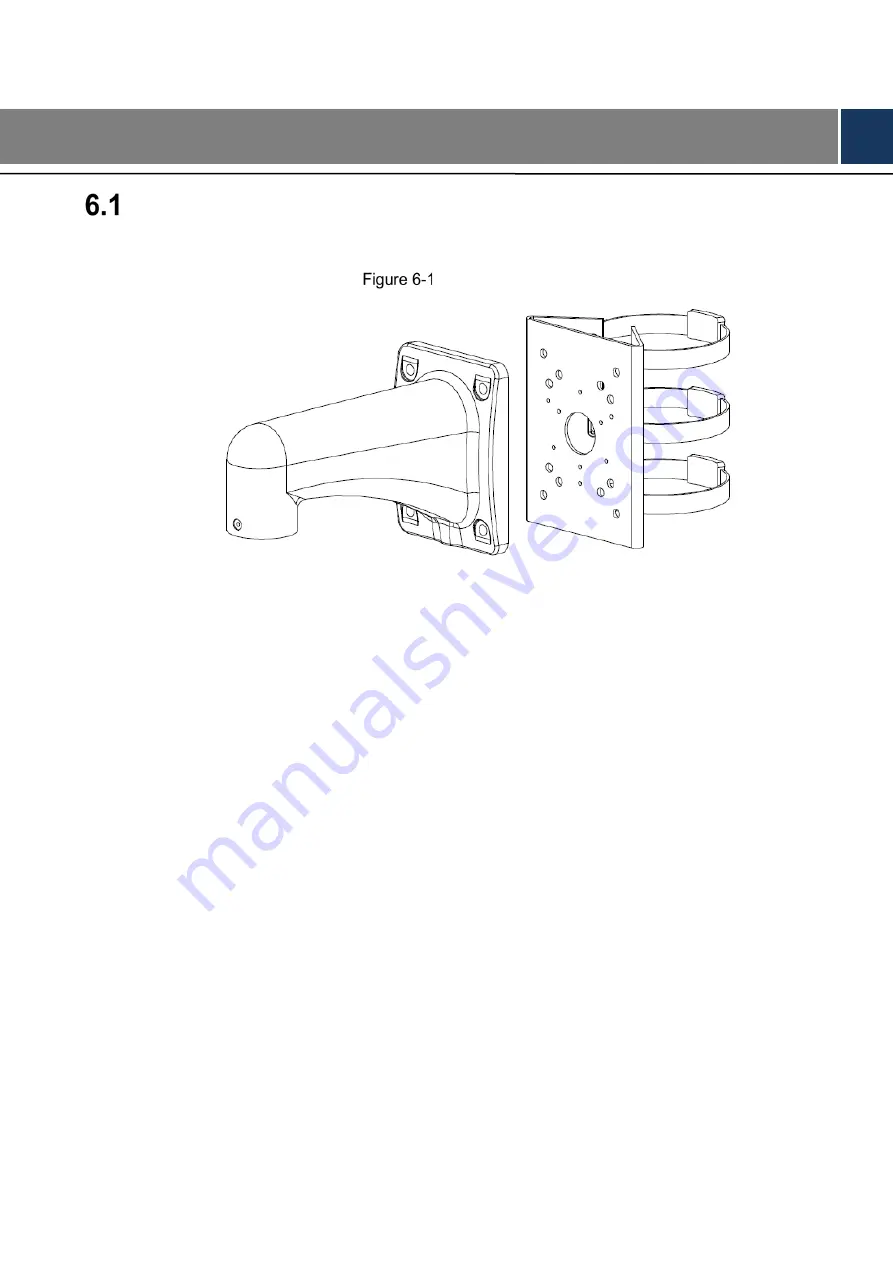
See Figure 6-1 for pole-mounted bracket, and see Figure 6-2 for dimension of the bracket. 

 Pole-mounted bracket 


Summary of Contents for 6AL445XANR

Page 1: ...6AL445XANR 4MP Starlight Network PTZ 45x PTZ Laser Network Camera with Analytics Installation Manual V1 0 1...

Page 2: ...eing able to guess which ports you are using 3 Enable HTTPS SSL Set up an SSL Certificate to enable HTTPS This will encrypt all communication between your devices and recorder 4 Enable IP Filter Enabl...

Page 3: ...to share video streams between two recorders Currently there are no known issues involving Multicast but if you are not using this feature deactivation can enhance your network security 13 Check the L...

Page 4: ...ndicates a potential risk which if not avoided could result in property damage data loss lower performance or unpredictable result TIPS Provides methods to help you solve a problem or save you time NO...

Page 5: ...ten notice The product updates might cause some differences between the actual product and the Manual Please contact the customer service for the latest program and supplementary documentation There s...

Page 6: ...lt in personal injury or device damage Contact your local retailer or customer service center for internal setup or maintenance requirement Make sure there is no metal or inflammable in the product A...

Page 7: ...ility for all the fires or electrical shock caused by improper handling or installation The power supply shall meet the SELV requirement Use the power supply that conforms to Limited Power Source acco...

Page 8: ...ling the Speed Dome 7 3 Wall mounted Bracket Installation 9 Dimension 9 Installing Wall mounted Bracket 10 3 2 1 Installation Conditions 10 3 2 2 Installation Procedure 10 4 Hang mounted Bracket Insta...

Page 9: ...might need it to pack the speed dome and send it back for repair Installation Check Make sure the installation environment has enough space to install the speed dome and its mounting accessories Make...

Page 10: ...ackage Open the package and take out the speed dome See Figure 2 1 IR Speed Dome The speed dome appearances might be different depending on the model you purchased and the actual product shall prevail...

Page 11: ...e Reset button on the PTZ mainboard See Figure 2 10 Open the front dome component and you can see the Micro SD card slot on the ISP board of speed dome module See Figure 2 11 Reset button is for reset...

Page 12: ...acket as the example 2 4 1 Installing Quick Mounting Connector Twine Teflon tape around the screw thread of the quick mounting connector and rotate it into the screw thread of the wall mounted bracket...

Page 13: ...on the model you purchased and the actual product shall prevail The Manual introduces the complete cables for you Do not drag or pull the cables to lift the speed dome when moving it See Figure 2 14 f...

Page 14: ...Cable connection 2 4 2 3 Alarm Cable Connection To connect alarm cables and configure alarm settings do the following Connect alarm input device to the ALARM_IN and ALARM_GND of the cables Connect al...

Page 15: ...et Align the speed dome flange with that on the quick mounting connector and push the speed dome to the quick mounting connector Screw the M6 14 stainless screw with spring washer on the quick mountin...

Page 16: ...8 Installation finished...

Page 17: ...ket Installation Dimension See Figure 3 1 for wall mounted bracket and see Figure 3 2 and Figure 3 3 for dimension of the bracket and the quick mounting connector Wall mounted bracket Dimension of wal...

Page 18: ...ht times the weight of the speed dome and its mounting accessories 3 2 2 Installation Procedure Draw and drill four screw holes on the wall according to the bracket pedestal Insert four expansion bolt...

Page 19: ...11 Installing the speed dome with wall mounted bracket...

Page 20: ...hang mounted bracket and see Figure 4 2 for dimension of the bracket Hang mounted bracket Dimension of hang mounted bracket mm The length of the hang mounted bracket is 200 mm by default and 400 mm o...

Page 21: ...arate the connection plate and the connection pole of the bracket Route the cables through the groove to the flange of the connection plate Fix the connection plate on the ceiling with four screws See...

Page 22: ...thread of the connection pole first and then fix the connection pole on the connection plate Install the speed dome on the hang mounted bracket see Figure 4 5 For details about speed dome installatio...

Page 23: ...5 5 Corner mounted Bracket Installation Dimension See Figure 5 1 for corner mounted bracket and see Figure 5 2 for dimension of the bracket Corner mounted bracket Dimension of corner mounted bracket m...

Page 24: ...drill the screw holes on the wall where there is the 90 included angle according to the mounting hole on the corner mounted bracket pedestal and insert M8 expansion screws See Figure 5 3 Route the cab...

Page 25: ...17 Installing the speed dome with corner mounted bracket...

Page 26: ...18 6 Pole Mounted Bracket Installation Dimension See Figure 6 1 for pole mounted bracket and see Figure 6 2 for dimension of the bracket Pole mounted bracket...

Page 27: ...sion of the clamp The default clamp is the 5 inch clamp matches with the pole of 80 130 mm The clamp shall work with the pole mounted bracket and the diameter of the clamp is adjustable according to t...

Page 28: ...stall the speed dome and adjust the diameter of the clamp to fix it on the pole See Figure 6 3 Pole mounted bracket CAUTION Make sure the clamp is firmly fixed on the pole Install the speed dome on th...

Page 29: ...21 Installing the speed dome with pole mounted bracket...

Page 30: ...22...

Reviews: