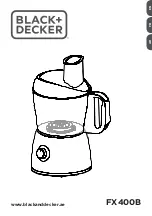
background image


10 


750W Food Processor 

Model No. SDA2100  

User Manual 

IMPORTANT 

 RETAIN THESE INSTRUCTIONS FOR FUTURE REFERENCE 

Fitting the Jug Blender 

This appliance is equipped with a safety lock system which will prevent the motor 

starting without correct installation of the blender jug and its lid. 


WARNING! : Do not connect to the mains supply until the blender is 

fully assembled. 


Do not operate for more than 40 seconds and allow 
the blender to rest for 1 minute between cycles. 
Repeat until the desired results are reached, to 
finish blending turn the control 

dial (12) to ‘O’.


To activate the blender follow the below 
instructions: 
1.


Place the 

Housing Unit

 (10) facing you on a dry, 

level surface. 

2.


Place the 

Blender Jug

 (3) onto the 

Housing Unit


(10) with the handle to the right, turn clockwise 

until it clicks into place. 

3.


Fit the 

Lid

 (2) onto the 

Blender Jug

 (3) ensuring 

the feeding 

Lid

 (1) is place and turn clockwise 

until it locks into place. 


The jug lid has an activator to trigger the safety lock system and must be 

fitted and locked into place onto the blender jug to operate. 


Using Your Jug Blender 


Pre-cut solid ingredients into smaller pieces (1.5cm) before you blend them. 


If you have a large amount of ingredients to blend, divide into small quantities 
instead of a large quantity at once. 


When blending soup, use cooked ingredients that have been allowed to cool 

first. 

WARNING!  NEVER BLEND HOT INGREDIENTS.


To start blending:


Dsad 
1.


Place the ingredients into the 

Blender Jug

 (3), add the required amount of 

liquid, never exceed the max level. 

2.


Place the ingredients into the 

Blender Jug

 (3), add the required amount of 

liquid, never exceed the max level. 

3.


Place the 

Lid

 (2) onto the 

Blender Jug

 (3) and turn clockwise until it locks. 

4.


Place the 

Feeding Hole Lid

 (1) into the hole in the 

Lid

 (2), and turn until secure. 

10 

Summary of Contents for SDA2100

Page 1: ...1 750W Food Processor Model No SDA2100 User Manual IMPORTANT RETAIN THESE INSTRUCTIONS FOR FUTURE REFERENCE...

Page 2: ...not be held liable for damages or injury incurred through improper or incorrect use Read and familiarise yourself with all operating instructions before using this Food Processor Before plugging your...

Page 3: ...lst being repaired Repairs to electrical appliances should only be performed by qualified personnel Improper repairs may place user at serious risk DO NOT operate this appliance with a damaged plug or...

Page 4: ...changing accessories or approaching parts that move in use Grasp the plug not the cord DO NOT touch the blades whilst the blender is connected to the mains Wash the blades in warm soapy water rinse a...

Page 5: ...te electrical goods and in doing so help the environment This symbol means waste electrical products at the end of their useful life should not be disposed of with normal household waste Please ensure...

Page 6: ...Jug 4 Blender Blade not removable 5 Processing Bowl 6 Processing Bowl Lid 7 Funnel 8 Pusher 9 Drive Shaft 10 Housing Unit 11 Non slip Feet 12 Control Dial Description of Parts Description of Parts Acc...

Page 7: ...tem This appliance is equipped with a safety lock system which will prevent the motor starting without correct installation of the bowl and its lid CAUTION DO NOT connect to the mains supply until the...

Page 8: ...and push down until the blade is securely in place at the base of the Blade Adaptor C See Fig 3 below Using Your Food Processor Grating and slicing blade 1 Carefully insert the required blade into the...

Page 9: ...ilst processing by removing the Pusher 8 and feeding down the Funnel 7 IMPORTANT Always use the pusher when feeding food into the funnel never push with your fingers 8 When processing is complete turn...

Page 10: ...ace 3 Fit the Lid 2 onto the Blender Jug 3 ensuring the feeding Lid 1 is place and turn clockwise until it locks into place The jug lid has an activator to trigger the safety lock system and must be f...

Page 11: ...fill the jug above the Max level some mixtures increase in volume during blending and create pressure in the jug 5 Do not operate for more than 30 seconds and allow the blender to rest for 1 minute b...

Page 12: ...ication Model Number SDA2100 Rated Voltage 220 240V 50 60Hz Rated Power 750W Capacity Blender 1800ml Capacity Processing Bowl 1200ml Protection Class II Non Rewireable Mains Plug If your appliance is...

Page 13: ...ical goods and in doing so help the environment This symbol means waste electrical products at the end of their useful life should not be disposed of with normal household waste Please ensure it is ta...

Page 14: ...use or any consumable parts The guarantee will berendered invalid if the product is re sold or has been damaged through inexpert repair The guarantee is only valid within the UK and Eire Your standard...

Reviews: