background image

FX710 - B5

www.blackanddecker.ae

Summary of Contents for FX710 - B5

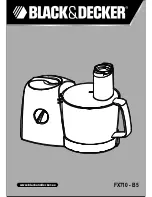
Page 1: ...FX710 B5 www blackanddecker ae ...

Page 2: ... grating blade D7 Coarse grating blade E Kneading blade F Chopping blade G Primary blade holder H Food processor jug I food processor base J Control knob K Food processor drive L Blender Drive M Blender cover N Grinder blade O Grinder jug seal P Grinder jug Q Citrus juicer R Reamer S Blender jug T Blender lid U Filler cap V Centrifugal juicer W Centrifugal juicer lid X Chopper blade case Y Spatula...

Page 3: ...3 ENGLISH ...

Page 4: ...intended for indoor household use only Read this entire manual carefully before using the appliance Safety instructions Warning When using mains powered appliances basic safety precautions including the following should always be followed to reduce the risk of fire electric shock and personal injury The intended use is described in this manual The use of any accessory or attachment or the performan...

Page 5: ... from the socket before leaving the appliance unattended and before changing cleaning or inspecting any parts of the appliance When not in use the appliance should be stored in a dry place Children should not have access to stored appliances Inspection and repairs Switch off the appliance before cleaning changing accessories or approaching parts which move in use Before use check the appliance for...

Page 6: ...Fit the food processor jug H onto the food processor base I secure it by turning it clockwise 2 For chopping or kneading fit the required blade F or E onto the primary blade holder G 3 For shredding or slicing fit the required blade D2 D3 D4 D5 D6 or D7 into the secondary blade holder D1 4 Place the assembled blade and holder into the food processor jug H 5 Fit the food processor lid C and secure it...

Page 7: ...quired setting Note Additional items can be added during use by using the chutes in the lids and the pusher The following settings are available P Pulse Operation O Power Off 1 Low Speed 2 Medium Speed 3 High Speed The appliance should be disconnected from the mains supply before removing the jug Recommendations when food processing 1 Use the chopping blade F 2 Use the kneading blade E Chopping 1 ...

Page 8: ...rning The grinder should NOT be used for wet grinding of hard food materials like pulses beans grains etc This will lead to damage of blades and reduction of motor life span Recommendations when Juicing 1 Use the centrifugal juicer V 2 Use the citrus juicer Q Note Fruits that contain starch such as bananas papayas avocados figs strawberries and mangoes are not suitable for processing in this juice ...

Page 9: ...lid and pour the ingredients into a suitable container Note Ingredients can be added by inserting them through the hole left when the filler cap A is removed Warning Never operate the Blender without the lid fitted Warning Never operate the Food processor without the lid fitted Maintenance cleaning Switch the appliance off remove the plug from the wall socket and wait until the blade has stopped rota...

Page 10: ...y statement is in addition to and in no way prejudices your statutory rights The warranty is valid within the territories of the Member States of the European Union and the European Free Trade Area If a Black Decker product becomes defective due to faulty materials workmanship or lack of conformity within 24 months from the date of purchase Black Decker warranty to replace defective parts repair p...

Page 11: ...rossière E Lame de pétrissage F Lame de hachage G Support de lame principale H Bol du mixeur I Base du mixeur J Molette de commande K Moteur du mixeur L Moteur du blender M Couvercle du blender N Lame du broyeur O Joint du bol du broyeur P Bol du broyeur Q Presse agrumes R Batteur S Bol du blender T Couvercle du blender U Bouchon de remplissage V Centrifugeuse W Couvercle de la centrifugeuse X Étu...

Page 12: ...12 FRANÇAIS ...

Page 13: ...appareil Ce produit est destiné uniquement à un usage domestique intérieur Consignes de sécurité Avertissement Lorsqu on utilise un appareil électrique des précautions de base y compris les suivantes doivent toujours être suivies afin de réduire les risques d incendie de chocs électriques ou de blessures corporelles L utilisation prévue est décrite dans ce manuel L utilisation d un accessoire ou d ...

Page 14: ...ion Retirez la fiche de la prise avant de laisser l appareil sans surveillance et avant de changer nettoyer ou inspecter un élément de d appareil Lorsqu il n est pas utilisé l appareil doit être rangé dans un endroit sec Les enfants ne doivent pas avoir accès aux appareils rangés Inspection et réparations Eteindre l appareil avant de le nettoyer de changer les accessoires ou d approcher les pièces ...

Page 15: ... une montre 2 Pour hacher ou pétrir adaptez la lame adéquate F ou E sur le support de lame principale G 3 Pour broyer ou trancher adaptez la lame adéquate D2 D3 D4 D5 D6 ou D7 dans le support de lame secondaire D1 4 Placez la lame et le support assemblés dans le bol du mixeur H 5 Installez le couvercle du mixeur C et sécurisez le en le tournant dans le sens des aiguilles d une montre 6 Adaptez le ...

Page 16: ...lacez la molette de commande sur le paramètre approprié Remarque il est possible d ajouter des ingrédients en cours d utilisation en utilisant les goulottes placées dans les couvercles et le poussoir Débranchez l appareil du secteur avant de retirer le bol Les réglages suivants sont disponibles P Fonction impulsion O Position arrêt 1 Vitesse lente 2 Vitesse moyenne 3 Vitesse rapide Recommandations...

Page 17: ... le mode par impulsions ne doit pas être utilisé plus de 10 secondes à la fois Attention la capacité maximale du moulin est de 50 g pour le broyage et de 150 g pour l éminçage Attention le broyeur NE DOIT PAS être utilisé pour le broyage humide d aliments durs tels que les pois les haricots les grains etc Cela risquerait d endommager les lames et de réduire la durée de vie du moteur Recommandation...

Page 18: ...emarque Les ingrédients peuvent être ajoutés en les insérant dans le trou du bouchon de remplissage A quand celui ci est enlevé Avertissement Ne faites jamais fonctionner le blender sans avoir mis le couvercle B Avertissement Ne jamais faire fonctionner le robot culinaire sans son couvercle Y Avertissement Ne jamais faire fonctionner le hachoir sans son couvercle K Entretien et nettoyage Mettez l ...

Page 19: ...ssaire de fournir une preuve d achat au vendeur ou à un réparateur agréé Pour connaître l adresse du réparateur agréé le plus proche de chez vous contactez le bureau Black Decker à l adresse indiquée dans ce manuel Vous pourrez aussi trouver une liste des réparateurs agréés de Black Decker et de plus amples détails sur notre service après vente sur le site Internet à l adresse suivante www 2helpU ...

Page 20: ...G Ñ dG ÑdGh Ée π ª d êÉYREG hCG á æ e hCG ájQÉŒ VGôZCG èàæŸG ΩGóîà SG ºàj ÒLCÉJ VGôZCG ɪgE G hCG ΩGóîà S G Aƒ ùd èàæŸG Vô àj áÑjôZ OGƒe hCG AÉ TCG áé àf à d èàæŸG Vô àj çOGƒM hCG ÒZ UÉî TCG á SGƒH èàæŸG ìÓ UEG ádhÉfi ºàj HÉàdG áfÉ üdG jôa hCG øjóªà ŸG áfÉ üdG AÓch ôµjO ófBG ÓH ácöûd Ëó J EG êÉà ƒ S ɪ dG ÖLƒÃ áÑdÉ e Ëó àd æµÁh óªà ŸG áfÉ üdG π ch hCG FÉÑ d AGöûdG π dO ÓN øe óªà e áfÉ U π ch ÜôbCG...

Page 21: ...ácöT ôaƒJ ájÉ f EG É dƒ Uh Oôéà ôµjO ófBG ÓH äÉéàæe òg Ëó J ºàjh πª d É à MÓ U ΩóYh ÉgôªY Lôj áeóÿG òg øe IOÉØà SÓd ÉkfÉ áeóÿG ƒ S òdGh óªà e áfÉ U π ch CG EG èàæŸG IOÉYEG ÉæY áHÉ f äÉéàæŸG ªL QhóH ƒàj óªà e áfÉ U π ch ÜôbCG bƒe Y ô àdG æµÁ ëŸG ôµjO ófBG ÓH Öàµe Y É üJ G ÓN øe dP øe k óHh π dódG Gòg í VƒŸG Gƒæ dG Ú HÉàdG øjóªà ŸG áfÉ üdG AÓcƒH áªFÉb óLƒJ Ée äÉeóÿ á eɵdG π UÉØàdGh ôµjO ófBG ÓH ácö...

Page 22: ...G ÈY É àaÉ VEG ÓN øe äÉfƒµŸG áaÉ VEG øµÁ á MÓe A ÓZE G IOGó S ádGREG iód á ÑàŸG áëàØdG B AÉ dG Ö côJ hóH ÓÿG π ûJ ôjò Ö côJ hO ΩÉ dG Ò RÉ L π ûJ ÖæŒ ôjò Y AÉ dG K AÉ dG Ö côJ hO áeôØŸG π ûJ ÖæŒ ôjò æàdGh áfÉ üdG ájò àdG òØæe øe ùHÉ dG õfGh RÉ G ÅØWCG GQhódG øY äGôØ ûdG bƒàJ àM ô àfGh á FÉHô µdG eÉ b ádÉM RÉ G æJ π SC G øe ƒµ S IöTÉÑe ΩGóîà S G ó H dòH hCG º J IQOƒH hCG á TÉc æJ OGƒe Ωóîà ùJ æJ iód...

Page 23: ...üæj äÉ UƒJ ójõJ IóŸ π UGƒàe mπµ ûH ÓÿG π ûJ ô ëj á MÓe Öéj á bO 1 IóŸ π UGƒàŸG π ûàdG ó H á bO 1 øY àM πbC G Y á bO 2 IóŸ mΩGóîà SG hO ÓÿG ôJ á fÉK Iôe eGóîà SG IOÉYEG πÑb OÈj 10 øY ójõJ IóŸ ÑædG VƒdG π ûJ ô ëj ôjò IóMGƒdG IôŸG ÊGƒK øë dG óæY É H í üæj äÉ UƒJ IóŸ É G øë dG ÓN áæë ŸG π ûJ ô ëj á MÓe á fÉK 40 øY ójõJ 10 øY ójõJ IóŸ ÑædG VƒdG π ûJ ô ëj ôjò IóMGƒdG IôŸG ÊGƒK á S übCGh ºL 50 g áæë ª d ...

Page 24: ...G øµÁ á MÓe áÄÑ àdG áëàa AÉ Z OƒLƒŸG ܃ÑfC G ΩGóîà SÉH aódG IóMhh QGhódG ìÉàت d Iôaƒàe á dÉàdG äGOGO E G ÑædG á VƒH π ûJ P ábÉ dG b 0 á Øîæe áYöS 1 á Sƒàe áYöS 2 á d0ÉY áYöS 3 ù FôdG QÉ àdG Qó üe øe RÉ G π üa Öéj jôHE G ádGREG πÑb ΩÉ dG Ò AÉæKCG É H í üæj äÉ UƒJ h ΩôØdG IôØ T Ωóîà SG 1 g øé dG IôØ T ΩGóîà SG 2 3O hCG 2O íFGöûdG äGôØ T Ωóîà SG 3 7O hCG 6O r öûnÑdG äGôØ T Ωóîà SG 4 á fÉK 15 2 hCG Ñ...

Page 25: ...dG AGõLC G ªL π ùZG æàdGh ΩÉ dG Ò RÉ L Ö côJ RÉ L IóYÉb ì ΩÉ dG Ò RÉ L jôHEG âÑK 1 ÉŒG Ø H à ÑãJ ºµMCGh ΩÉ dG Ò áYÉ ùdG ÜQÉ Y g hCG h áHƒ ŸG IôØ ûdG âÑK øé dG hCG ΩôØ d 2 R ù FôdG IôØ ûdG πeÉM áHƒ ŸG IôØ ûdG âÑK íFGöûd àdG hCG â àØà d 3 7O hCG 6O hCG 5O hCG 4O hCG 3O hCG 2O 1O ƒfÉãdG IôØ ûdG πeÉM Ò RÉ L jôHEG πeÉ Gh áÑcôŸG IôØ ûdG V 4 ì ΩÉ dG à ÑãJ ºµMCGh ê ΩÉ dG Ò RÉ L AÉ Z âÑK 5 áYÉ ùdG ÜQÉ Y ÉŒ...

Page 26: ... óæY ÉL ɵe RÉ G øjõîJ Ñæj ßØM ɵe øY kGó H ÉØWC G AÉ H Ñæjh eGóîà SG Iõ LC G ìÓ UE Gh üëØdG ÜGÎb G hCG JÉ ë e Ò J hCG Ø æJ πÑb ÓÿG ÅØWCG ɪ à S G ÓN ácôëàŸG FGõLCG πÑb áHƒ e hCG IQö àe AGõLCG OƒLh ΩóY øe FGõLCG Qƒ ùc OƒLh ΩóY øe ÓÿG ΩGóîà SG ôKDƒJ CG øµÁ iôNCG ä ÉM ájCG hCG QGQRCG QGöVCG hCG ûJ óMCG π Y hCG J OƒLh ádÉM ÓÿG Ωóîà ùJ FGõLCG IôØ T J OƒLh ádÉM ÓÿG Ωóîà ùJ àdG áHƒ e hCG IQö àe AGõLCG á...

Page 27: ...É TQEG áeÓ ùdG äÉWÉ àMG ªL PÉîJG Ñæj ôjò QOÉ üà á üàŸG Iõ LC G ΩGóîà SG iód á SÉ SC G π à d ÉfOCG IQƒcòŸG dP Éà á FÉHô c ájò J hCG á FÉHô c äÉeó U çhóM hCG GÒædG ófG ô N øe á üî T äÉHÉ UEG EG π dódG Gòg πeɵdÉH á üØe ÓÿG äÉeGóîà SG hCG á ÑJôŸG JGhOCG hCG ÓÿG äÉ ë e øe m CG ΩGóîà SG π dO IQƒcòŸG àd áØdÉfl á ªY CG AGôLEG äÉHÉ UEG ƒbh ô N æY ºéæj CG øµÁ äGOÉ TQE G á üî T kÓÑ à ùe dEG ƒLô d π dódG Gò H...

Page 28: ...28 ARABIC ...

Page 29: ... D6 ø ûÿG r öûnÑdG IôØ T D7 øé dG IôØ T E ΩôØdG IôØ T F ù FôdG IôØ ûdG πeÉM G ΩÉ dG Ò RÉ L jôHEG H ΩÉ dG Ò RÉ L IóYÉb I ºµëàdG ìÉàØe J ΩÉ dG Ò RÉ L ôfi K ÓÿG ôfi L ÓÿG AÉ Z M áæë ŸG IôØ T N áæë ŸG jôHEG AÉ Z O áæë ŸG jôHEG P ƒª dG InQÉ qn ünY Q InQÉ qn ün dG R ÓÿG jôHEG S ÓÿG AÉ Z T áÄÑ àdG áëàa AÉ Z U õcôŸG Oô dÉH á eÉ dG InQÉ qn ün dG V õcôŸG Oô dÉH á eÉ dG InQÉ qn ün dG AÉ Z W ΩôØdG IôØ T ÓZ X á...

Page 30: ... Kano Nigeria Tel 234 8053294947 234 8037767774 OMAN Oman Marketing Service Co Omasco P O Box 2734 Behind Honda Showroom Wattayah Oman Tel 968 24560232 24560255 Fax 968 24560993 Oman Marketing Service Co Omasco Al Ohi Sohar Oman Tel 968 26846379 Fax 968 26846379 Oman Marketing Service Co Omasco Sanaya Salalah Oman Tel 00968 23212290 Fax 968 23210936 PAKISTAN Ammar Service Spares 60 Bank Arcade Ser...

Page 31: ......

Page 32: ...WARRANTY REGISTRATION CARD YOUR NAME YOUR ADDRESS POSTCODE DATE OF PURCHASE DEALER S NAME ADDRESS PRODUCT MODEL NO FX710 B5 ù ß r F M u Ê d e d b Í U a A d ß r Ë M u Ê U z l ...

Reviews: