background image

English - 13

English - 12

CHANGING THE ST

CHANGING THE ST

AND

AND

F

F

ACTOR

ACTOR

Y PRESET TIMINGS

Y PRESET TIMINGS

VESA MODES

IBM MODES

MAC MODES

VGA

640 

X  

480@60Hz

31.5

60

Non-interlaced

VGA

640 

X  

480@72Hz

37.9

72

Non-interlaced

VGA

640 

X  

480@75Hz

37.5

75

Non-interlaced

SVGA

800 

X  

600@56Hz

35.2

56

Non-interlaced

SVGA

800 

X  

600@60Hz

37.9

60

Non-interlaced

SVGA

800 

X  

600@72Hz

48.1

72

Non-interlaced

SVGA

800 

X  

600@75Hz

46.9

75

Non-interlaced

XGA     

1024 

X  

768@60Hz

48.4

60

Non-interlaced

XGA     

1024 

X  

768@70Hz

56.5

70

Non-interlaced

XGA     

1024 

X  

768@75Hz

60.0

75

Non-interlaced  

EGA

640 

X  

350@70Hz

31.5

70

Non-interlaced

DOS

720 

X  

400@70Hz

31.3

70

Non-interlaced

VGA

640 

X  

480@67Hz

35.0

67

Non-interlaced

Mode 

H.Freq (KHz)       V.Freq (Hz)

Remark

Resolution

(dots 

X

lines)

Mode 

H.Freq (KHz)       V.Freq (Hz)

Remark

Resolution

(dots 

X

lines)

Mode 

H.Freq (KHz)       V.Freq (Hz)

Remark

Resolution

(dots 

X

lines)

The LCD Monitor has only Non-interlanced modes without flicker.

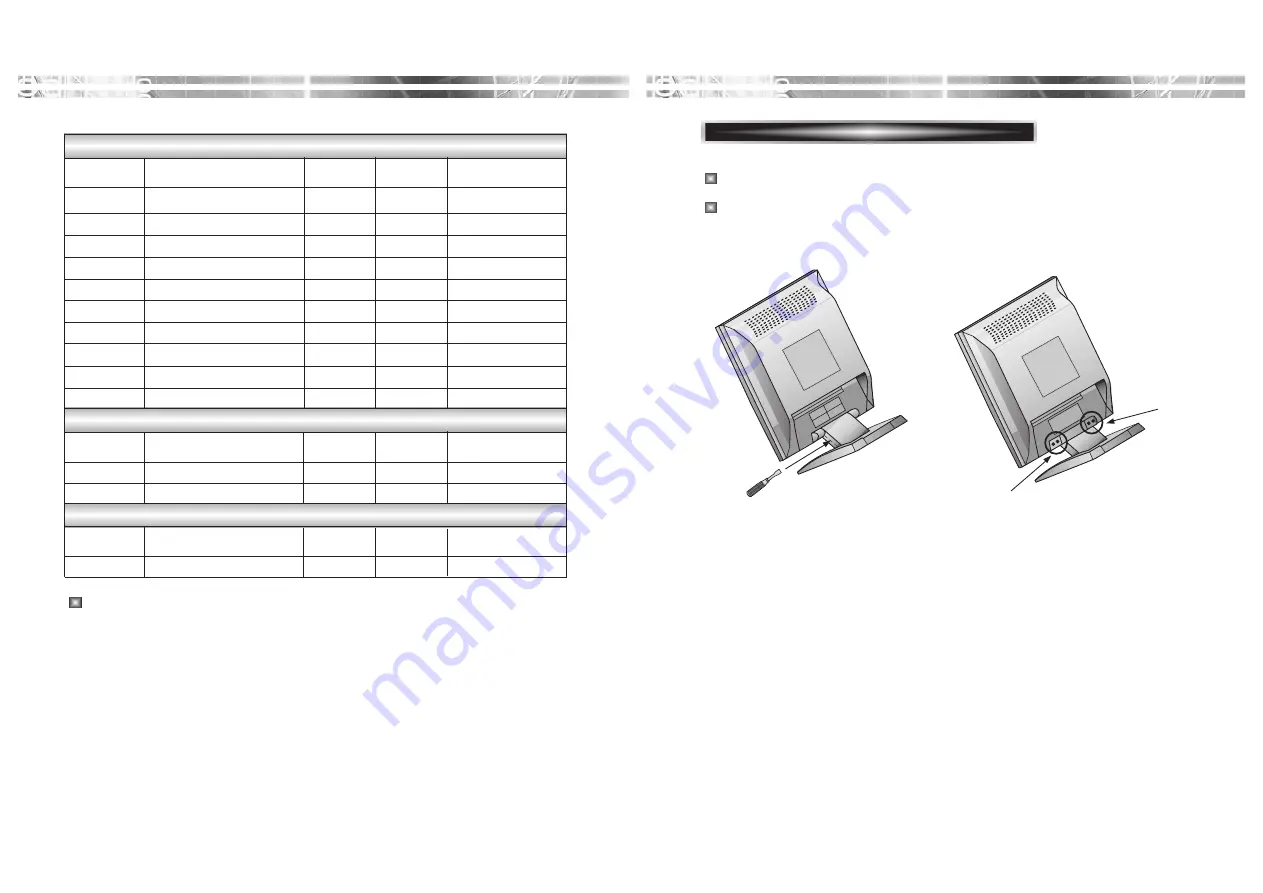
Removing Original Stand

1

.   Detach the rear cover of the stand with a screwdriver.

2

.  Remove the four screws connecting the stand and the body and the

stand is disassembled. 

1

2

2

Turn off the monitor and pull out the power cable.

Place a cushion or a soft cloth on the floor and put the product on it with
the front of the monitor facing the floor.

Summary of Contents for Lucoms L540

Page 1: ...USER S GUIDE USER S GUIDE USER S GUIDE USER S GUIDE USER S GUIDE USER S GUIDE USER S GUIDE USER S GUIDE USER S GUIDE USER S GUIDE USER S GUIDE USER S GUIDE USER S GUIDE USER S GUIDE USER S GUIDE USER S GUIDE USER S GUIDE USER S GUIDE USER S GUIDE USER S GUIDE USER S GUIDE Model No L540 Model No L540 ...

Page 2: ...e monitor does not operate normally by following the operating instructions Adjust only those controls that are covered by the operating instructions as improper adjustment of other controls may result in damage and will often require extensive work by a qualified technician to restore normal operation e If the monitor has been dropped or the cabinet has been damaged f When the monitor exhibits a ...

Page 3: ...rformance from your monitor Please read this user s guide carefully before installing your monitor then keep it near your monitor for quick reference First please check that the contents of the box corresponds with the following checklist TFT LCD monitor Power cord 15 pin signal cable User s guide If any item is missing or damaged please contact your dealer Please keep the box and packing material...

Page 4: ...ontrols to adjust the color temperature RGB gain value for the best possible screen color and intensity Press the menu button and activate the Self Diagnosis menu to determine whether your monitor is functioning normally not receiving a signal or is receiving a signal that is out of scanning range Activate the higher refresh rates of the monitor to stabilize the screen and eliminate the annoying f...

Page 5: ... management status with power indicator light POWER Indicator POWER 1 3 4 2 Moves cursor to the right or low window in the OSD window and increases the value of any selected function While the OSD screen is off you can adjust the brightness directly Moves cursor to the left or high window in the OSD window and decreases value of any selected function While the OSD screen is off you can adjust the ...

Page 6: ...by 10 If you carry out general PC works such as document edition on the Movie mode you may shorten the life span of LCD panel Thus it is recommended to verify the selected mode before use Signal Source Mode Select PC Game Movie Reset YES NO 1024 X 768 75Hz POWER LIGHT ADJUSTMENT PROCEDURE Adjust the CLOCK control Perform the AUTO POSITION Is the H Size proper Is the noise displayed on the screen P...

Page 7: ...scaling up SHARPNESS Choose automatically the proper horizontal position and vertical position size of the screen image AUTO Adjust Adjust the color COLOR ADJUST Adjust the contrast of image the difference between light and dark areas on the screen CONTRAST Adjust the brightness of image BRIGHTNESS PICTURE Adjust the gamma correction GAMMA OSD MENU MISC Adjust the OSD Transparency Tranlucent Selec...

Page 8: ...n Contrast Ratio 400 1 contrast ratio typ Brightness 250cd m2 brightness typ Color Filter RGB vertical stripe Synchronization Horizontal 30 62 KHz Vertical 50 75 Hz Video Bandwidth 80MHz Max Resolution 1024 x 768 75Hz Optimal Resolution 1024 x 768 60Hz Colors 16 2M Colors Display Area 304 1 mm x 228 1 mm PC Input Signal Sync H V separate TTL Video 15 pin mini D sub Analog RGB Plug and Play VESA DD...

Page 9: ... X 768 75Hz 60 0 75 Non interlaced EGA 640 X 350 70Hz 31 5 70 Non interlaced DOS 720 X 400 70Hz 31 3 70 Non interlaced VGA 640 X 480 67Hz 35 0 67 Non interlaced Mode H Freq KHz V Freq Hz Remark Resolution dots Xlines Mode H Freq KHz V Freq Hz Remark Resolution dots Xlines Mode H Freq KHz V Freq Hz Remark Resolution dots Xlines The LCD Monitor has only Non interlanced modes without flicker Removing...

Page 10: ...nal cable is correctly connected to the video card Check if the pins of D subconnector are not bent Check if the computer is in the power saving mode Check if power switch is in the on position Check if the power cord is correctly connected Check if the signal cable is suitable to the video card Adjust Clock or H V Center to get the proper image Keep the devices that may cause electrical interfere...

Page 11: ...S N 9978600200 ...

Reviews: