


9
These functions are available in the Features menu (see description page 13).
CHILD LOCK
This function only allows the TV to be turned on using the remote
control. Once the user has set this CHILD LOCK to ON or OFF, it will
remain in this condition until the user changes it again.
WAKE UP
It is necessary to have set the clock (either manually or
automatically) in order to be able to use this function. If the clock is
not set (--:-- is shown) then the WAKE TIME and WAKE PROG. will
not be selectable.
The default setting for WAKE TIME is in the „OFF” position. After
each use (the TV turns on according to the previous setting) the
WAKE TIME will be returned to the „OFF” position, conserving
always the last time setting entered ready for re-use.
CLOCK SETTING
The TV will automatically attempt to set the clock when powered on
(with the MAIN POWER button). It takes as reference information
embedded in the teletext signal of the channel defined by CLOCK
PROG. Therefore, automatic clock setting is only possible if teletext
is available on this channel.
If no time is captured automatically (the clock will show - - : - -), then
the TV will try again to set the clock whenever turning on from
standby mode.
Alternatively, the user can enter the time manually using the CLOCK
function. However, if this is done the clock will not be periodically
updated as would happen if the time is set automatically. We
recommend that the user choose (if available) a CLOCK PROG
which allows the time to be updated automatically.
DEFAULT ZOOM CONTROL
If the ZOOM control is set to AUTO (A15, see page 8, FORMAT
SELECTION), then the picture format presented is controlled by the
received picture format signalling data embedded in the
transmission. In the absence of this signalling data (as can often be
the case) a default format must be used. This default format can be
selected by the ZOOM AUTO function.
LANGUAGE
This can be changed at any time by the user in the LANGUAGE
menu (accessed via the FEATURES menu).
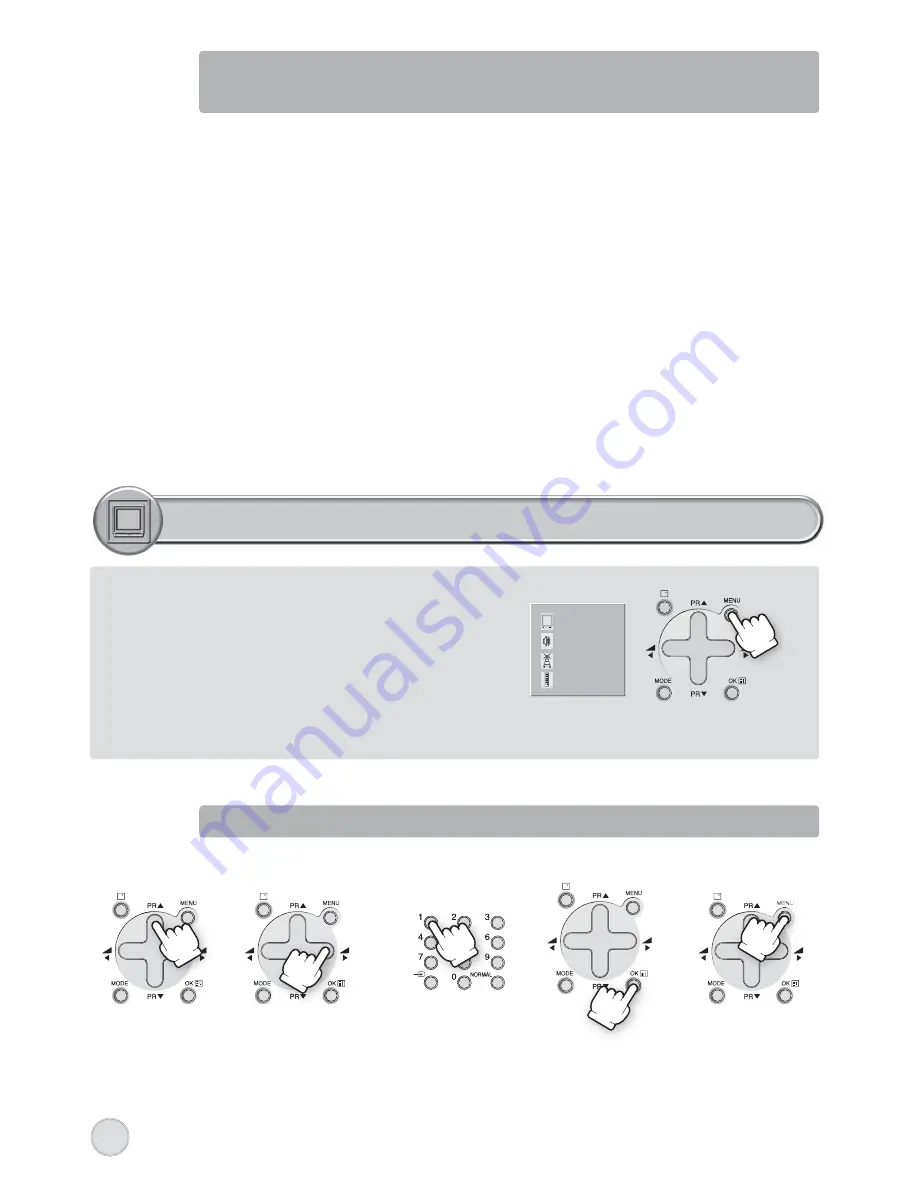
MAIN MENU
All menus are removed within 60 seconds if you don’t press any button.
Press the remote control MENU button (A19) to display the main menu.
Then, you have the choice between several sub-menus:
If you want to Exit the main menu, press the MENU button (A19) a
second time.
- To select one of the sub-menus, use the remote control CURSOR UP
(A6), DOWN (A21) buttons.
- To enter the selected sub-menu, press the remote control OK button (A18).
Remark:
In AV mode the INSTALL menu is not available, and will not be selectable.
HOW TO USE THE SUB-MENUS
The sub-menus referred to here are: PICTURE, SOUND, INSTALL, FEATURES.
-
Adjust
the
function
using
:
- Select the desired Position
by using the remote
control CURSOR UP (A6) or
DOWN (A21) buttons.
- The remote control
CURSOR LEFT (A7) or
RIGHT (A20) buttons if
you want to modify the
function value
- The remote control
NUMBER 0...9 buttons (A3)
to enter directly new data.
- Store (if needed) by
pressing the remote
control OK button (A18).
- Then Exit to main menu by
pressing the MENU button
(A19).
PICTURE
PICTURE
SOUND
SOUND
INSTALL
INSTALL
FEATURES
FEATURES
MENUS LANGUAGE SELECTION, CHILD LOCK, CLOCK
SETTING, WAKE UP, NOISE REDUCTION
MENUS DESCRIPTION


