background image

E10

Before Operating

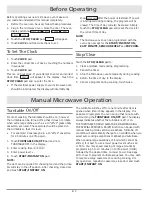
Before operating your new microwave oven make sure 

you read and understand this manual completely.
•  Before the oven can be used, follow these procedures:
1.  Plug in the microwave oven. Close the door. The oven 

display will show 

WELCOME


PRESS


CLEAR


AND


PRESS


CLOCK

.

2.  Touch the STOP/CLEAR pad. 

:

 will appear.

3.  Touch 

CLOCK

 and follow directions to set.

To Set The Clock

1.  Touch CLOCK pad.
2.  Enter the correct time of day by touching the numbers 

in sequence.

3.  Touch CLOCK pad.
This is a 12 hour clock. If you attempt to enter an incorrect 

clock  time, 

ERROR

  will  appear  in  the  display.  Touch  the 

STOP/CLEAR pad and re-enter the time.
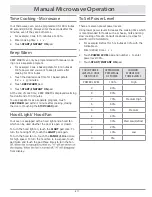
•  If the electrical power supply to your microwave oven 

should be interrupted, the display will intermittently 

Manual Microwave Operation

show 

WELCOME

 after the power is restored. If power 

is interrupted during cooking, the program will be 
erased. The time of day will also be erased. Simply 
touch the STOP/CLEAR pad and reset the clock for 
the correct time of day.

NOTE: 

•  The microwave oven can be programmed with the 

oven open except for the START/INSTANT ON, 

EASY MINUTE, SENSOR REHEAT and POPCORN.

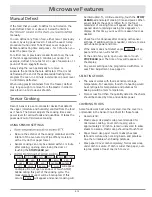
Stop/Clear

Touch the STOP/CLEAR pad to:
1.  Clear a mistake made during programming.
2.  Cancel the timer.
3.  Stop the Microwave oven temporarily during cooking.
4.  Return the time of day to the display.
5.  Cancel a program during cooking, touch twice.

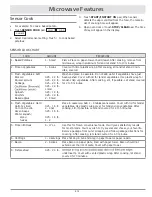
Turntable 

For most cooking, the turntable should be on; however 

the turntable can be turned off so that it does not rotate 

when extra large dishes, such as a 13”x9”x2” glass utility 

casserole, are used. The casserole should be placed on 

the turntable so that it is level.
•  For example: Cook lasagna in a 13”x9”x2” casserole 

for 45 minutes on 40% power.

1.  Touch


TURNTABLE ON/OFF pad and note 

TURNTABLE OFF in the display.

2.  Enter cooking time 

.

3.  Enter power level 

4

.

4.  Touch START/INSTANT ON pad.

NOTE: 

The door can be opened for checking food and the turnta-

ble will stay in the off position. After checking, close door 

and touch START/INSTANT ON.

The turntable will stay off for one minute after door is 

opened when time-of-day appears in the display. It is 

possible to reprogram the oven during that minute with-

out touching the TURNTABLE ON/OFF pad. The display 

always indicates whether the turntable is off or on.
THE TURNTABLE SHOULD ALWAYS BE ON WHEN USING 

THE SPECIAL FEATURES. On/Off function can be used with 

manual cooking modes and Sensor Reheat. Turntable off 

condition will automatically change to on condition when you 

select auto cooking except Sensor Reheat and Auto Bake.
When cooking large quantities of food which cannot be 

stirred, it is best to use a lower power level such as 40 

or 50%. You may speed cooking of large amounts by 

programming 5 to 10 minutes on 100% power (HIGH) 

followed by the desired time on lower power. See page 

23 for how to program multiple sequences. You may wish 

to reverse a large casserole once during cooking; sim-

ply open door, reposition casserole, close door and touch 

START/INSTANT ON.

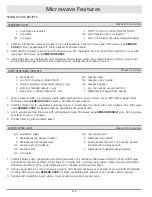
Summary of Contents for PCOR30S

Page 1: ...7003 Rev D Use and Care Manual PCOR30S Over The Range Convection Microwave Oven Important Safety Instructions 1 2 Information You Need to Know 3 7 Part Names 8 Control Panel 9 Before Operating 10 To S...

Page 2: ...at can occur Use common sense and caution when installing maintaining or operating this or any other appliance Always contact the Dacor Customer Service Team about problems or situations that you do n...

Page 3: ...pliance when paper plastic or other combus tible materials are placed inside the oven to facilitate cooking b Remove wire twist ties from paper or plastic bags before placing bag in oven c If material...

Page 4: ...ance with the National Electrical Code and local codes and ordinances In the event of an electrical short circuit grounding re duces risk of electric shock by providing an escape wire for the electric...

Page 5: ...n the same room The child must be able to reach the oven comfortably At no time should anyone be allowed to lean or sit on the microwave oven Children should be taught all safety precautions how to us...

Page 6: ...the spread of foodborne bacteria Keep stirrer cover clean Food residue can cause Use care when removing items from the oven so that the utensil your clothes or accessories do not touch the safety doo...

Page 7: ...at and sugar content Follow manufacturer s directions NO NO CERTIFICATE OF WARRANTY ON DACOR OUTDOOR GRILL UNITED STATES FULL TWO YEAR WARRANTY This warranty covers any defects in materials or wor man...

Page 8: ...reheating NO NO Wicker wood straw YES May be used for short periods of time Do not use with high fat or high sugar content foods Could char NO NO DISH CHECK If you wish to check if a dish is safe for...

Page 9: ...button Push for high low off 9 LIGHT button Push for on off Front of Microwave 13 14 17 18 FRONT VIEW 10 Auto Touch control panel 11 Time display Digital display 99 minutes 99 seconds 12 Ventilation...

Page 10: ...ation indicate page numbers where feature descriptions and usage information is located INTERACTIVE DISPLAY Words will light in the display to indicate features and cooking instructions 11 11 10 10 14...

Page 11: ...ooking the turntable should be on however the turntable can be turned off so that it does not rotate when extra large dishes such as a 13 x9 x2 glass utility casserole are used The casserole should be...

Page 12: ...an Your oven is equipped with a hood light and a hood fan which can be used whether the door is open or closed To turn the hood light on touch the LIGHT pad once To turn the hood light off touch the L...

Page 13: ...l appear in the display Auto Defrost can be programmed with More or Less Time Adjustment See page 23 To defrost other foods or foods above or below the weights allowed on Auto Defrost Chart use time a...

Page 14: ...ON or FISH will appear on display Do not open oven door or touch STOP CLEAR during this part of the cooking cycle The measurement of vapor will be interrupted If this occurs ERROR will appear and sens...

Page 15: ...t can be used to provide adjustment needed for older popcorn or individual tastes Instant Sensors Your oven has Instant Sensor Popcorn and Instant Sensor Reheat To use any of the Instant Sensors simpl...

Page 16: ...st been washed Cover with lid for tender vegetables Use plastic wrap for tender crisp vegetables After cooking stir if possible Let stand covered for 2 to 5 minutes 4 Fresh Vegetables Hard Carrots sli...

Page 17: ...owave using SENSOR COOK for Bacon Crumble and save bacon 2 Combine chicken broth vegetables and seasonings in 4 quart casserole Cover with vented plastic wrap Microwave using SENSOR COOK for Baked pot...

Page 18: ...utes SPICED CARROTS Makes 6 to 8 servings 3 cups sliced carrots 1 4 inch thick 2 teaspoons vinegar 1 2 cup chopped green pepper 1 inch cubes 1 teaspoon soy sauce 1 4 cup linely chopped onion 1 2 teasp...

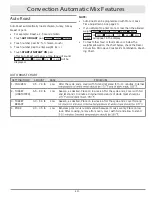
Page 19: ...tly on the turntable Convection Cooking During convection heating hot air is circulated through out the oven cavity to brown and crisp foods quickly and evenly This oven can be programmed for ten diff...

Page 20: ...age of these two cooking methods produces breads all with just the right amount of browning and crispness The temperature can be changed however the micro wave power cannot HIGH MIX or LOW MIX then to...

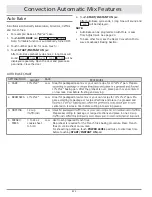
Page 21: ...lose the door 5 Touch START INSTANT ON pad After Auto Broil cycle ends 1 long tone will sound and END will be displayed NOTE Auto Broil can be programmed with More or Less Time Adjustment See page 23...

Page 22: ...O SMALL PRESS CLEAR will appear in the display To roast other food or foods above or below the weights allowed on the chart below check the Dacor Convection Microwave Cookbook s Combination Roast ing...

Page 23: ...ng Section AUTO BAKE CHART SETTING FOOD AMOUNT RACK PROCEDURE 1 CAKE 13 x9 x2 Low Ideal for packaged cake mix or your own recipe for 13 x9 x2 pan Prepare 13 x9 x2 baking pan After the preheat is over...

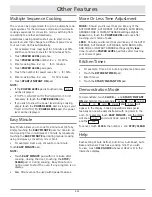
Page 24: ...te Touch EASY MINUTE pad NOTE Touch EASY MINUTE pad within 1 minute after cooking closing the door touching the STOP CLEAR pad or during cooking Easy Minute can not be used to start the oven if any pr...

Page 25: ...readout so that the oven will automatically begin programmed cooking at the chosen Auto Start time Be sure to choose foods that can be left in the oven safely until the Auto Start time Baked potatoes...

Page 26: ...ere is long time high temperature cooking If so you may wish to pur chase an oven cleaner pad with liquid cleaner within it not surfaces Follow manufacturer s directions carefully and be especially ca...

Page 27: ...s This may cause spattering or boilover 2 Avoid burning food 3 Light 1 oven at the circuit breaker panel or by unplugging 2 To release cover remove the screw on the light cover See illustration 3 Repl...

Page 28: ...at HIGH 100 A Does the oven light come on YES _______ NO _______ B Does the cooling fan work Put your hand over the rear ventilating openings YES _______ NO _______ C Does the turntable rotate It is n...

Page 29: ...oking Uniformity Turntable Stirrer Fan Weight Approx 71 lb The International Electrotechnical Commission s standardized method for measuring output wattage This test method is widely recognized Intern...

Page 30: ...IX will be displayed and cooking mode and time can be entered For more information on convection cooking see pages 18 19 EASY MINUTE Touch EASY MINUTE for one munute at 100 power or to add additional...

Page 31: ...sponsibility for damage to surrounding property including cabinetry floors ceilings and other structures or objects Breakage discoloration or damage to glass metal surfaces plastic components trim pai...

Page 32: ...r that Product a Partial Refund The amount of any Partial Refund to be offered shall be determined in our discretion based on the fair market value of the Product given its age and condition If Purcha...

Page 33: ...AW INCLUDING ANY APPLICABLE IMPLIED WARRANTY OR CONDITION OF MERCHANTABILITY OR FITNESS FOR A PARTICULAR PURPOSE ARE HEREBY LIMITED TO THE SAME DURATION OF TIME AS THIS LIMITED WARRANTY SOME PROVINCES...

Page 34: ...L RIGHTS AND YOU MAY ALSO HAVE OTHER RIGHTS WHICH VARY FROM PROVINCE TO PROVINCE THIS LIMITED WARRANTY STATES THE PURCHASER S EXCLU SIVE REMEDY EXCEPT WHERE PROHIBITED BY APPLICA BLE PROVINCIAL LAW TH...

Page 35: ...Notes...
Page 36: ...you have any questions or comments relating to Dacor appliances please contact the Dacor Customer Service Center Country Contact Center Web Site U S A 1 833 353 5483 www dacor com CANADA 1 844 509 46...

Reviews: