


Welding
•
Do not touch welding gun near the stud. While
welding high temperatures develop which can cause
serious burns. Take hold of the welding gun only on
and above the handle with your two hands.
•
To control the adjustments do always test weldings
and readjust if the welding results are poor.
•
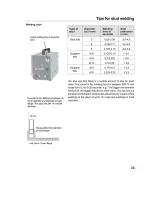
Take care that the work piece is thick enough (at
least 1/4 of the stud’s diameter).
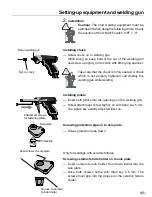
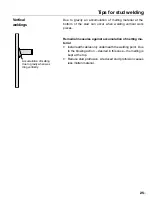
— Put welding gun on the work piece in vertical/horizon-
tal position. The contact lamp on the operating panel
lights up.
— Press trigger button and keep welding gun in the right
position. On the operating panel the release-, control-
and contact lamps light up.
The equipment welds automatically. The stud is lifted and the
electric arc melts the material. After the adjusted time the dips
into the melting by the adjusted stud protrusion. During this
time and shortly after that do not move the welding gun and the
work piece.
Provided the weld has cooled down as far as necessary the
welding gun can be removed.
— After a short period of cooling remove welding gun ver-
tically.
Attention! After welding the ceramic ferrule is very
hot. Wear eye protection. Parts of the ceramic ferrule
can fly some metres when being knocked off.
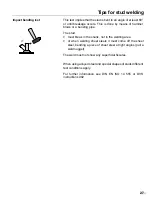
— Knock off ceramic ferrule with a welder’s hammer.
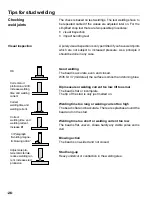
— Check weld as instructed. Do a visual inspection in any
case.
→
Chapter »Tips for stud welding«.
Putting welding gun on work piece
by the square
Welding
21


