4
Camera Installation
NOTE:
Unit is to be used with a camera weighing no more than 8 pounds. Camera and camera cables NOT included.
1. Run the camera arm down and then disconnect the power to
the unit.
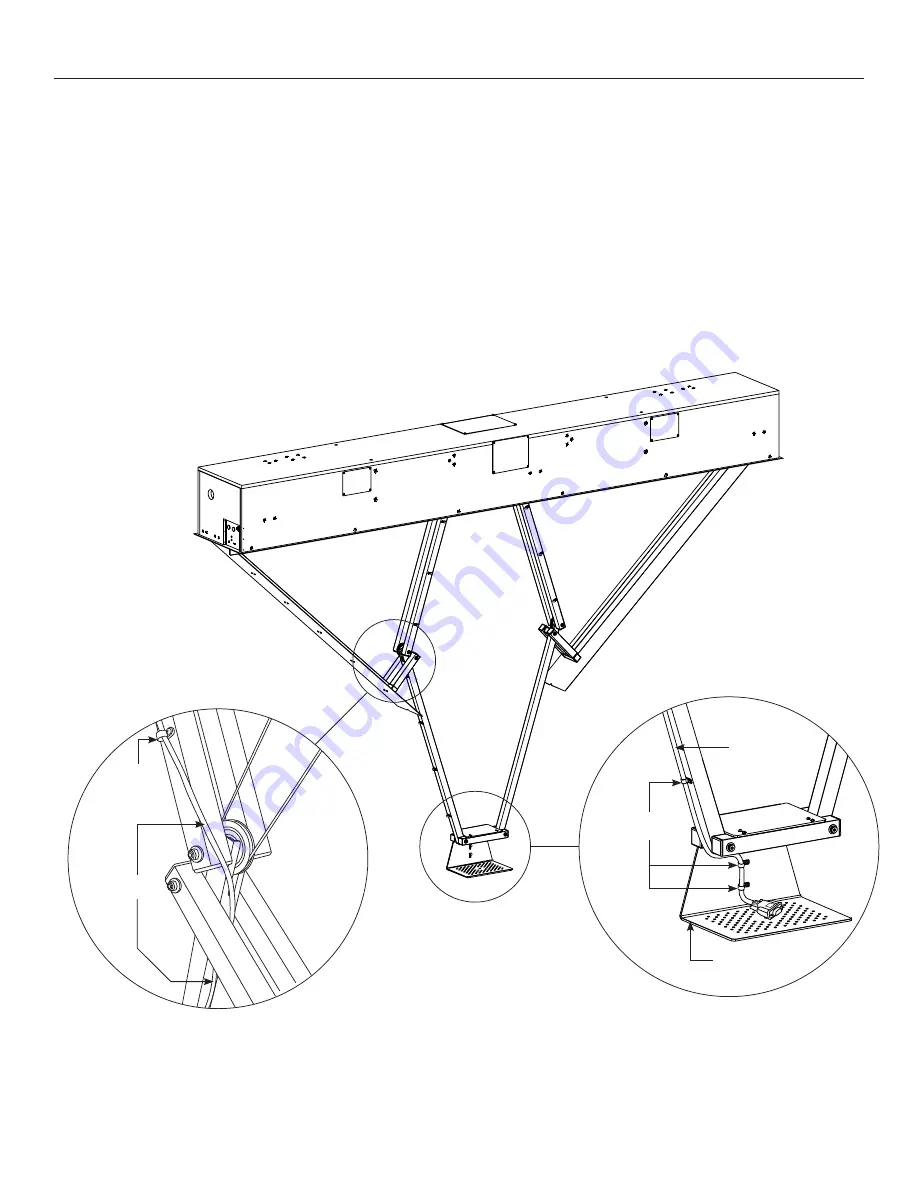
2. Install the camera cables through the cable loops. See Figure 4.
Start from the camera shelf and then up the arms through the
camera cable exit in the end of the case.
NOTE:
The camera cables must not interfere with the arm or
door mechanisms. Leave enough cable to allow for a natural
bend at the pivot points (Figure 4). Use cable ties if needed to
secure the camera cables through the loops. Do NOT go around
the camera arm tubes with wire ties.
3. Connect camera to the cable(s) and secure the camera to the
camera shelf. The camera shelf is perforated for easy camera
attachment (Figure 4).
4. Check the camera cable path and ensure there will not be
interference with the arm or door mechanism operation.
5. Reconnect power to the unit and test operation.
Cable Loops
Cable
Loop
Cable
Cable
Camera Shelf
Figure 4


