background image

9

D-Link DPR-1260 Quick Install Guide

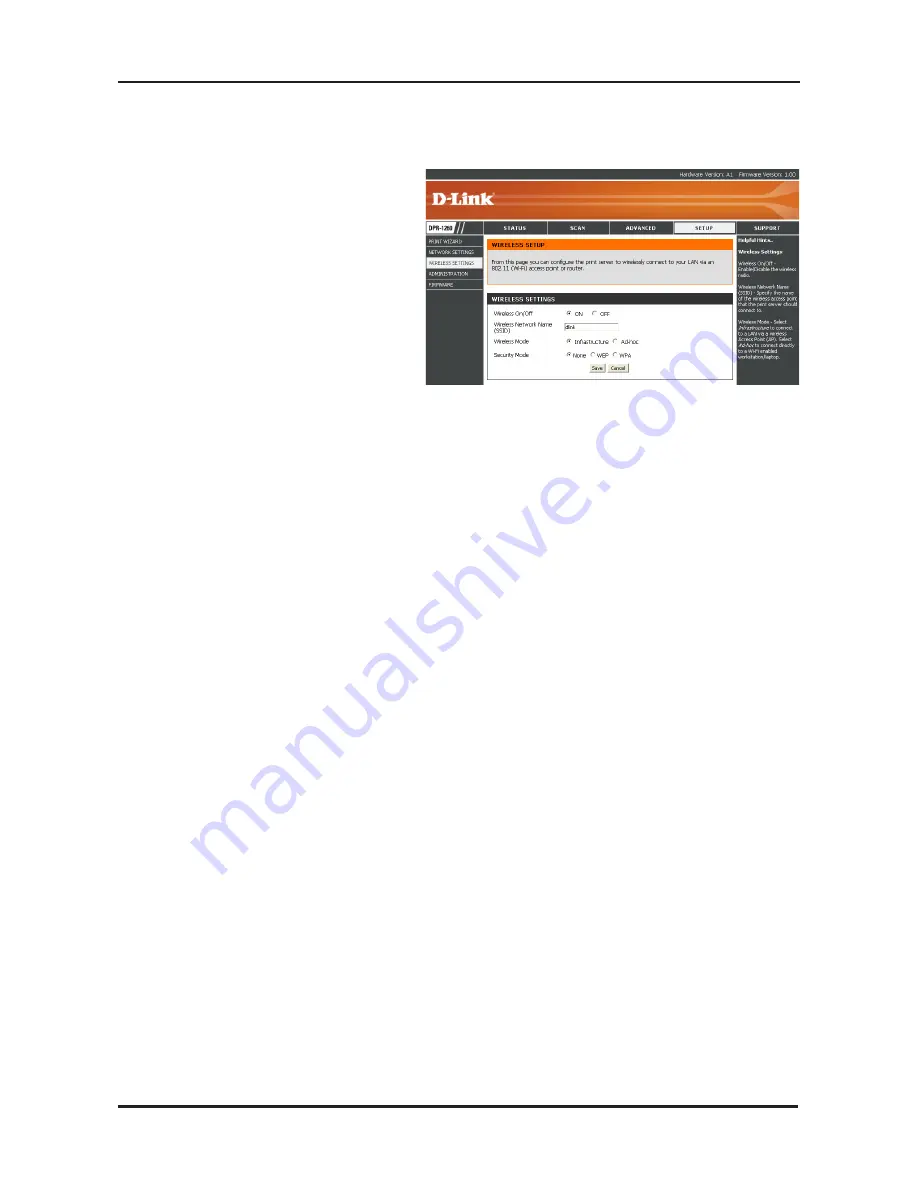
Wireless Settings

If  you  want  to  connect  to  a 
wireless  network,  click  on 

Setup

 and then click 

Wireless 

Settings

 on the left side. 

Set  the 

Wireless  on/off

  to 

On

. If you want to disable the 

wireless feature, select 

Off

.

Enter the 

Wireless Network Name (SSID)

 of your wireless network.

If you are connecting to an access point or wireless router, select 

Infrastructure

. If you are connecting directly to a computer with a 

wireless adapter, click 

Ad-Hoc

.

Select 

None

  (to  use  connect  to  an  unsecure  network), 

WEP

,  or 

WPA.

Summary of Contents for DPR-1260 - RangeBooster G Multifunction Print...

Page 1: ...Wireless G USB 2 0 Adapter Wireless Print Server with 3G Mobile Video ...

Page 2: ... Note Using a power supply with a different voltage rating than the one included with the DPR 1260 will cause damage and void the warranty for this product 10 100 Fast Ethernet Wired or 802 11b g Wireless Network Printer with USB Port Computer with Windows XP SP2 or Windows 2000 SP4 or Mac OS X v10 4 v10 3 Internet Explorer v6 or Mozilla Firefox CD ROM Drive Network Interface Card For a list of co...

Page 3: ...nnections Power Receptor Receptor for the Power Adapter LAN Port Connect to a network using an Ethernet cable USB Ports Connect USB printers using an USB cable Reset Button Pressing the Reset Button restores the router to its original factory default settings ...

Page 4: ...to the power supply LAN LED A solid light indicates connection on the LAN port This LED blinks during data transmission WLAN LED A solid light indicates that the wireless segment is ready This LED blinks during wireless data transmission USB LEDs 1 4 A solid light indicates connectivity to an USB printer or scanner ...

Page 5: ...onnector located on the Print Server s bottom panel and connect it to a power outlet or power strip The factory default IP address of the DPR 1260 is 192 168 0 10 The IP address of the DPR 1260 must be in the same range as your network You can change the IP address of the DPR 1260 to match the IP address scheme of your existing network To access the Print Server s Web configuration interface assign...

Page 6: ... Adapter and select Properties Click Internet Protocol TCP IP and click Properties Input a static IP address in the same range as the print server 192 168 0 xx Select Use the Following IP Address and enter an IP address 192 168 0 28 and a Subnet Mask 255 255 255 0 Click OK to save the new IP address Once you are finished configuring your print server you can change the settings back ...

Page 7: ... the configuration utility open a web browser such as Internet Explorer and enter the IP address of the print server 192 168 0 10 If you get a Page Cannot be Displayed error please refer to the Troubleshooting section of the manual for assistance Click Next to continue ...

Page 8: ...e Click the radio button next to the printer you want to configure Click Next to continue Click Next to continue You may need to insert your printer driver CD to load the drivers to your computer Click Finish to complete the setup wizard ...

Page 9: ... the Wireless on off to On If you want to disable the wireless feature select Off Enter the Wireless Network Name SSID of your wireless network If you are connecting to an access point or wireless router select Infrastructure If you are connecting directly to a computer with a wireless adapter click Ad Hoc Select None to use connect to an unsecure network WEP or WPA ...

Page 10: ...de 2 Next to Security Mode select WEP 3 Next to Authentication select Shared Key 4 Select either 64 bit or 128 bit encryption from the drop down menu next to WEP Encryption 5 Next to Key Type select either Hex or ASCII Hex recommended Letters A F and numbers 0 9 are valid ASCII All numbers and letters are valid 6 Next to Key 1 enter a WEP key that you create Make sure you enter this key exactly on...

Page 11: ... the web based configuration by opening a web browser and entering the IP address of the router 192 168 0 1 Click on Wireless Settings on the left side 2 Next to Security Mode select WPA 3 Next to Cipher Mode select TKIP AES or TKIP and AES 4 Next to PSK enter a key passphrase The key is an alpha numeric password between 8 and 63 characters long The password can include symbols _ and spaces Make su...

Page 12: ... 02 14 2006 Copyright 2006 D Link Corporation D Link Systems Inc All rights reserved D Link and the D Link logo are registered trademarks of D Link Corporation or its subsidiaries in the United States and other countries Other trademarks are the property of their respective owners Maximum wireless signal rate based on IEEE Standard 802 11g specifications Actual data throughput will vary Network con...

Reviews: