


DP-301 Print Server Hardware Guide
Unpacking and Installation
9
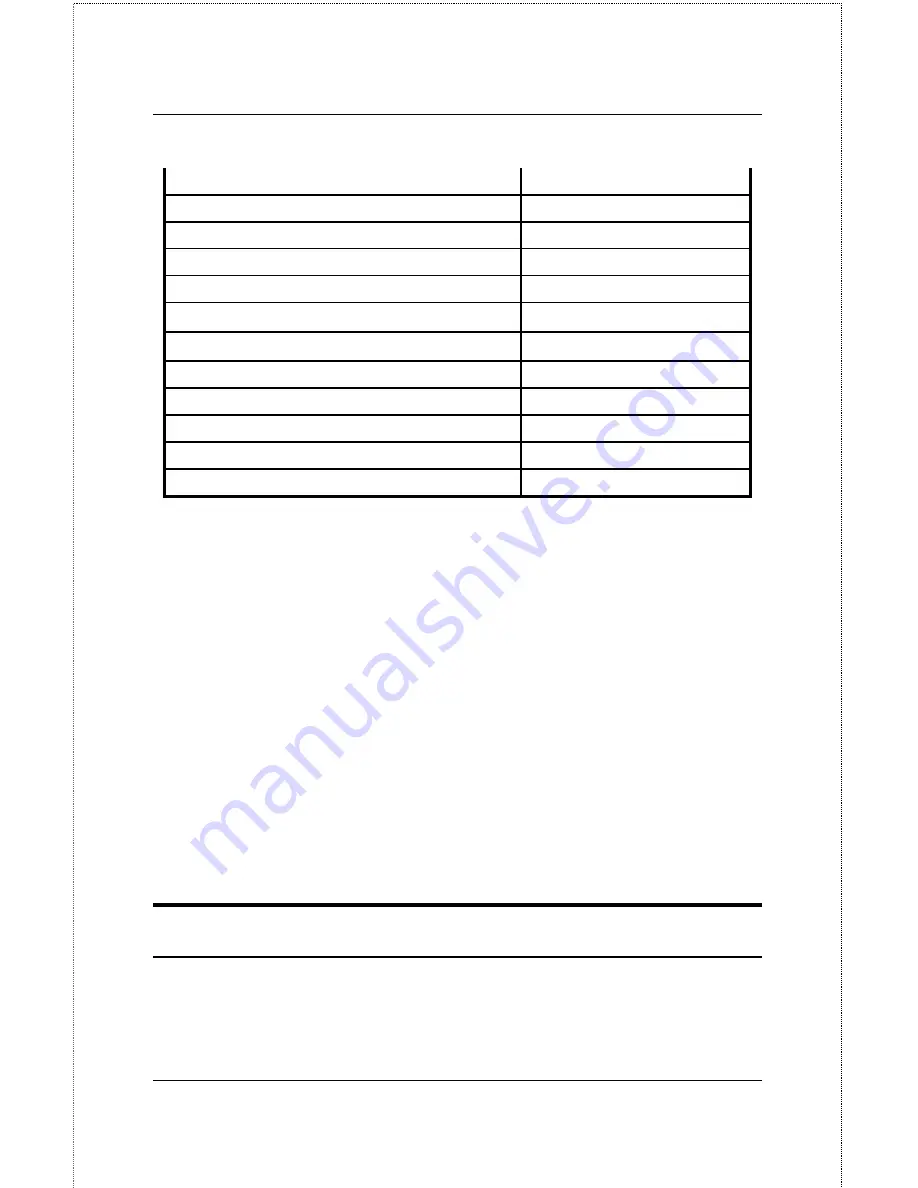
steady long flashes
Firmware Reload Required
continuous on
DRAM Error
One long, two short flashes
Timer INT Error
One long, three short flashes
Flash Protected
One long, four short flashes
Flash ID Error
One long, five short flashes
Flash Erase / Program Error
One long, six short flashes
LAN Controller Error
One long, seven short flashes
LAN Memory Error
One long, eight short flashes
Parallel Controller Error
One long, nine short flashes
LPT Error
steady short flashes
EERPROM Error
One long, eleven short flashes
LAN I/O Base error
In the event of a Firmware Reload Required error at startup, proceed
according to instructions given in the PS Admin User’s Guide ("PS Admin
Administration" section, under the heading "Upgrading the Print Server's
Internal Firmware").
In the event that any of the other listed error conditions is encountered on
startup, contact your dealer for correction of the fault.
Operational Test
The PS Admin software includes a Print Test function for confirmation of
connections and functions. That operational test can be performed after you
have completed installation of the PS Admin software, and the PS Admin
procedures for configuring the DP-301. See instructions given in the PS
Admin User’s Guide ("Getting Started Setting up Your Print Server"
section, under the heading "Testing your Print Server").
Velcro-mounting the DP-301
The DP-301 can stand on the printer's tabletop, or may be Velcro-mounted
to a side panel of the printer or another suitable surface next to the printer.
To prepare for Velcro-mounting, separate the two parts of the supplied


