Powering the Device
The DIS-2650AP can be powered with an 802.3at
PoE source or by using the built-in terminal
EN
G
L
IS
H
adapter. This allows dual power inputs using
wires from the power source(s) to be screwed
into the terminal connections.
Using the Terminal Connections
1.
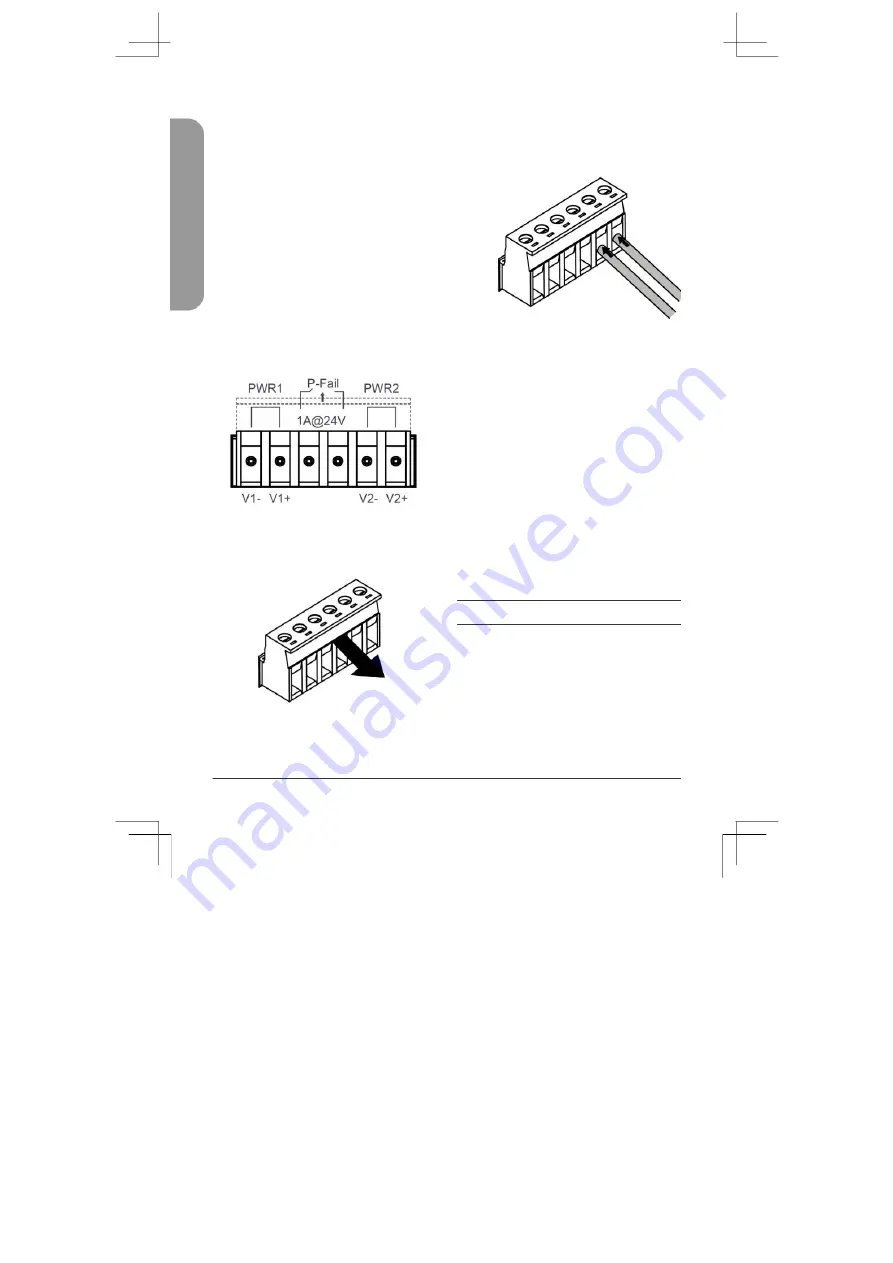
Before continuing, consult the diagram
below to decide which wires from the
power source need to connect to which
contacts on the terminal block. Note
that two power sources can be used;
one inserted into V1-/V1+ (labeled
PWR 1) and the other inserted into
V2-/V2+ (labeled PWR2).
Figure 6: Terminal Block Diagram
2. Use a lever to remove the terminal
block from the switch.
Figure 7: Removing the Terminal Block
3.
Use a flat head screwdriver to unscrew the
terminal connections that you wish to use.
4.
Insert the wires into the terminal
connectiosn and use the screwdriver to
tighten the screws to secure the wires.
Figure 8: Connecting a Power
Source to the Terminal Block
5. Re-insert the terminal block into the
socket on the device.
Connecting Devices
The Ethernet port can be connected to an
end device. Use a standard Category
5/5e/6 RJ-45 Ethernet cable to connect
the end device to the DIS-2650AP.
The port will auto-negotiate to the highest
possible port speed based on the
connected device.
Management Options
The DIS-2650AP can be managed by
using the Web User Interface (Web UI),
the Nuclias Connect app, or the console
port or Telnet management interfaces.
4
DIS-2650AP Quick Installation Guide
Summary of Contents for DIS-2650AP
Page 2: ...Contents English 1 ...
Page 12: ...Notes ...
Page 13: ...Notes ...
Page 14: ...Notes ...
Page 15: ...Notes ...
Page 16: ...Ver 1 00 WW _130x183 2020 12 07 5300 00007836 01W ...


