User Manual
20X Full HD High Speed Dome Network Camera
DCS-6915
Version 1.1 | 4/18/2013
Page 1: ...User Manual 20X Full HD High Speed Dome Network Camera DCS 6915 Version 1 1 4 18 2013 ...
Page 2: ...e Description 1 0 March 20 2013 DCS 6915 Revision A1 with firmware version 1 00 1 1 April 18 2013 DCS 6915 Revision A2 with firmware version 1 00 Trademarks D Link and the D Link logo are trademarks or registered trademarks of D Link Corporation or its subsidiaries in the United States or other countries All other company or product names mentioned herein are trademarks or registered trademarks of...
Page 3: ...gs 24 Setup 25 Standard Setup 25 Advanced Setup 26 System Overview 27 Audio and Video 28 Video Settings 28 Image Settings 31 Audio Settings 34 Day and Night Settings 35 Network 36 IP Settings 36 Port and Access Name Settings 38 Dynamic DNS 39 HTTPS 40 Access List 42 Advanced Settings 43 Event Management 45 Motion Detection 45 DI and DO 46 Event Settings 47 Recording 52 Recording Settings 52 Local ...
Page 4: ...4 D Link DCS 6915 User Manual System Log 64 Technical Specifications 65 Connection Panel Pin Definition 69 ...
Page 5: ...e Power Adapter Power Cable Lubricant Quick Installation Guide Cap Screws Screwdriver Product Overview Package Contents If any of the above items are missing please contact your reseller Note Using a power supply with a different voltage than the one included with your product will cause damage and void the warranty for this product Mini Pendant ...
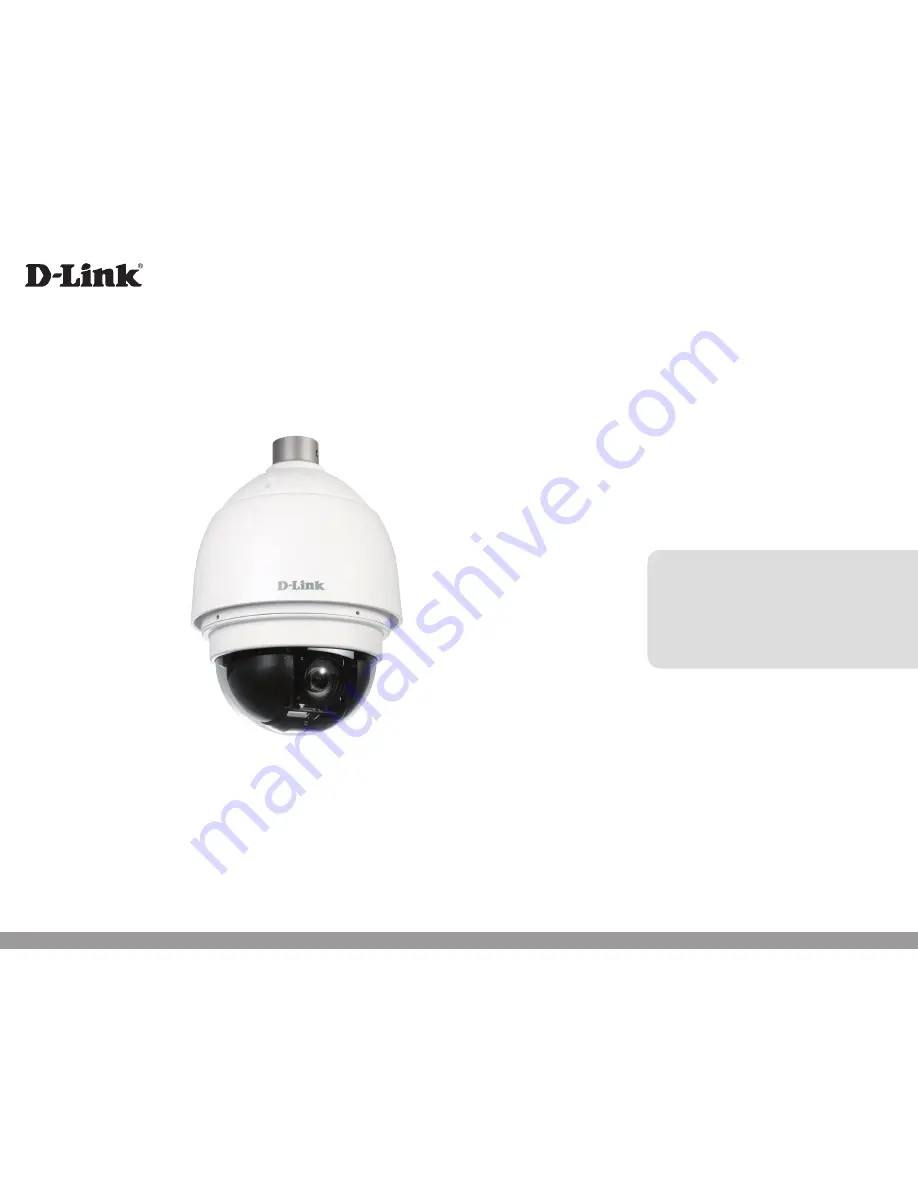
Page 6: ...al surveillance and security solution suitable for small medium and large enterprises The DCS 6915 features a 3 megapixel sensor capable of Full HD 1080P resolution allowing for very clear surveillance footage to be taken The powerful 20X optical zoom and 10X digital zoom ensure that you can see even the smallest details with ease The included D ViewCam camera management software allows you to vie...
Page 7: ...ter It provides a convenient way to ensure that the viewing angle is optimized for the scene and required need for resolution Built for Tough Environments Specially designed for use in challenging environments the DCS 6915 has a toughened metal industry certified IK 10 vandal proof and IP 66 weather proof housing This means that it is able to withstand sudden high impacts as well as adverse weathe...
Page 8: ...MicroSD card slot Reset The reset button can be used to reset the system or restore the factory default settings To reset simply press and hold the button for 10 seconds Power Socket This 3 pin socket accepts the power cable RJ45 connector Connect your category 5 Ethernet cable to this port The Green Link Light indicates a good network connection The Orange Light indicates network activity Alarm I...
Page 9: ...6915 User Manual Section 2 Assembly and Installation Step 1 Unpack the DCS 6915 and remove the dome camera unit Step 2 Remove the protective cover and PE sheet Assembly and Installation Manual Hardware Installation ...
Page 10: ...maketheinstallationprocesssmoother Attach the optical cover to the camera body The small protrusions on the cover must align with the four holes on the camera body Step 4 Gently press down the dome cover with two hands on the side of it Warning DO NOT press down on the optical cover This might cause damage to the camera ...
Page 11: ...11 D Link DCS 6915 User Manual Section 2 Assembly and Installation Step 5 Screw the dome cover and body together Step 6 Insert the power connector into the opening on the cap ...
Page 12: ...CS 6915 User Manual Section 2 Assembly and Installation Step 7 Connect the 3 pin connector to the slot on the camera enclosure The connector will lock into place Step 8 Connect the power cable to the power adapter ...
Page 13: ...Step 9 Connect one end of the CAT 5 Ethernet cable to the RJ 45 connector of the camera enclosure and the other end of the cable to your network Step 10 Insert a MicroSD card for local storage of recorded images and video Step 11 Plug the power cable into a wall outlet ...
Page 14: ...try hole with the supplied sponge in two different ways 3 Thread the cables through the pendant mount and affix the pendant mount on the wall with screws and screw anchors not supplied 4 Attach the waterproof collar to the pendant mount 5 Thread the cables through the cap and affix it to the pendant mount with the supplied screws and washers 6 Connect the cables to the camera enclosure Attach the ...
Page 15: ... with screws and screw anchors not supplied 4 Attach the waterproof collar to the straight tube 5 Thread the cables through the straight tube and the cap 6 Affixthecaptothestraighttubewiththesuppliedscrewsandwashers Attach the waterproof collar around the junction of the straight tube and cap 7 Connect the cables to the camera enclosure Attach the camera enclosure to the cap and affix it with the ...
Page 16: ...cess to configuring your camera Note If the autorun program does not automatically start on your computer go to Windows click Start Run In the Run command box type D DCS6915 exe where D represents your CD ROM drive Step 2 Accept the End User Licence Agreement and follow the on screen prompts to install the Camera Installation Wizard Step 3 Select your camera from the list then click Wizard If you ...
Page 17: ...nd confirm a password for your device Click Next to continue Step 5 SelectStaticIPifyourInternetServiceProviderhasprovidedyouwithconnection settings or if you wish to set a static address within your home network Enter the correct configuration information and click Next to continue Note Select DHCP if you are unsure of which settings to choose Click Next to continue ...
Page 18: ...nd IP address details and click Restart The LED on the front of the DCS 6915 will blink then turn solid green once it successfully connects to your network Step 7 Your DCS 6915 camera is now set up Click Exit to exit the wizard and can skip to AdvancedConfiguration onpage20foradvancedconfigurationofyourcamera ...
Page 19: ...ton labeled Link to access the web configuration The Setup Wizard will automatically open your web browser to the IP address of the DCS 6915 in this example it is http 192 198 0 20 Your camera may have a different IP Address Enter admin as the default username and leave the password blank Click OK to continue ...
Page 20: ...t to the camera s web interface you will see the following page This is the Live Video page which will allow you to view the camera s video feed and control basic camera functions using the icons on the screen Please refer to the tables on the following pages for detailed information about the icons on this screen ...
Page 21: ...n on the main page to enter the camera setting pages Note that only Administrators can access the setup page To simplify the setting procedure two types of user interfaces are available Advanced Setup for professional users and Standard Setup for entry level users Digital Output Click this button to turn the digital output device on or off Video Stream This camera supports multiple streams stream ...
Page 22: ...ser determines the focal area Focus Near Sets the depth of field zone as close Focus Far Sets the depth of field zone as far Patrol Auto Pan Patrol Patrol executes a pre defined sequence of pan tilt zoom and focus features Before selecting this users must define at least two preset points Auto Pan Auto Pan automatically scans an area horizontally Cruise Select from up to 8 user defined cruise path...
Page 23: ...ted to your network camera Microphone Mute Microphone Mute Un mute Click to turn off the microphone internal external that is connected to your network camera Press again to turn the microphone back on Speaker Volumn Speaker Volume When the mute function is not active move the slider bar to adjust the volume of the speakers that are connected to your network camera Speaker Mute Speaker Mute Un mut...
Page 24: ...UDP and provides error correction However transmission speed will be reduced HTTP Offers the highest image and video quality However packet loss will diminish image quality when bandwidth becomes restricted If the network is protected by a firewall and it opens only HTTP port 80 HTTP protocol must be selected In this mode audio is disabled and only video can be viewed UDP connections will not be a...
Page 25: ...des the following options System Overview Audio and Video Video Settings Audio Settings Network IP Settings Event Management Motion Detection PTZ Control Motorized PTZ System User Settings Device Settings Time and Date Maintenance Setup The DCS 6915 includes basic and advanced setup screens Both screens include a tree view with multiple setup options This manual includes detailed explanations for ...
Page 26: ...nced setup includes the following options System Overview Audio and Video Video Settings Image Settings Audio Settings Day and Night Settings Network IP Settings Port Access Name Settings Dynamic DNS HTTPS Access List Advanced Settings Event Management Motion Detection DI and DO Event Settings Recording Recording Settings Local Storage PTZ Control Motorized PTZ System User Settings Device Settings...
Page 27: ...ion 3 Advanced Configuration System Overview The system overview page contains a summary of the camera s current settings For more information about adjusting these settings please consult the subsequent instructions found in this manual ...
Page 28: ...Max Gain You can manually set the Max Gain level from off to 57dB The higher the value the brighter the image will be Full Auto Allow the camera to adjust exposure time and iris automatically Slow shutter In this mode it is the shutter speed that takes main control of the exposure The range of shutter speed is from 1 10000 to 1 Maximum ExposureTime Select a proper maximum exposure time according t...
Page 29: ...eam 1 3 Users can define the Region of Interest viewing region and the Output Frame Rate size of the live view window Stream 4 This is global view stream which captures the full view of the video Users can also define the Output Frame Rate size of the live view window ...
Page 30: ... of the video Select higher frame rate for smoother video quality but it requires more storage usage 3 options for selection customize 15 fps 30fps Intra Frame Period Determine how often to plant an I frame The shorter the duration the more likely you will get better video quality but at the cost of higher network bandwidth consumption Select the intra frame period from the following durations 1 4...
Page 31: ...which enables user to keep tracking objects seamlessly under the mode almost no delay occurs in comparing with that under the M E mode Note The tilt range of flip can be set in PTZ Control Tilt Range setting the angle is from 10 to 100 White Balance This adjusts the relative amount of red green and blue primary colors in the image so that the neutral colors are reproduced correctly Auto The camera...
Page 32: ... on the video streams When the frame size is set to 176 x 144 only the time will be stamped on the video streams Sharpness Increasingthesharpnesslevelcanmaketheimagelooksharper especially enhancing the object s edge The Sharpness value is adjustable from 1 to 15 ExpComp Users can define the value of Exposure Compensation the value ranges from 1 to 15 WDR TheWDR function is especially effective in ...
Page 33: ...lue Cyan Yellow Magenta are available colors for the mask Mask 1 16 Upto 16 masks can be set Hsize 1 80 The horizontal length of the mask The mask center is at the center of current live view User may adjust Hsize or zoom in out to set the ideal mask length Vsize 1 60 The vertical height of the mask The mask center is at the center of current live view User may adjust Vsize or zoom in out to set t...
Page 34: ...l microphone input Sets microphone input gain between 1 and 6 Note The higher the setting the louder the sound Output Gain Set the audio input output gain levels for sound amplification The audio gain values are adjustable from 1 to 6 The sound will be turned off if the audio gain is set to Mute Audio Type Select between uLAW G 711 and ALAW G 711 compression formats A higher audio quality will req...
Page 35: ... to Auto Day Mode In this mode the camera switches on the IR cut filter at all times which will block the infrared light from reaching the sensor so that the colors are not distorted Night Mode The camera switches off the IR cut filter to allow the infrared light to pass through This helps the camera to see more clearly in low light conditions Schedule Mode The camera switches between day and nigh...
Page 36: ...ned Use fixed IP address To setup a static IP address select and move the cursor to the IP address fieldandinsertthenewIPaddress ex 192 168 7 123 thengototheDefaultgateway explained later and change the setting eg 192 168 7 254 IP address This is necessary for network identification Subnet mask It is used to determine if the destination is in the same subnet The default value is 255 255 255 0 Defa...
Page 37: ...figured as a UPnP device on your network Enable UPnP Port Forwarding Enabling this setting allows the camera to add port forwarding entries into the router automatically on a UPnP capable network PPPoE For PPPoE users enter the PPPoE Username Password and Confirm Password into the fields and click on the Save button to complete the setting ...
Page 38: ...reams simultaneously The access name is used to differentiate the streaming source RTSP Authentication Depending on your network security requirements the Network Camera provides three types of security settings for streaming via RTSP protocol disable basic and digest If basic authentication is selected the password is sent in plain text format but there can be potential risks of it being intercep...
Page 39: ...ing Server Name Select a DDNS server name from the provider drop down list With a Dynamic DNS account the camera automatically updates your IP address To enable DDNS enter your host information Click Save to continue Host Name Enter the host name of the DDNS server Username Enter your username or e mail used to connect to the DDNS Password Enter your password used to connect to the DDNS server Con...
Page 40: ...ll a certificate Create Self signed Certificate Automatically 1 Select this option 2 In the first column select Enable HTTPS secure connection then select a connection option HTTP HTTPS or HTTPS only 3 Click Save to generate a certificate 4 The Certificate Information will automatically be displayed in the third column You can click Property to view detailed information about the certificate 5 Cli...
Page 41: ...t issues digital certificates Enroll the camera Wait for the certificate authority to issue a SSL certificate Click Browse to search for the issued certificate then click Upload in the Create and Install Certificate Method section How to disable the HTTPS setting 1 Deselect Enable HTTPS secure connection in the first column and click Save A warning dialog will pop up 2 Click OK to disable HTTPS 3 ...
Page 42: ...cific IP addresses Check the box to enable the IP Filter function Once enabled the listed IP addresses IPv4 will be allowed denied access to the IP Camera Filter Type Select Allow or Deny from the drop down list and click on the button to determine the IP Filter behavior Filter Input the IP address and click on the button to add a new filtered address The Filtered IP Addresses list box shows the c...
Page 43: ...ead only objects The default value is write IEEE 802 1X The IP Camera is allowed to access a network protected by 802 1X EAPOL ExtensibleAuthenticationProtocoloverLAN Usersneedtocontactwith the network administrator for gaining certificates user IDs and passwords CA Certificate The CA certificate is created by the Certification Authority for the purpose of validating itself Upload the certificate ...
Page 44: ...eive the corresponding forwarding treatment from DiffServ capable routers DSCP Settings The DSCP value range is from 0 to 63 The default DSCP value is 0 which means DSCP is disabled The IP Camera uses the following QoS Classes Video Audio and Management Live Video The class consists of applications such as MJPEG over HTTP RTP RTSP and RTSP HTTP Live Audio This setting is only available for the IP ...
Page 45: ... trigger a snapshot Note Setting a higher sensitivity and a lower detection level will make motion more easily detected Add Click to add a new window A maximum of three motion windows can be opened simultaneously Use your mouse to drag the window frame to resize or the title bar to move Clicking on the x at the upper right corner of the window will close the window Save Save the configured setting...
Page 46: ...necting a variety of external alarm devices such as IR Sensors and alarm relays The digital input is used for connecting external alarm devices and once triggered images will be taken and e mailed After making any changes click the Save Settings button to save your changes The Network camera supports 4 digital alarm inputs and 2 digital alarm outputs Note Please make sure the alarm connections are...
Page 47: ...er is activated Sender e mail address Enter the e mail address of the sender Recipient e mail address Enter the e mail address of the recipient Server address Enter the domain name or IP address of the e mail server User name Enter the user name of the e mail account if necessary Password Enter the password of the e mail account if necessary Server port The default mail server port is set to 25 Yo...
Page 48: ...e to exit the page Media Settings Click Add Media to open the Media Settings page On this page you can specify the type of media that will be sent when a trigger is activated A total of 5 media settings can be configured Media name Enter a name for the media setting Media Type There are three choices of media types available Snapshot Video Clip and System log Select the item to display the detaile...
Page 49: ...p to 20 seconds can be set For example if pre event recording is set to 5 seconds and the maximum duration is set to 10 seconds the camera continues to record for another 4 seconds after a trigger is activated File name prefix Enter the text that will be appended to the front of the file name Click Save to enable the settings then click Close to exit the page System log Select to send a system log...
Page 50: ...on detection mechanism or external digital input devices There are several choices of trigger sources as shown below Select the item to display the detailed configuration options Video motion detection This option makes use of the built in motion detection mechanism as a trigger source To enable this function you need to configure a Motion Detection Window first For more information please refer t...
Page 51: ...ction Define the actions to be performed by the camera when a trigger is activated To set an event with recorded video or snapshots it is necessary to configure the server and media setting so that the camera will know what action to take i e the server to send the media files to when a trigger is activated Add Server same as Sever Settings on page 47 Add Media same as Media Settings on page 48 ...
Page 52: ...le Specify the recording duration 1 Select the days of the week 2 Select the recording start and end times in 24 hr time format Destination The MicroSD Card recording schedule supports up to ten sets of time frames Click Save to enable the setting and click Close to exit the page When the system begins recording it will send the recorded files to the MicroSD Card Recording Settings Recording ...
Page 53: ...le if you enter 7 days the recorded files will be stored on the SD card for 7 days Click Save to enable your settings Remove oldest recordings when disc is Enter a percentage value for the maximum capacity of the storage to be used for recordings Searching and Viewing the Records This section allows the user to set up search criteria for recorded data If you do not select any search criteria all r...
Page 54: ...djust the fine zoom focus ratio Subsequently assign a number for the current position from the drop down Number List click on PrePage or NextPage button to reach number 1 to 256 and enter its descriptive name Click on the button Set to save the settings mentioned above Preset Go To have the camera move to a specified Preset position please select the Preset Point from the drop down Preset list cli...
Page 55: ...begin recording a path Use the navigation pad or mouse to define a path within the live video window Click the Record End Set button when you are finished defining the path Cruise Run Select the specified Cruise Path from the drop down list click on the Run button and then the camera will start touring around as recorded To view the camera touring around in full screen mode please move the cursor ...
Page 56: ...he Direction drop down list Move the camera to another desired position as the end point of the Auto Pan Path Move the camera view to the desired end point and click Set End Point You may also specify the pan direction and speed Note The zoom setting of an Auto Pan Path starting point will persist throughout the whole path AutoPanRun Select the specified Auto Pan Path from the drop down list click...
Page 57: ... Specify a path number to use 2 Specify up to 64 point numbers using the Prev Page and Next Page buttons to navigate between the sequence preset numbers a Select a preset point from the Preset List b Specify the Dwell Time c Specify the Camera Speed 3 Repeat steps a b and c for up to 64 points Sequence Run Select the specified Sequence Line from the drop down list click on the Go button and then t...
Page 58: ...from 1 to 128 minutes please specify it in the field Type PleaseselectaActiontype PresetPoint CruiseLine AutoPanPath SequenceLine andspecifythe number of Preset Point Cruise Line Auto Pan Path Sequence Line from the drop down Type and Line lists Click on the button Set to save the Home settings Set Home Position the camera as desired then click this button to set a home position Reset Home Set the...
Page 59: ... algorithm when zooming The larger zoom ratio leads to the lower rotating speed Auto Calibration With the Auto Calibration function the IP Camera calibrates when the deviation of dome pivot is detected Click on Set button to save the setting 2DNR Set the 2DNR feature to On or Off OSD Set the OSD feature to On or Off Set Pan Zero Set the camera s currently shooting position as the original spot to ...
Page 60: ...word Setup The administrator account name is admin The admin account is permanent and cannot be deleted The default password is blank Add user account Add a new user account Username Enter a username for the new account Password Enter a password for the new account Privilege Select the access rights for the new user Manage user Manage the accounts for existing users System ...
Page 61: ...5 User Manual Section 3 Advanced Configuration Device Settings Use this page to set a name for the device The name chose will appear on the OSD overlay Enter a name for the camera and click Set to store the chosen name ...
Page 62: ...h mm ss eg if the amount of time offset is one hour enter 01 00 00 into the field Automatic Time Configuration Sync with NTP Server Network Time Protocol NTP is an alternate way to synchronize your camera s clock with an NTP server Specify the server you wish to synchronize in the enter field then select an update interval from the drop down menu For further information about NTP see the web site ...
Page 63: ...ers can save the system settings by exporting the configuration file bin to a specified location for future use Click on the Export button and the popup File Download windowwillappear ClickonSaveandspecifyadesiredlocationforsavingtheconfigurationfile Upload Files To copy an existing configuration file to the IP Camera please click on Browse to select the configuration file first and then click on ...
Page 64: ...ion about the current configuration of the camera which is useful for trouble shooting and diagnostics purposes Parameter List The content of the file provides useful information about configuration and connections after system boot up which is useful for trouble shooting and diagnostics purposes System Log ...
Page 65: ... Mechanical Digital Off Digital Slow Shutter Image Freeze Image Features Configurable image size quality frame rate and bit rate Time stamp and text overlays Configurable motion detection windows 16 configurable privacy masks Configurable shutter speed Iris exposure gain sharpness BLC WDR Auto flip Video Compression Simultaneous H 264 MJPEG format compression H 264 multicast streaming JPEG for sti...
Page 66: ...iewCam System Requirements Operating System MicrosoftWindows 7 Vista XP Web Browser Internet Explorer 7 or higher Protocol StandardTCP IP D ViewCam Software Functions Remote management control of up to 32 cameras Viewing of up to 32 cameras on one screen Supports all management functions provided in web interface Scheduled motion triggered or manual recording options General Power Input AC 24V 3 A...
Page 67: ...67 D Link DCS 6915 User Manual Appendix A Technical Specifications Dimensions 282 11 mm 191 97 mm ...
Page 68: ...e 500 mm 50 mm diameter 1 5 kg DCS 32 2 Short StraightTube 250 mm 45 mm diameter 1 kg DCS 32 3 Standard Pendant Mount 348 x 104 x 138 6 mm 1 5 kg DCS 32 4 Mini Pendant Mount 204 x 124 x 135 2 mm 1 2 kg DCS 80 5 Power Box 187 x 147 x 76 mm 2 kg 100 to 115V AC DCS 80 6 Power Box 187 x 147 x 76 mm 2 kg 220 to 230V AC ...
Page 69: ...x A Technical Diagrams Power Socket This is 3 pin socket accepts the power cable Alarm I O Support two digital alarm outputs and four digital alarm inputs Audio I O Support one audio input and one audio ouput Connection Panel Pin Definition ...