background image

Web-Administrator

E-Mail Restrictions

25

6 E-Mail Restrictions

6.1

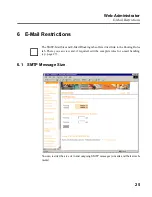
SMTP Message Size

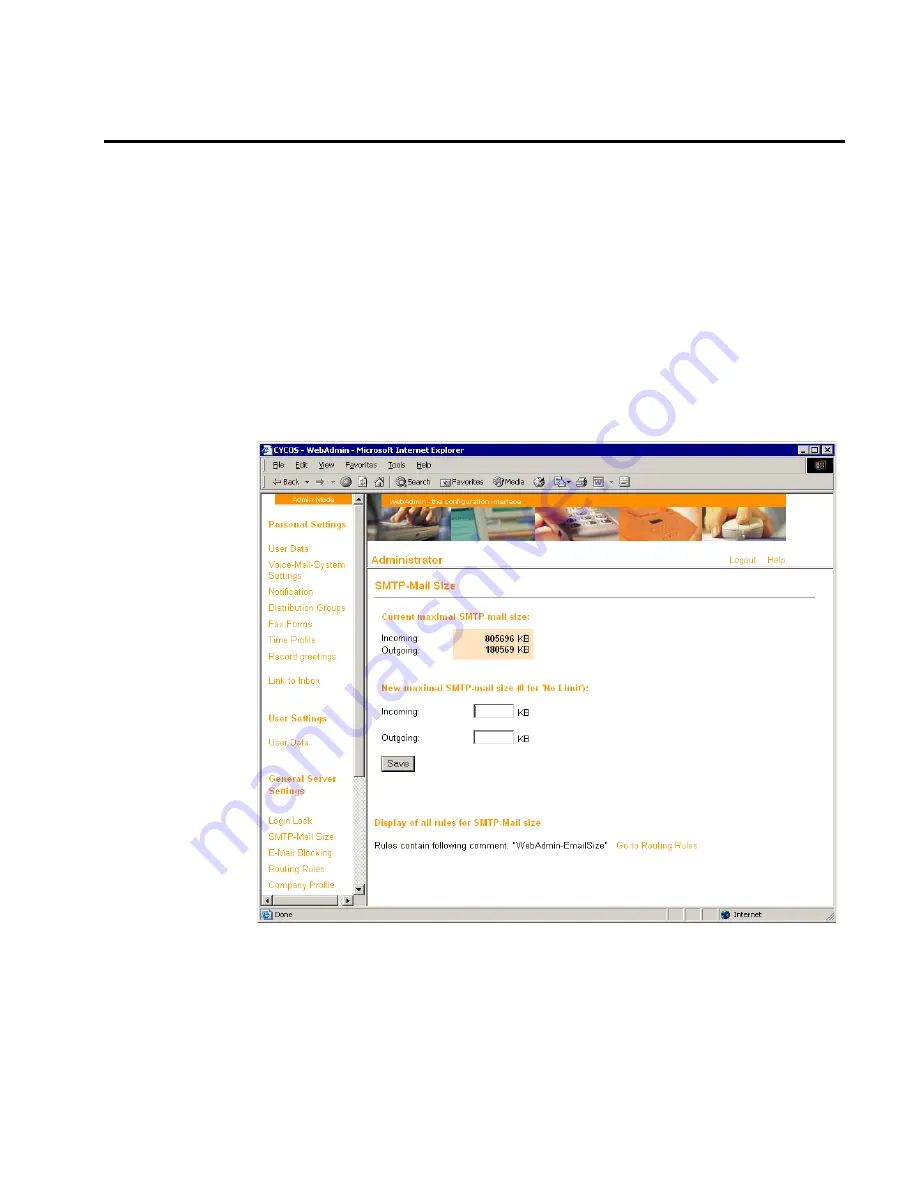
You can restrict the size of in and outgoing SMTP messages (e-mails and their attach-
ments).

The


SMTP-Mail Size


and E-Mail Blocking tabs offer a direct link to the Routing Rules

tab. There you can view and, if required, edit the complete rules for e-mail handling
(c.p. page 27).

Summary of Contents for Cycos ERGO mrs 5.0

Page 1: ...Web Administrator Administrator Manual ...

Page 2: ......

Page 3: ......

Page 4: ...performance in the various possible system configurations Furthermore manufacturers protocols are subject to change without notice Like wise possible subsequent licensing conflicts could occur in regards to support of these protocols For this reason even if depicted in this documentation manufacturer specific protocols can only be offered after agreement with the individual customer The informatio...

Page 5: ...Administrator 7 2 1 1 Login 7 2 1 2 Login via SSL Secure Sockets Layer 9 2 1 3 Selecting a Language 10 2 1 4 Logging Off 10 2 2 General Procedure 11 2 2 1 Navigation 11 2 2 2 Modifying Settings 11 2 2 3 Saving Modifications 11 3 User Data 13 3 1 Viewing Editing and Deleting User Data 14 3 1 1 User List 14 3 1 2 Viewing and Editing User Data 15 3 1 3 Deleting Users or User Groups 16 3 2 Defining Ne...

Page 6: ...les 28 7 1 1 Displaying and Editing Rules 28 7 1 2 Deleting Rules 28 7 1 3 Saving Rules 28 7 2 Creating a New Rule 28 8 Recording Greetings 31 8 1 Recording Name Greetings 32 8 2 Recording and Editing Greetings 34 8 2 1 Recording a Greeting 34 8 2 2 Editing Greetings 36 8 2 3 Deleting Greetings 36 9 Special Server Settings 37 9 1 APL Application Protocol Layer 37 9 1 1 Updating Information 38 9 1 ...

Page 7: ... and administer global telephone announcements and greeting texts Configure global time profile for telephone announcements and greeting texts Define routing rules for incoming message handling Administer global distribution groups and distribution lists Start and stop single services APL View protocol files and other system data Administer personal message parameters passwords and access data 1 1...

Page 8: ...tor WebAdmin 4 1 1 3 Help The Web Administrator has an online user assistance that you can access any time after starting the Web Administrator This help function is always opened with a click on the Help link in the window s top section ...

Page 9: ...oft Internet Explorer from version 5 or Netscape Navigator from version 4 5 1 3 About this Web Administrator 1 3 1 Administrator Privileges This Web Administrator manual describes Web Administrator handling for people working with administrator privileges The standard functions available to normal users are described in a separate Web Administrator manual 1 3 2 Special System Functions This manual...

Page 10: ...Web Administrator About this Web Administrator 6 ...

Page 11: ...ress depends on your network configuration As a rule you can use the following default address http localhost WebAdmin Instead of the localhost short form you should use the IP address of the desired ser ver if possible 1 Start your web browser and as the case may be enlarge the browser window to screen size to gain a better view of the following tabs 2 Enter the Web Administrator start address in...

Page 12: ...n the User field Alternatively you can specify your voice box number 4 Enter your password resp your voicebox PIN in the Password field 5 Click the Login button After successfully logging in you see the User Data In the event that something went wrong you are informed by a note accordingly ...

Page 13: ...vigator 2 1 2 1 SSL via Internet Explorer 1 Click on the SSL link under the Login Cancel buttons A dialog opens 2 Click on the View Certificate button A second window opens 3 Select Install certificate Next Automatically Finish OK OK The security certi ficate is now accepted 4 Subsequently click Yes to accept the certificate The window closes and you can log in as described above 2 1 2 2 SSL with ...

Page 14: ... language list select the desired language for working with the Web Administrator and click the Save button at the bottom marging of the tab 2 1 4 Logging Off 2 1 4 1 Manual Logoff If you want to stop working with the Web Administrator log off for security reasons 1 Click on the Logout link in the top window section You are logged off and the Login tab appears again 2 Close the browser 2 1 4 2 Aut...

Page 15: ...ields In some cases you can select the desired option only from one list or activate one or several options by checkmarking You can perform the respective steps as customary in other Windows programs You can cancel and overwrite wrong entries any time 2 2 3 Saving Modifications Setting modifications only take effect when they have been saved For this purpose you find the Save button at the end of ...

Page 16: ...Web Administrator General Procedure 12 ...

Page 17: ...e User Data tab you can administer the data of user groups and system users Among other things you can Define edit and delete data for user groups Define edit and delete data for single users Define system related privileges of user groups and users ...

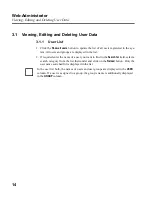
Page 18: ...s are displayed in the list 2 If required enter the name of a user you want to find in the Search for field select a search category from the list thereunder and click on the Reload button Only the user name searched for is displayed in the list In the user list both the names of users and user groups are displayed in the USER column If a user is assigned to a group the group s name is additionall...

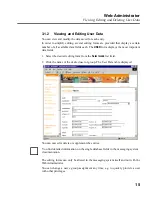
Page 19: ...ortant data fields 1 Select the desired editing form from the Select mask list field 2 Click the name of the desired user or group The User Data tab is displayed You can now edit delete or supplement the entries The editing forms can only be altered in the messaging system itself and not with the Web Administrator You can change a user s group assignment any time e g to quickly provide a user with...

Page 20: ...r Saving Modifications So that user data modifications take effect you must save them before leaving the tab 1 Click the Save button to store all previously performed modifications Saving is confirmed with a note 2 Click on OK to return to the User Data tab 3 As the case may be click the Back button to leave the tab without modifying the data The User Data tab appears again 3 1 3 Deleting Users or...

Page 21: ...ator Viewing Editing and Deleting User Data 17 3 Confirm the security prompt The data are deleted 4 Click on OK to return to the User Data tab The name of the deleted group or user is no longer displayed in the list ...

Page 22: ...orm in the Select mask list field 2 Click the Create new user or Create new group button A new window for entering the name opens 3 Enter the desired name in the text field Only capital letters and numerals are per mitted and no special characters 4 Click the Create button The window closes After defining a new user you now see the User Data tab You can immediately edit delete or supplement the en...

Page 23: ... is identical Therefore you find a general description of group handling in the following 4 1 Creating Groups 1 Enter the desired group names in the Create new group field 2 Click the Create private group or the Create global group button The new group is created and displayed in the list The newly created group is empty yet You can first create further not specially defi ned groups or edit the ne...

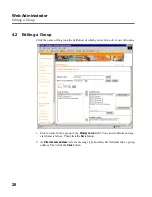
Page 24: ...ion of which you want to edit A new tab opens 1 Enter a name for the group in the Display name field You can use blanks and spe cial characters here Then click the Save button 2 As Direct access address select a message type from the list field and enter a group address Then click the Save button ...

Page 25: ...om the Sort by field for the lists and click the Sort button to update sorting 2 Enable the Show next user button to display further entries in the list 3 Press the Back to begin button to reload the first 50 entries 4 If you are looking for a certain name enter it in the Search user field and click the Search button 5 In the Available users field select a user desired for the group 6 Enable the b...

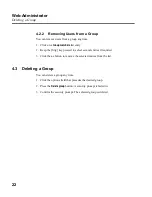
Page 26: ...ep the Strg key pressed to select several entries if required 3 Click the button to remove the selected entries from the list 4 3 Deleting a Group You can delete a group any time 1 Click the options field that precedes the desired group 2 Press the Delete group button A security prompt is faded in 3 Confirm the security prompt The selected group is deleted ...

Page 27: ...ator Access Protection 23 5 Access Protection To access the Web Administrator login you need to enter a user name and a pass word You can define how the system is to react when wrong entries are made with logging in ...

Page 28: ...ter the desired maximum value in the New value text field 5 2 Automatic Unlocking After several failed login attempts with the wrong password the system locks access for the corresponding user name You can set after which period the access lock is to be lifted After expiration of the set time the respective user name is automatically unlocked Enter the desired value in minutes in the New value tex...

Page 29: ...age Size You can restrict the size of in and outgoing SMTP messages e mails and their attach ments The SMTP Mail Size and E Mail Blocking tabs offer a direct link to the Routing Rules tab There you can view and if required edit the complete rules for e mail handling c p page 27 ...

Page 30: ... files from being transmitted by a correspondingly small value e g 2 000 kB for Out going Enter the desired values in the two text fields 6 2 E Mail Blocking You can prevent delivery of unwanted e mails The respective messages are immedia tely deleted after their complete transmission The message subject text serves as criterion for message deletion Enter the desired text in the Subject string fie...

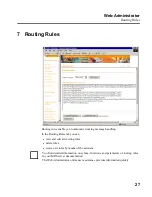
Page 31: ...g In the Routing Rules tab you can view and edit all existing rules delete rules create new rules by means of the assistant You find detailed information on syntax functions and parameters of routing rules in your MRS server documentation The Web Administrator online user assistance provides information quickly ...

Page 32: ...le or behind selected rule and click the Insert rules button The modified rule is inserted in the corresponding place 7 1 2 Deleting Rules 7 Select the desired rule with a click 8 Press the Delete rule button The selected rule is immediately deleted from the list 7 1 3 Saving Rules Edited created modified and deleted rules must be saved to take effect After editing click on Save rules If you leave...

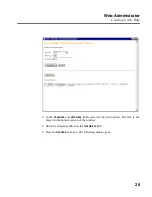
Page 33: ...9 2 In the of service and with class fields select the desired options The rule is dis played in the bottom section of the window 3 Enter the recipient address in the to recipient field 4 Press the Continue button The following dialog opens ...

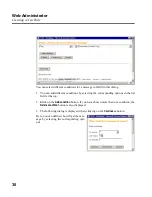
Page 34: ... by selecting the corresponding options in the list field at the top 2 Klick on the Add condition button If you have chosen more than one condition the Delete condition button is also displayed 3 The following dialog is displayed when clicking on the Continue button Here you can define who will get the mes sage by selecting the corresponding opti ons ...

Page 35: ...one mobile phone or PBX for recording The system calls the number of the desired telephone connection after you have ente red it Control the recording and play back functions with the buttons that appear in the browser window later on You can record play and delete texts Global greetings can be supplemented by individual greetings of each subscriber who can also choose between global and private g...

Page 36: ... edited and deleted just like normal greetings 1 Click the Create Name button The system calls you immediately at the specified connection 2 Pick up the receiver 3 Press the Record button and speak the name into your telephone s mouthpiece 4 Enable the Pause button to interrupt recording The current length of the greeting is displayed for information 5 Click on the left end of the Navigation bar t...

Page 37: ...n back to the first Record greetings tab illustration on page 31 8 If you want to repeat recording click on the left end of the Navigation bar to rewind to be beginning Then press Record to start recording anew 9 Enter a number in the text field under the buttons and click the Seek button to skip to a certain position in the recording The current position is displayed above the buttons in seconds ...

Page 38: ...lect a memory location and then proceed analog to recording a name greeting Recorded greetings can be edited and deleted any time 8 2 1 Recording a Greeting 1 In the text field Phonenumber to be called enter the number of the connection that the system is to call 2 Click the Create button The list of available memory locations is faded in ...

Page 39: ... rewind to the recording start 8 Enable the Play button to listen to your recording via the telephone receiver 9 If you are satisfied with the recording click the Exit button The recording is saved and you are taken back to the first Record greetings tab illustration on page 31 10 If you want to repeat recording click on the left end of the Navigation bar to rewind to be beginning Then press Recor...

Page 40: ... as desired cp previous section 4 Enable the Exit button The recording is saved and you are taken back the first Record greetings tab illustration on page 31 8 2 3 Deleting Greetings Attention Please check in which time profiles you have used a greeting before deleting it 1 Select the greeting that you want to delete from the list field 2 Enable the Delete button You are then prompted to confirm t...

Page 41: ...ings 37 9 Special Server Settings 9 1 APL Application Protocol Layer You can check the status of the APLs and start or stop them individually if required You find detailed information on the APLs and services in the MRS Server informa tion ...

Page 42: ...ed in the tab 2 Enable the Automatic refresh each 5 seconds button to activate the automatic infor mation update 9 1 2 Starting Stopping an APL If problems occur you can manually start and stop single APLs 1 Click the option field that precedes the desired APL for selection 2 Either click the Start APL or Stop APL button The action is immediately performed ...

Page 43: ...trator to view the log file of the MRS Server Besides the current log file you can also access the saved log files 1 Select a log file from the list field 2 In the text field thereunder enter the number of lines that are to be displayed 3 Click the Show button The log is displayed ...

Page 44: ...rs to the hard disk where documents and the database are stored Documents are all message files voicemail audio files e mails and fax documents The database contains all user data information on incoming and outgoing messages and further system information If required click the Reload button to manually update the information displayed in the tab ...

Page 45: ...pt 5 L Language 10 Link 11 Log File 39 Logging in 7 Logging off 10 Login 7 24 Logoff 10 M Mail Size 25 Members 21 Memory Capacity 40 Messaging System 5 Modifications 11 MRS Server 5 N Name Greetings 31 Navigation 11 Navigation Bar 32 O Online User Assistance 4 P Password 8 24 PIN 8 Privileges 16 R Recording 31 Recording a Greeting 34 Recording Greetings 31 Requirements 5 Routing Rules 27 S Save 11...

Page 46: ...Web Administrator Index 42 U Unlocking 24 User Data 8 User Groups 13 User List 14 V Voicemail System 5 ...

Reviews: