background image

35

MAINTENANCE & TROUBLESHOOTING MANUAL

 PS5.0-M REV B

SECTION 6 

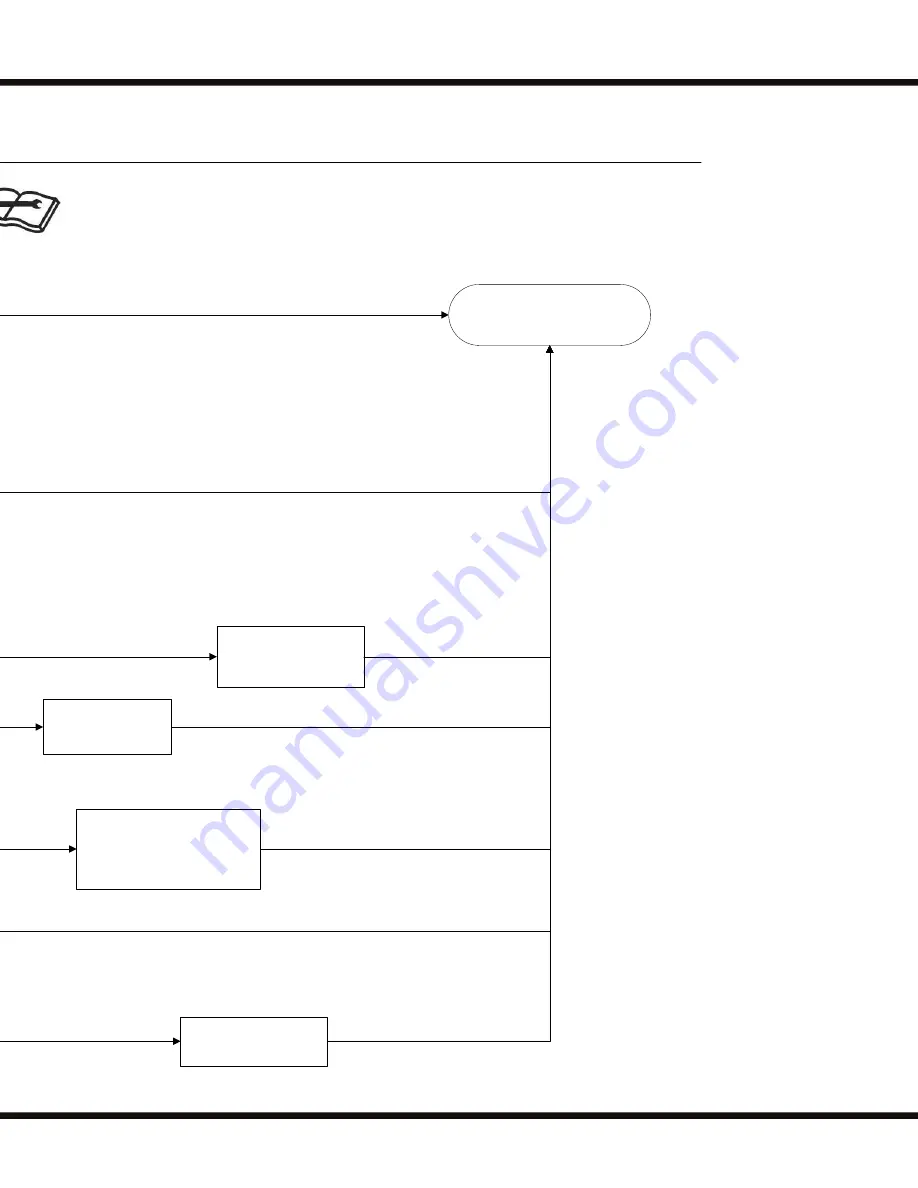
TROUBLESHOOTING FLOWCHARTS

No Left Turn & Right Turn

OK?

R1 Failure. Replace

Relay.

R2, R3, or R4 failure. Listen for

clicks, try switching relays around.

Replace relay(s).

No Right Turn & Left Turn

OK?

Does machine steer ?

(drive, elevate, lower OK)

Check for power connection.

See Hy-Brid Troubleshooting.

(Power connections at pump,

fuse, etc.)

No; Drive, elevate and

lower not operating

Consider Steer Limit Switch Adjustment

Check electrical connections at switch. Do a

continuity check on switch.

Replace limit switch and/or

readjust.

Consider relay failure, relay

block wiring.

Check steer actuator for

failure. Apply 24V to leads.

Replace actuator

Consider joystick failure or

wiring connection problem.

Contact Hy-Brid Lifts for further

troubleshooting

Consider damaged

main cable, main cable

connections at upper

and lower control.

(Check terminals #17 &

#22)

No; Steering

Not operating

properly

Check wire connections at actuator.

Pull test connections

if failure,

crimp on new connector(s)

Consider mode limit switch wiring or switch failure

(red and/or black wires) Continuity test on switch,

voltage test on red/black wires

Verify joystick

rocker switch

working properly.

WARNING

Any modification on this machine without

the express consent of the manufacturer

is prohibited.

WARNING

Failure to comply with safety precautions

may result in damage, injury, or death.

Refer to Maintenance Manual for

complete warnings

Flowchart: Pro Series-Steer

Revision A

Summary of Contents for HY-BRID LIFTS PRO PS-1030

Page 1: ...FORMS ANSI A92 20 CSA B354 6 17 PRO SERIES PS 1030 PS 1430 PS 1930 PS5 0 M REV B SERIAL NO PRO SERIES INFORMATION DE1316 To view machine specific information on your mobile device scan the code to the left Decals with this code can also be found on the manual box and base of the machine ...

Page 2: ...75 Richfield WI 53076 U S A 1 262 644 1300 1 262 644 1320 www hybridlifts com Service Information 1 262 297 5195 webservice hybridlifts com Parts Information 1 262 297 5196 webparts hybridlifts com Register your Hy Brid Lift at www hybridlifts com RegisterOnline htm Register your Hy Brid Lift to Recieve product updates and recalls Recieve service bulletins product and part recalls and other import...

Page 3: ...ttempt is made to service this machine The operation and safety manual is considered a part of the work platform and contains instructions and operating procedures essential to properly and safely operate the Custom Equipment Hy Brid Lift Users must read and understand all information in the Safety and Operations Manual before operation The user operator should not accept operating responsibility ...

Page 4: ...QUENT INSPECTION CHECKLIST 14 SECTION 4 TECHNICAL REFERENCES 16 4 1 HYDRAULIC SCHEMATIC 16 4 2 ELECTRICAL SCHEMATIC 18 4 3 CONTROL BOARD DIAGNOSTIC 20 SECTION 5 WIRING DIAGRAMS 22 5 1 WIRING DIAGRAM 22 5 2 MACHINE HARNESS WIRING DIAGRAM 24 5 3 LOWER CONTROL WIRING DIAGRAM 26 5 4 UPPER CONTROL WIRING DIAGRAM 28 SECTION 6 TROUBLESHOOTING FLOWCHARTS 30 6 1 MAIN POWER SAFETY CIRCUIT 30 6 2 DRIVE CIRCU...

Page 5: ...Lock Use 7 FIGURE 2 Maintenance Lock Storage 7 FIGURE 3 Battery Location 8 FIGURE 4 Charger Cord Location 8 FIGURE 5 Battery Charger LED Display 9 FIGURE 6 LED Light Diagnostic Location 20 FIGURE 7 EZ Cal Handheld Controller 20 REVISION LOG REV A May 2020 REV B November 2020 INDEX OF FIGURES ...

Page 6: ...ry or damage to equipment 1 2 GENERAL RULES AND PRECAUTIONS An operator of any type of work platform is subject to certain hazards that cannot be protected by mechanical means It is therefore essential that operators be competent careful physically and mentally fit and thoroughly trained in safe operation of this machine Although Custom Equipment LLC conforms to specified ANSI OSHA and CSA it is t...

Page 7: ...ntil maintenance locks have been engaged Remove all rings watches and jewelry when performing any maintenance Do not wear long hair unrestrained or loose fitting clothing and neckties which may become caught on or entangled in equipment Observe and obey all warnings and cautions on machine and in manual Keep oil grease water etc wiped from standing surfaces and handholds Before making any adjustme...

Page 8: ...to split ring with distilled water Reinstall caps Wash all dirt debris acid etc off battery whenever corrosion is detected Use a solution of 5ml baking soda per 0 95 liters of warm water Coat terminals with a commercially available coating Close cabinet and latch in place NOTE The surrounding temperature greatly affects the power reserve within a battery EXAMPLE A battery that is 100 charged at 80...

Page 9: ...URE 5 Battery Charger LED Display DO NOT OPERATE UNIT WHILE CHARGING DO NOT DISABLE CHARGER INTERLOCK Battery Charge Display Pro Charging Systems IS2412 MEANING OFF SOLID Standby Mode Or battery connection error FLASHING SOLID Normal Charging Bulk Charging SOLID SOLID Normal Charging Absorption Stage SOLID SOLID Charge Complete Flat Maintenance Mode FLASHING FLASHING Charger Error ...

Page 10: ...NG CHECKS Check safety functions as part of daily inspection Check that the brakes are holding 2 7 STORAGE After periods of storage exposure to extremes of ambient conditions heat cold moisture dust etc inspect the machine Batteries will need to be charged Refer to the Pre Delivery Frequent Inspection Checklist in the Maintenance Manual 2 8 MAJOR ALTERATIONS OR REPAIRS Any alterations must be appr...

Page 11: ...11 MAINTENANCE TROUBLESHOOTING MANUAL PS5 0 M REV B THIS PAGE WAS INTENTIONALLY LEFT BLANK ...

Page 12: ...ired by local operating conditions The following inspection checklists are included in this manual Pre Start required before operation at each work shift Pre Delivery Frequent Annual Required every 3 months after periods of storage and after any alterations or repairs The rated life of the machine is Light Intermittent Duty typical use 10 years 40 weeks per year 20 hours per week 5 load cycles per...

Page 13: ...p Stops all movement Drive Mode Button Selects drive steer mode Up Down Button Selects elevate mode Joystick Return to neutral drives forward reverse Enable Trigger Must be activated for joystick operated movement Rocker Switch Moves front wheels left and right Elevates lowers Horn sounds when button is pressed Information button cycles through battery life percent load capacity percent and hour m...

Page 14: ...IST WORK PLATFORMS SHALL BE INSPECTED SERVICED AND ADJUSTED TO MANUFACTURER S REQUIREMENTS BY A QUALIFIED MECHANIC PRIOR TO EACH SALE LEASE OR RENTAL AND EVERY 3 MONTHS OR 150 HOURS WHICHEVER COMES FIRST AND ANNUALLY Y Yes Acceptable N No Unacceptable R Repaired N A Not Equipped Y N R N A BASE Inspect slide tracks for damage All frame bolts tight Pump secure DC drive motors secure Batteries fully ...

Page 15: ...eploy when platform elevated Emergency stop breaks circuits Slow speed mode activates just after units pothole bars are deployed Pothole interlock functions correctly BRKAES Operational EMERGENCY DOWN Operational WIRING Switches secure Contactor s secure Tight on terminals No loose wiring OIL Level 1 from top when platform stowed OTHER Check all hoses for leaks Check all fittings for leaks Battery...

Page 16: ...PRO SERIES PS 1030 PS 1430 PS 1930 16 SECTION 4 TECHNICAL REFERENCES 4 1 HYDRAULIC SCHEMATIC Part No HS 112 20 501 50 M 2 GPM ...

Page 17: ...O A REV DO NOT SCALE DRAWING 04 29 2020 T VUE APPROVED DATE REV BY DESCRIPTION OF CHANGE REVISION HISTORY ECO THE INFORMATION CONTAINED IN THIS DRAWING IS THE SOLE PROPERTY OF CUSTOM EQUIPMENT AND IS LOANED IN EXPECTATION THAT IT WILL BE KEPT CONFIDENTIAL ANY REPRODUCTION IN PART OR AS A WHOLE WITHOUT THE WRITTEN PERMISSION OF CUSTOM EQUIPMENT IS PROHIBITED 04 16 2020 T VUE REV A CONFIGURATIONS 50...

Page 18: ...Part No WS 112 20 501 50 ANG SENS 1 ANG SENS 2 PRES SENS 1 BEACON J11 J12 STEERING CONTACTOR T1 GRD T2 REV BAT FWD NC NO NO NC TB1 20 AMP TB1 TB1 M H1 H2 2 3 9 8 7 4 5 6 1 10 11 12 13 14 15 2 3 9 8 7 4 5 6 1 10 11 12 2 3 9 8 7 4 5 6 1 2 3 6 5 4 1 1 2 3 4 1 2 3 1 2 5 4 3 2 1 A J B C D F G E K H L ...

Page 19: ...HOLE L S SIGNAL PUMP CONTACTOR SIGNAL EZCAL 232 COM PORT CANBUS HIGH CANBUS LOW EZCAL 232 COM PORT EZCAL 232 COM PORT EZCAL 232 COM PORT LEFT STEER SIGNAL RIGHT STEER SIGNAL DESCRIPTION SCALE WEIGHT LBS SHEET THIRD ANGLE PROJECTION DRAWN NAME DATE P 1 262 644 1300 F 1 262 247 0073 ELEC SCH PRO SERIES S5 WS 112 20 501 1 1 N A 1 OF 1 T VUE 04 13 2020 SIZE B DWG NO A REV DO NOT SCALE DRAWING 04 29 20...

Page 20: ...ctive together the TS100 does not know how to function Check key switch and wiring to P15 1 and P12 1 2 2 A safety feature is locking functions or a switch has failed Check that platform is not overloaded operating on a level surface and pothole guards deploy Check that joystick is neutral when powered on Check that joystick trigger is not closed for too long without selecting a function Check for...

Page 21: ...ler may need to be replaced 4 3 Problem with controller internal voltage Controller may need to be replaced 4 4 Battery supply is too low or too high Make sure batteries are fully charged Do not operate while charging 4 5 Joystick signal problem Wiring problem check for short circuits misconnection check P15 12 connection 6 x There is a problem with the height measurements or the elevation switch ...

Page 22: ...0 3 4 2 1 LOWER CONTROL WD 112 21 505 LOWER CONTROL HARNESS 6AWG 6AWG 4 2 3 1 SOLENOID 1 10AWG 10AWG 10AWG 12AWG 30 AMP FUSE 10AWG 6AWG MACHINE HARNESS WD 112 21 532 6AWG ACTUATOR 1 2 3 4 UP VALVE 6AWG TS100 M2 SPADE CONNECTION NC NC L STEER LIMIT SWITCH R STEER LIMIT SWITCH NC NC BATTERY CHARGER CONNECTION L C HARNESS TO MACHINE HARNESS NOT USED ...

Page 23: ... SHEET THIRD ANGLE PROJECTION DRAWN NAME DATE P 1 262 644 1300 F 1 262 247 0073 WIRING DIAGRAM PS1930 S5 WD 112 20 501 1 1 N A 1 OF 1 T VUE 04 29 2020 SIZE B DWG NO A REV DO NOT SCALE DRAWING 04 29 2020 T VUE APPROVED DATE REV BY DESCRIPTION OF CHANGE REVISION HISTORY ECO THE INFORMATION CONTAINED IN THIS DRAWING IS THE SOLE PROPERTY OF CUSTOM EQUIPMENT AND IS LOANED IN EXPECTATION THAT IT WILL BE...

Page 24: ... 15 12 3 2 1 3 2 1 3 2 1 P H LIMIT SWITCH 1 2 BRAKE P 1 2 BRAKE R 1 2 ACTUATOR T HIRSHMAN CONNECTOR U HIRSHMAN POSITION 2 HIRSHMAN POSITION 1 2 3 9 8 7 4 5 6 1 10 11 12 13 14 15 2 3 1 2 1 1 2 3 MACHINE HARNESS K PRESSURE SENSOR L ANGLE SENSOR 1 M ANGLE SENSOR 2 N STEER CONTACTOR FWD STEER CONTACTOR REV DIODE CEI PN ELEC 755 TVS 5 0 KP 5 K L M N P R T U ...

Page 25: ...OJECTION DRAWN NAME DATE P 1 262 644 1300 F 1 262 247 0073 WD MACHINE HARNESS PS S5 WD 112 21 532 1 1 N A 1 OF 1 T VUE 02 24 2020 SIZE B DWG NO A REV DO NOT SCALE DRAWING 04 06 2020 S MCG APPROVED DATE REV BY DESCRIPTION OF CHANGE REVISION HISTORY ECO THE INFORMATION CONTAINED IN THIS DRAWING IS THE SOLE PROPERTY OF CUSTOM EQUIPMENT AND IS LOANED IN EXPECTATION THAT IT WILL BE KEPT CONFIDENTIAL AN...

Page 26: ... 3 2 1 14 13 15 12 10 9 6 7 5 8 4 3 2 1 12 10 11 9 8 6 5 7 3 4 2 1 1 2 4 3 7 5 6 8 9 1 2 2 3 9 8 7 4 5 6 1 10 11 12 13 14 15 2 3 9 8 7 4 5 6 1 10 11 12 2 3 9 8 7 4 5 6 1 2 3 6 5 4 1 3 2 1 4 TS100 P15 A TS100 P12 B TS100 P9 C BEACON MACHINE HARNESS J ROCKER SWITCH KEY SWITCH A J B C D E H SECTION 5 WIRING DIAGRAMS ...

Page 27: ... 1300 F 1 262 247 0073 WD LWR CTL PRO SERIES S5 WD 112 21 505 1 1 N A 1 OF 1 T VUE 02 14 2020 SIZE B DWG NO P02 REV DO NOT SCALE DRAWING 02 14 2020 T VUE APPROVED DATE REV BY DESCRIPTION OF CHANGE REVISION HISTORY ECO THE INFORMATION CONTAINED IN THIS DRAWING IS THE SOLE PROPERTY OF CUSTOM EQUIPMENT AND IS LOANED IN EXPECTATION THAT IT WILL BE KEPT CONFIDENTIAL ANY REPRODUCTION IN PART OR AS A WHO...

Page 28: ... 1030 PS 1430 PS 1930 28 5 4 UPPER CONTROL WIRING DIAGRAM Part No WD 112 21 506 50 8 7 6 1 2 3 4 5 6 8 5 7 3 4 2 1 5 4 3 2 1 CANBUS JOY STICK NOT USED REFERENCE ONLY CANBUS BOARD W V W X Y SECTION 5 WIRING DIAGRAMS ...

Page 29: ...6 1 1 N A 1 OF 1 S MCG 03 10 2020 SIZE B DWG NO A REV DO NOT SCALE DRAWING 04 17 2020 T VUE APPROVED DATE REV BY DESCRIPTION OF CHANGE REVISION HISTORY ECO THE INFORMATION CONTAINED IN THIS DRAWING IS THE SOLE PROPERTY OF CUSTOM EQUIPMENT AND IS LOANED IN EXPECTATION THAT IT WILL BE KEPT CONFIDENTIAL ANY REPRODUCTION IN PART OR AS A WHOLE WITHOUT THE WRITTEN PERMISSION OF CUSTOM EQUIPMENT IS PROHI...

Page 30: ...o No WARNING Any modification on this machine without the express consent of the manufacturer is prohibited See Wiring Diagram See also Main Power Safety Circuit Wiring Diagram Or Electrical Schematic Flowchart Pro Series Power Troubleshooting Step 1 Main Power Charge batteries Is the master power switch turned off or the key missing No Turn the master power switch to the ON position Yes Unplug th...

Page 31: ...oblem Troubleshooting Flowcharts General Notes Inspect parts for visible damage as they are encountered After each step check if problem has been indentified and or resolved If so make the recommended fix or see a referenced document If not continue troubleshooting If a part has been identified as needing replacement see the Parts Manual to identify part number to order If any wiring or components...

Page 32: ...y charged Drives slow when lowered Drives fast when elevated Does not drive when elevated Is angle sensor damaged Drives intermittently Check connections at both pump and board See wiring diagrams Yes but not properly Is machine tilted Is there a trouble code flashing Yes Refer to Diagnostic Light Codes in Maintenance Manual Charge batteries No Yes Some models have tilt interlock installed Lower p...

Page 33: ...ve control board secure No Is there moisture or corrosion in any connections No Yes Yes Contact Hy brid Lifts for further troubleshooting Consider brake damage broken joystick handle drive enable bad hour meter loose connections in lower and upper control and control board failure Still no drive Do pothole guards and lock deploy properly Yes Contact Hy Brid Lifts for further troubleshooting Consid...

Page 34: ...y block wiring Check steer actuator for failure Apply 24V to leads Consider joystick failure or wiring connection problem Consider damaged main cable main cable connections at upper and lower control Check terminals 17 22 No Steering Not operating properly Check wire connections at actuator Pull test connections if failure crimp on new connector s Consider mode limit switch wiring or switch failur...

Page 35: ...R4 failure Listen for clicks try switching relays around Replace relay s Replace limit switch and or readjust Replace actuator Contact Hy Brid Lifts for further troubleshooting WARNING Failure to comply with safety precautions may result in damage injury or death Refer to Maintenance Manual for complete warnings Revision A ...

Page 36: ...PRO SERIES PS 1030 PS 1430 PS 1930 36 SECTION 6 TROUBLESHOOTING FLOWCHARTS 6 4 ELEVATE CIRCUIT ...

Page 37: ...37 MAINTENANCE TROUBLESHOOTING MANUAL PS5 0 M REV B SECTION 6 TROUBLESHOOTING FLOWCHARTS ...

Page 38: ...hart Pro Series Lowering Troubleshooting Step 3B Lowering See also Wiring Diagram or S And Hydraulic Schem WARNING Set up for maintenance safety Remove load from platform Check for overhead obstructions Platform movement may occur Never Reach between scissors links or prop up platform unless maintenance pins are in place Yes but not properly No No WARNING Double check that maintenance pins are in ...

Page 39: ...NING Any modification on this machine without the express consent of the manufacturer is prohibited WARNING Failure to comply with safety precautions may result in damage injury or death Refer to Maintenance Manual for complete warnings Schematic matic Check wiring connections in lowering components See Electrical Schematic Charge battery Yes No No Yes Level of skill with hydraulic maintenance Che...

Page 40: ...TURAL COMPONENTS Refer to the Hy Brid Lifts Operation and Safety Manual for decal part numbers and locations In addition to the decals listed in the Operation and Safety Manual a partial list of replacement parts These represent current model revisions A full parts manual part no PS5 0 P is available from Hy Brid Lifts Refer to our website www hybridlifts com for more complete part listings and ea...

Page 41: ... ASM MAIN CABLE CANBUS PS19 S5 112 21 531 50 ASM DECALS 1030 ANSI S5 112 21 520 50 K ASM DECALS 1430 ANSI S5 112 21 520 53 K ASM DECALS 1930 ANSI S5 112 21 520 56 K DRIVE MOTOR 24VELE HB AUB ELEC 790 HYDRAULIC OIL HYDR 032 Not available as a replacement part Replace with Flomite 150 Dexron II Mobil DTE 2 or equivalent KEY SPARE ELEC 310EKEY MANUAL BOX HARD 603 E STOP ASM ALBRIGHT 250A ELEC 308 KEY...

Page 42: ...ed by normal wear and tear weathering lack of use or use with incompatible equipment or software Damage resulting from or caused by improper maintenance improper handling or storage improper use abuse neglect operation beyond rated capacity or operation after discovery of defective or worn parts Any part component or assembly altered or modified in any way not approved in writing by the Company Da...

Page 43: ...rized dealer such maximum amount shall be referred to in this Limited Warranty as the Maximum Labor Amount Current versions of the Company s FSR and Flat Rate Guides are incorporated by reference into this Limited Warranty For a current copy of the Company s FSR and Flat Rate Guides Buyer should contact the Company at 1 866 334 0756 Buyer shall be responsible for any costs or fees due to the autho...

Page 44: ...PRO SERIES PS 1030 PS 1430 PS 1930 44 SECTION 9 INSPECTION REPAIR LOG DATE COMMENTS ...

Page 45: ...45 MAINTENANCE TROUBLESHOOTING MANUAL PS5 0 M REV B SECTION 9 INSPECTION REPAIR LOG DATE COMMENTS ...

Page 46: ...PRO SERIES PS 1030 PS 1430 PS 1930 46 SECTION 9 INSPECTION REPAIR LOG DATE COMMENTS ...

Page 47: ...47 MAINTENANCE TROUBLESHOOTING MANUAL PS5 0 M REV B SECTION 9 INSPECTION REPAIR LOG DATE COMMENTS ...

Page 48: ...ual Custom Equipment LLC 2647 Highway 175 Richfield WI 53076 U S A 1 262 644 1300 1 262 644 1320 hybridlifts com Hy Brid Lifts is a trademark of Custom Equipment LLC These machines comply with ANSI SIA A92 20 and CSA B354 6 17 Revision Date November 2020 Printed in the U S A 2020 Custom Equipment LLC ...

Reviews: