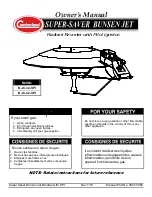
Super Saver Bunsen Jet Brooder with SPI
12
7 Operating instructions
7.1
Placing Brooder in Service
1.
Check that all installation steps in section 6 of this manual have been performed.
Read and understand warning statements in section 2.
2.
Open gas supply valve.
3.
Turn control knob on gas valve to the PILOT position.
4.
Press and hold red pilot purge button all the way in.
5.
Hold a flame close to the pilot hood to ignite the pilot.
6.
Hold in the pilot purge button for at least 30 seconds after lighting pilot. (This allows
the thermocouple to heat up prior to taking responsibility for the pilot flame).
7.
After pilot purge button has been released, check that pilot remains lit. If not, repeat
steps 4-6 above.
8.
When pilot remains burning with a smooth continuous flame, turn control knob to
the “ON” position.
7.2
Taking Brooder out of Service
1.
Turn control knob to the Off position.
2.
Shut gas supply valve.
7.3
Thermostat Settings
The thermostat is the large tan knob on top of the gas valve. The thermostat has the
numbers 1-9 raised on its face. Align the number with the arrow on the gas valve body
to set the thermostat. The settings correspond to the following temperatures:
Setting
Temperature
Setting
Temperature
1
78 ºF
25.5 ºC
6
98
°
F
36.6
°
C
2
82 ºF
27.7 ºC
7
102
°
F
38.8
°
C
3
86 ºF
30 ºC
8
106
°
F
41.1
°
C
4
90 ºF
32.2 ºC
9
110
°
F
43.3
°
C
5
94 ºF
34.4 ºC
Note: The temperatures in the above table show the temperature at the thermostat bulb.
Temperatures beneath the brooder will be higher, and temperatures farther away from the brooder
will be lower.
8 Maintenance
1.
Your Super Saver Bunsen Jet Radiant Brooder should be inspected before each use and at
least annually by a qualified service person.
2.
The appliance area should be kept clear and free from combustible materials, gasoline, and
other flammable vapors and liquids.
3.
The gas hose should be inspected prior to each use of the brooder. If it is evident there is
excessive abrasion or wear, or the hose is cut, it must be replaced prior to the brooder being
put into operation.
4.
The flow of combustion and ventilation air must not be obstructed.
5.
Inspect brooder and gas connections periodically for gas leaks with an approved gas leak
testing solution. (Soap and water work well.)
6.
The burner and pilot orifice must be kept clean and free of carbon deposits at all times.
7.
The brooder must be cool before wash-down. Do not operate brooder for one hour following
wash-down.
8.
The thermostat bulb must be kept clean to assure proper temperature control.

