background image

TROUBLESHOOTING

34

If you're running into any issues while using your bidet, refer to the below troubleshooting chart to properly assess 

and correct the problem. 

If the problem perists, contact our Customer Service Center.

Problem

Water is not being sprayed 

out when the bidet is 

plugged in and a function

is initiated 

• Is the water flow shut off?

• Is the water supply valve locked?

• Is the waterworks filter blocked?

• Wait until the water flow shut-off process ends.

• Open the water supply valve.

• Replace the waterworks filter.

The bidet is not operating 

properly/turning on

• Is the power plug plugged into a 

  working outlet?

• Was the bidet activated while you are 

  not sitting down on the seat?

• Has there been a blackout?

• Plug the power cord into an available 

  120V AC outlet.

• Sit on the center of the toilet seat to activate the 

  seating sensor. The bidet will not function if the 

  sensor cannot detect you.Wait to operate the 

  bidet until the blackout ceases.

• Please wait until the power is recovered.

There is a water leakage

• Is the pipe connection properly made?

• Refer to "Before Installation" to ensure the water 

  supply was connected to the bidet properly. 

• Contact the location of purchase or our 

  Customer Service Center.

The water pressure is 

too weak

• Are foreign substances stuck on the 

  waterworks filter?

• Is the hose of the main frame bent?

• Is the water pressure display lamp set to 

  Level 1?

• Is the waterworks filter blocked?

• Clean the waterworks filter.

• Smooth out the bent part of the hose.

• Try raising the water pressure.

• Contact the location of purchase or our 

  Customer Service Center.

The water temperature, 

the seat temperature, 

or air temperature are 

not warm enough

• Is the hot water or seat temperature set to 

  "Low" or "OFF"?

• Is the hot air temperature set to 

  "Level 2" or below?

• Is the water entry temperature low 

  (below 15℃) or the water pressure 

  set to "Level 5"?

• Is the ECO mode turned on?

• Set the hot water or seat temperature to either 

  "Medium" or "High".

• Set the hot air temperature to 

  "Level 3" or higher.

• To maintain the temperature of hot water, 

  set the water pressure to "Level 3" or below.

• In the ECO mode, the temperature is 

  maintained lower than the set temperature. 

  Either deactivate the ECO mode or sit on the 

  seat and wait for about 5 minutes.

The main frame shakes 

while in use

• Are the fixing bolts that fix the main 

  frame loose?

Re-fasten the fixing bolts of the main frame.

The buttons do not 

operate when pressed

• Is there any water on the touch 

  control panel?

• Is the display lamp of the remote 

  control lit?

• If any water gets onto the control panel, 

  buttons may not work so be sure to remove 

  any water first before use.

• If the batteries of the remote control are too low, 

  the display lamp will not be lit. 

  Please replace the batteries.

Possible Issues

Corrective Action

Summary of Contents for CBT-I1030RW

Page 1: ...ELECTRONIC TOILET SEAT...

Page 2: ...e done using the one touch method which adds convenience to cleaning It is a bidet that children can use safely thanks to a button exclusively usable by them Extended nozzle length The length of the n...

Page 3: ...e Installation How to Install After Installing Before Use Explanation of functions of Control Panel How to Use How to Use Each Functions How to Clean How to Disassemble the Product Store Product Speci...

Page 4: ......

Page 5: ...www cukooamerica com...

Page 6: ...CAUTIONS FOR SAFE USE...

Page 7: ...www cukooamerica com CAUTIONS FOR SAFE USE...

Page 8: ......

Page 9: ...www cukooamerica com...

Page 10: ......

Page 11: ...www cukooamerica com...

Page 12: ......

Page 13: ...www cukooamerica com...

Page 14: ......

Page 15: ...www cukooamerica com...

Page 16: ...1 Remote control AA batteries 2 Mount User manual Materials for piping Others Power cord Bidet nozzle Simple control panel Remote reception panel FRONT Main Frame Accessories BACK NOZZLE TURBO nozzle...

Page 17: ...freezing temperatures The product may not be able to be installed if the water supply valve is a ush valve Check the valve status before installation Always use caution when moving the product This pr...

Page 18: ...aside for future re installation Install the T valve as shown in the image Install the body Place the main frame xing plate on the toilet and a x the xing bolts on the main frame xing plate as shown i...

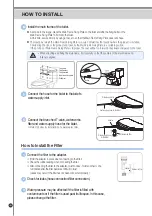
Page 19: ...ve Install a T valve from where the water supply hose has been separated Unfasten the xing nuts 2 on left and right sides and then separate the original seat and the seat cover Store the detached orig...

Page 20: ...t the hose for the bidet to the bidet s water supply inlet Connect the branched T valve waterworks lter and water supply hose for the bidet Refer to below for installation of a waterworks filter Water...

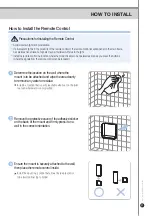
Page 21: ...control can be received Precautions for Installing the Remote Control Determine the location on the wall where the mount is to be attached and wipe the area cleanly to remove any water or residue Remo...

Page 22: ...atteries according to the direction marked Replace the battery cover to the back of the remote control To check if the batteries have been successfully replaced press the CLEAN button Press the STOP b...

Page 23: ...trol panel found on the main frame When power is supplied to the main frame do not turn or move the main frame as this may cause product malfunction Plug in the power cord to an available power outlet...

Page 24: ...f the toilet seat Never perch on the outer edge Ensure the water pressure is appropriate for use If the lter is blocked by foreign substances or the water penetration rate is reduced as it nears the r...

Page 25: ...he power cord before attempting to clean the bidet While cleaning use a slightly damp cloth to wipe down Do not use a dishwashing sponge benzene thinner or any other harmful substances that could caus...

Page 26: ...ence of settings to ensure a deep clean Adjusts the seat temperature from Level 0 to Level 3 Turns the mood lamp on when pressed once Turns o the mood lamp with a second press di erentiated by sound I...

Page 27: ...functions CLEAN STOP in the case that the remote control is lost broken or the batteries have been depleted Due to its limited functions the temperature control and water pressure cannot be adjusted...

Page 28: ...all times When the NOZZLE POSITION button is pressed the position of the nozzle is displayed DRYER TEMPERATURE CONTROL You may change the drying temperature from Level 1 to 5 by pressing the PRESS LVL...

Page 29: ...splay lamp Other power saving measures To save power the following are recommended Keep the seat cover closed If the seat cover is closed after use less heat is generated from the surface of the seat...

Page 30: ...press the NOZZLE CLEANING button brie y to use the automatic function In the automatic function the nozzle automatically moves for automatic cleaning of the nozzle 2 Manual function While you are not...

Page 31: ...e seat press and hold the NOZZLE CLEANING button for 3 seconds The manual function will be activated to protrude the nozzle Clean the nozzle with a toothbrush etc you do not use Once the STOP button i...

Page 32: ...ctrical shock Always ensure the power plug has been removed from the outlet before attempting to clean Touching a power outlet with wet hands may cause electric shock After cleaning use a soft cloth t...

Page 33: ...ply valve by turning it clockwise until loose Replace the old toilet seat onto the toilet with the saved nuts Plug the power cord into an available 120V AC outlet If storing the bidet during winter do...

Page 34: ...waterworks lter Is the hose of the main frame bent Is the water pressure display lamp set to Level 1 Is the waterworks lter blocked Clean the waterworks lter Smooth out the bent part of the hose Try r...

Page 35: ...at heating device Temperature control Roomtemperature Low 93 2 F 34 Medium 98 6 F 37 High 104F 40 Heater capacity 55W Safety device Temperature fuse Hot air drying device Temperature control Room temp...

Page 36: ...CBT I1030RW...

Page 37: ...www cukooamerica com 37 38 41 42 43 44 48 49 50 51 52 53 54 56 57 58 59 60 61 CONTENTS...

Page 38: ...38 120V 120 120V...

Page 39: ...39 www cukooamerica com...

Page 40: ...40...

Page 41: ...41 www cukooamerica com...

Page 42: ...42 2 2 CBT IS1131REW CBT IS1131RRW CBT I1030RW CBT IS1131REW CBT IS1131RRW...

Page 43: ...43 1 1 490mm 490mm 2 140 200mm 140 200mm 140mm 2 3 4 0 0 5 www cukooamerica com...

Page 44: ...44 AC120V CBT I1030RW 2 T T T...

Page 45: ...45 www cukooamerica com AC120V T...

Page 46: ...46 2 4 8 3 1 4 1...

Page 47: ...www cukooamerica com 47...

Page 48: ...48...

Page 49: ...49 4 5 www cukooamerica com...

Page 50: ...50 AC120V AC120V 0 04 MPa 0 4Kgf cm...

Page 51: ...www cukooamerica com 51...

Page 52: ...52 ON OFF 3 3 CBT IS1131REW CBT IS1131RRW CBT IS1131REW CBT IS1131RRW...

Page 53: ...www cukooamerica com 53...

Page 54: ...54...

Page 55: ...CBT I1030RW 55 CBT I1030RW www cukooamerica com...

Page 56: ...56...

Page 57: ...www cukooamerica com 57...

Page 58: ...58...

Page 59: ...T 59 www cukooamerica com...

Page 60: ...60...

Page 61: ...430 5x493 9x162mm 430 5x534x162mm 61...

Page 62: ...62 MEMO...

Page 63: ...63 MEMO www cukooamerica com...

Page 64: ...www cuckooamerica com www cuckoorental com...

Reviews: