background image

S E C T I O N   3 :   O P E R A T I O N  


M N X 1 0 0 1 1   R E V   C  

  7 / 3 0 / 2 0 1 8  

1 1  


Connection Technology Center, Inc. 

 7939 Rae Boulevard 

 Victor, NY 14564 

 (585) 924-5900 

regulator. This voltage is factory set to p24 VDC compliance voltage at +5 mA output 
level. 


EXTERNAL POWER SOURCES 


Model PS12A may be powered by an external DC power source such as batteries or a DC power 
supply. 24 VDC is recommended but voltages down to 18 volts are sufficient. (With voltages as 
low as +18 volts, the front panel LED voltmeter may not function normally, however the unit 
will work normally otherwise.) 

To use an external supply, connect the leads from the power source to the twin banana plugs at 
the rear panel. Be sure to observe the proper polarity as marked at the rear panel. A protective 
diode is built into the PS12A to preclude damage from reverse polarity connection of the power 
source. 

Switch the front panel toggle switch to ‘EXT PWR’. With +24 VDC as the power source, It will be 
noticed that the LED voltmeter may indicate one segment lower than normal when there is no 
sensor connected to that channel. This is normal and will not affect the operation of the units 
or the sensors. 

When operating from batteries or an external DC power supply, the operation of the sensors 
and power units, aside from the minor points mentioned, will be the same as with AC power. 

The center position of the power toggle switch is the “off” position and should be used when 
the instrument is not taking data, to prolong battery life. 


Summary of Contents for PS12A

Page 1: ...M N X 1 0 0 1 1 R E V C 7 3 0 2 0 1 8 1 ConnectionTechnologyCenter Inc 7939RaeBoulevard Victor NY14564 585 924 5900 Power Supply 12 Channel Rack Mountable Power Supply PS12A ...

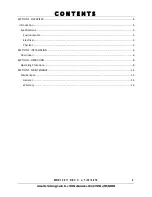
Page 2: ...nc 7939RaeBoulevard Victor NY14564 585 924 5900 SECTION 1 OVERVIEW 4 Introduction 4 Specifications 5 Environmental 5 Electrical 5 Physical 5 SECTION 2 INSTALLATION 6 Description 6 SECTION 3 OPERATION 8 Operating Procedure 8 SECTION 5 MAINTENANCE 14 Maintenance 14 General 14 Warranty 14 ...

Page 3: ...X 1 0 0 1 1 R E V C 7 3 0 2 0 1 8 3 ConnectionTechnologyCenter Inc 7939RaeBoulevard Victor NY14564 585 924 5900 Figure 1 PS12A Layout Diagram 7 Figure 2 PS12A Terminal Block Layout 7 Figure 3 Constant Current Circuit 10 ...

Page 4: ...s guide PRO model PS12A can support up to 12 channels simultaneously The sensor signal riding atop an approximate 12 volt bias level is decoupled from this DC bias by use of a 10µF coupling capacitor for each channel The PS12A has a sturdy powder coated aluminum case that fits standard 19 racks The front panel has a convenient switchable output BNC to monitor a single channel at a time The switch ...

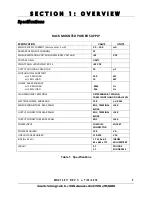
Page 5: ...TER F S 24 VDC OUTPUT COUPLING CAPACITOR 10 µF COUPLING TIME CONSTANT w 10 MΩ LOAD w 1 MΩ LOAD 100 10 SEC SEC LOWER 3db FREQUENCY w 10 MΩ LOAD w 1 MΩ LOAD 0016 016 Hz Hz HIGH FREQUENCY RESPONSE DETERMINED BY SENSOR CABLE LENGTH AND SIGNAL LEVEL ELECTRICAL NOISE WIDEBAND 150 µV RMS SENSOR CONNECTORS REAR PANEL BNC TERMINAL BLOCK JACK OUTPUT CONNECTORS REAR PANEL BNC TERMINAL BLOCK JACK OUTPUT CONNE...

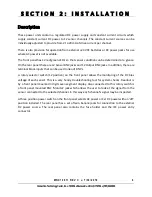
Page 6: ...re 12 Sensor BNC jacks and 12 Output BNC jacks In addition there are terminal block inputs that can be used in lieu of BNC s A rotary selector switch 12 position on the front panel allows the monitoring of the DC bias voltage of each sensor This is a very handy troubleshooting tool for system checks Readout is by a front panel mounted 3 digit seven segment display Also connected to this rotary swi...

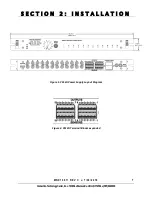
Page 7: ...N S T A L L A T I O N M N X 1 0 0 1 1 R E V C 7 3 0 2 0 1 8 7 ConnectionTechnologyCenter Inc 7939RaeBoulevard Victor NY14564 585 924 5900 Figure 1 PS12A Power Supply Layout Diagram Figure 2 PS12A Terminal Blocks expanded ...

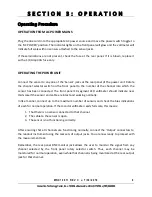
Page 8: ...annel into which the sensor has been connected The front panel 10 segment LED voltmeter should indicate near mid scale if the sensor and cable are intact and working normally In like manner connect up to the maximum number of sensors and check the bias indications of each for normal operation If the monitor voltmeter reads full scale this means 1 That there is no sensor connected to that channel 2...

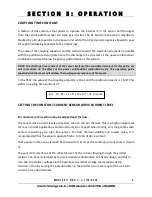
Page 9: ...sor will address the low frequency response of the sensor In the PS12 the value of the coupling capacitor is 10µF and the pulldown resistor is 1 MΩ This yields a coupling time constant of SETTING THE CONSTANT CURRENT SENSOR DRIVE CURRENT LEVEL For most users this section may be skipped over for now The sensor drive current levels are factory set at 5 mA per channel This is a high enough level for ...

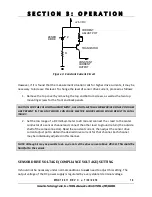
Page 10: ...NJURY 2 Set the mA range of a DC milli ammeter to 20 mA and connect the lead to the center conductor of a sensor channel and connect the other lead to ground return the outside shell of the same connector Read the constant current then adjust the sensor drive current adjust pot to obtain the desired drive current for that channel Each channel may be individually adjusted in this manner NOTE Althou...

Page 11: ...the twin banana plugs at the rear panel Be sure to observe the proper polarity as marked at the rear panel A protective diode is built into the PS12A to preclude damage from reverse polarity connection of the power source Switch the front panel toggle switch to EXT PWR With 24 VDC as the power source It will be noticed that the LED voltmeter may indicate one segment lower than normal when there is...

Page 12: ...ith a 250V 0 6A fuse Should a problem arise with the power unit contact the factory for help in analyzing the problem and or for instructions on sending the unit back for evaluation Should the PS12 develop a problem contact the factory Service Department for help in trouble shooting or for instructions in returning the unit to the factory for evaluation At this time a Returned Material Authorizati...

Reviews: