10
GB
avoid damage to property!
• Do not erect the tent so that the tent entrance
is in the direction of the wind. Wind could
damage the tent.
• All the tent materials suffer material fatigue
and bleaching if they are exposed to
prolonged, strong sunlight. For this reason,
when the tent is to be used over longer
periods, erect it in a shady position.
Do not leave the tent assembled
unnecessarily.
assembly
note!
Perform a test assembly before the camping trip.
In doing so, ensure that all the accessories are
present.
selecting a location for
placing the tent
Choose a place that is as flat and clean as
possible. Avoid dips in the ground.
Remove stones, branches and other sharp ob-
jects in order to prevent damage to the tent floor.
Use natural shade, such as hedges, rocks, etc.
Use the appropriate pegs for sandy ground in
order to prevent accidental loosening of the
tension.
note!
Insert the pegs into the ground at a slight angle
to achieve good strength but without causing
tension in the tent surface. The tent material and
tension points should only be slightly taut, so that
it can compensate for pressure from the wind.
Ensure that there is not too much pressure on the
tent. Check the tent tension according to weather
condition.
note!
Water condensation occurs basically in every
tent, however particularly during strong fluctu-
ations in temperature. After a night in the tent,
there will be drops of condensation on the inner
wall. Condensation is not evidence of leakiness.
Good ventilation reduces condensation in the
tent.
1. Spread the base of the inner tent flat on the
ground, close the zips for the entrance and fix
the loops at all four corners with the pegs
(Fig. B).
2. Build together the segments of the tent poles
(3) and (4). Slide the two black tent poles (3)
diagonally through the loops in the middle of
the inner tent (Fig. C). Secure the inner tent on
the tent poles using the clips (Fig. D).
3. Turn the tent around and insert the metal pins
at the corners of the inner tent into the end
of the tent poles so that these are under
tension (Fig. E).
4. The storage net (9) can now be hooked onto
the roof ridge in the interior of the inner tent
(Fig. F).
5. Place the outer tent over the inner tent
(Fig. G). Secure the outer tent using the bands
to the tent poles and at the crossing point in
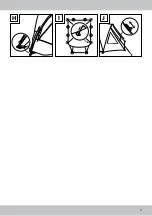
the frame. Push the grey tent poles (4) through
the frame tunnel in the outer tent (Fig. H).
Right the frame up and insert the metal pins
from the corners of the inner tent into the end
of the tent poles. Secure the outer tent with
10 pegs and ensure that the loops at the four
corners are fixed with the pegs of the inner
tent (Fig. I).
6. Secure each of the 6 guy ropes with a peg.
The length of the guy ropes can be adjusted
with the tensioner (Fig. J).
disassembly
note!
Disassemble the tent, if possible, when clean
and dry to prevent the formation of mould and
mildew. After disassembling in rain, immedia-
tely dry the tent. Clean all the parts thoroughly
before packing them away.
• Remove the pegs and guy ropes.
• Remove the tent poles, fold them together
and disassemble the inner and outer tents.
Summary of Contents for 96716
Page 2: ...2 1 6 7 8 2 3 4 5 9 A B C D E F G ...
Page 3: ...3 H I J ...
Page 4: ...4 ...
Page 15: ...15 ...


