


122. Use a pointed blade or box knife to cut a slot completely through the elevator for the horn. Start just behind the hinge line.
123. Remove the extra tab that comes attached on the back of the horns.
124. Push the horn up through the bottom of the elevator so that the base is flat against the bottom of the elevator. Use hot glue along
the base of the servo horn, and around the top and bottom of the horn, to keep it in place as the hot glue cools, make sure the horn
is facing straight forward, and that the holes in the front of the horn are directly over the elevator
’s hinge.
125. Attach the EZ Connectors to the servo horns with a pair of pliers.
126. Use side cutters or snips to trim off extra push rod.
127. With the push rod inserted in both the servo arm and the EZ connector, mark a spot on the fuselage about halfway between the
two, underneath the push rod.
128. Remove the push rod, and use your soldering iron to melt a hole at the mark you just made. This hole should be wide enough and
deep enough that the push rod guide (the metal staple included in the kit) can sit in it, and extend just over the push rod.
129. Fill the hole with hot glue, and set the push rod guide (staple) in place. Hold it there while the glue cools. Make sure rod slides
freely through the guide
130.
On the other side of the fuselage, insert the second push rod into the other servo’s arm, and hold the end of the push rod against
the rudder (vertical flap). Place a mark on the front edge of the rudder, where the push rod will go.
131. Use your razor blade to cut a slo
t completely through the rudder, about 1/8” (.25 cm) back from the hinge. Remember to note the
angled side of the hinge.
132. Glue the horn into the slot in the rudder, and attach the EZ connector so that the set screw faces up. Use side cutters or snips to
remove extra push rod.
133. Mark and melt a spot for the push rod guide, then glue in place so that the guide extends just over the push rod.
RECEIVER AND ESC
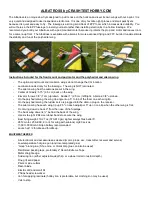
As long as the plane balances on the center of gravity you can mount your radio and servos any way you like and the plane will fly well.
It is best to first lay out the electronics and make sure wires will reach before you start cutting into the foam. We recommend you
install the ESC and Rx and servos on top of the fuselage and the battery on the right . If we are building the fuselage with a pod
mounted motor we put the ESC and receiver in the fuselage under the wing. If we are putting the motor on the nose of the plane we
put the ESC in front of the wing so the wires will reach to the motor.
Plug your servos and ESC into your Rx. Lay the Rx far enough forward that the ESC will reach the motor leads. If your servo and ESC
wires do not reach, you will need to purchase a short servo lead extension to go between the ESC and the receiver. You can also
use two extensions to the servos which will work the same. For the aileron version of the wing you may want a "Y" connector
extension to plug both servos into the aileron plug and still have an extension making putting the wing on the plane easier.
134. Mark with a pen where the ESC and Rx will go.


