background image

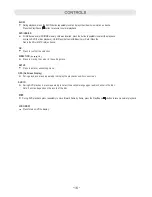
SUBTITLE

      During DVD playback, press repeatedly to select the available subtitles on the DVD as desired.

      NOTE: Function depends on the recording of the DVD disc, not all the DVD discs with this function.

MUTE

      During playback, press to turn off the sound temporary, press again to resume.

TITLE

      During DVD playback, press to return to Title menu.

     NOTE: Function depends on the recording of the DVD disc, not all the DVD discs with this function. 

REPEAT

      During CD playback, press repeatedly to select the repeat mode to         Track (Plays the current track repeatedly) 
      or         All (Plays all tracks repeatedly) as desired.

      During DVD playback, press repeatedly to select the repeat mode to         Chapter (Plays all the titles in the 
        current chapter repeatedly);          Title (Plays the current title repeatedly) or          All (Plays all tracks on the 
        current disc repeatedly).

      To cancel, press the button repeatedly until all repeat icons disappear on the screen or press th

utton twice to stop. 

During MP3 disc playback, press repeatedly to select the repeat mode:

1-9; 10/0 and 10+ buttons

      Enter the desired number in the setting menu or in tracks searching mode.

emark

10+" button is valid only in DVD playback mode, e.g. to select chapter "13",  press the "10+"   and  3" button.

MENU

      During DVD playback, press to return to disc menu.

GOTO

In DVD Playback:
      To select the desired Title and Chapter, press the GOTO button once, the Title and Chapter selection menu will appear on 
      the screen. Use the Direction and Numeric buttons to select the desired title and chapter then press the OK button to start 
      playback.

      Select the desired establish time of the current Title to play, press the GOTO button twice, the time selection table will 
      appear on the screen. Using the Direction and Numeric buttons to enter the desired establish time. The unit will start plays 
      the movie from the selected establish time.

      Select the desired establish time of the current Chapter to play, press the GOTO button three times, the time selection table 
      will appear on the screen. Using the Direction and Numeric buttons to enter the desired establish time. The unit will start 
      plays the movie from the selected establish time.

  In CD or MP3 playback:
      Press the GOTO button then select and plays the desired track as the on screen instructions.

15

e Stop

b

~ Random:

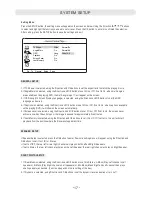
Press REPEAT Button once to play the files randomly. "Random" will appear on screen.

~ Single:


Press REPEAT Button twice to play the current file then stop. "Single" will appear on screen.

~ Repeat One: 

Press REPEAT Button three times to play the current file repeatedly. "Repeat One" will appear on screen.

~ Repeat Folder: 

~ Normal: 

Press REPEAT Button five times to return to narmal playback mode. "Normal" will appear on screen.

Press REPEAT Button four times to play all the files in the current folder repeatedly. "Repeat Folder" 
will appear on screen.

"


R

"

~ In CD/DVD playback mode, press the "0/10" button once to plays the number 10 chapter/tracks directly.

~

Summary of Contents for CTFT751tk

Page 1: ...Size 148 5 W x 210 H mm A5 PLEASE READ BEFORE OPERATING THIS EQUIPMENT Owner s Manual Model CTFT751tk 10 1 INCH PORTABLE 10 1 INCH PORTABLE DVD CD PLAYER DVD CD PLAYER ...

Page 2: ......

Page 3: ......

Page 4: ......

Page 5: ...connect to power turn ...

Page 6: ......

Page 7: ... stop playback completely In this mode when press th The player will start to play the current disc from eginning VOL Volume Press to increase the volume level OPEN LCD ON OFF LCD ON OFF t f e display b 4 10 b t n a utto b n e Pause utto gain b n a Play 5 6 8 In audio playback or AV out mode press this button to turn off the screen to save the battery power Press again to turn back the screen Slid...

Page 8: ...d slo 14 Headphone jack 15 AV OUT jack 16 AV IN jack 17 Power ON OFF switch 18 DC IN jack Right Sid Fron 21 Charging indicator 20 Remote sensor ower ON indicator 20 C DC IN OFF ON AV IN AV OUT CARD USB 19 P 17 18 21 e t t For SD MMC Card ...

Page 9: ...ton SLOW button GOTO button A B Repeat button Numeric buttons Fast Search and buttons Skip and buttons STOP button Play Pause button Direction butto butto AUDIO button REPEAT button LCD ON OFF OSD VOLUME DVD DVD USB SD b LOCATION OF CONTROLS REMOTE CONTROL ns 1 9 0 10 and 10 ns LCD ON OFF button OSD On Screen Display button STEP button ...

Page 10: ...t can overheat and rupture Follow battery manufacturer s directions 6 Do not dispose of battery in fire Battery may explodes or leak 7 Clean the battery contacts and also those of the device prior to battery installation Remarks 1 When there is an obstacle between the unit and the transmitter the transmitter may not operat 2 When direct sunlight a ncandescent lamp fluorescent lamp or any other str...

Page 11: ...ter into the wall outlet in vertical and horizont al direction only BATTERY INDICATOR When power of the built in battery is low the player will stop and turn off recharge it as previous procedures During charging you can plays the DVD as usual NOTES Your battery will last longer if you following these simple guidelines for caring for and storing it A For charging first time charge it at least 10 h...

Page 12: ...nected res the SOURCE button on the unit repeatedly to select the AV in or out modes as the connecting HEADPHONE For private listening connect the supplied Earbuds into th eadphone jack on the side of unit The speakers will be disconnected when Earbuds are inserted into the jack 11 Connected to the External Video Player AUDIO OUT L R 120V 60H z VIDEO OUT VIDEO External Video Player DIGITA L Figure...

Page 13: ...The viewing angle of the swivel panel can adjust as below as desir 12 ed ...

Page 14: ...mber Fig B will appear on the screen Using the Direction buttons to select and highlight the Start button then press the OK button to start program playback During playback press th utton twice to cancel the program playback Fig A Fig B During CD disc playback press the PROG button the setting menu will appear on the screen as Fig C Fig C Fig D Using the Numeric and Direction buttons to enter the ...

Page 15: ...cks as desired STOP During playback press once to pre stop In this mode when press the Play Pause utton again The player will start to play the point your were stopped Or press twice to stop playback completely In this mode when p The player will start to play the current disc from beginning 14 ANGLE During DVD playback press repeatedly to select the available angl s desired NOTE Function depends ...

Page 16: ...ton once the Title and Chapter selection menu will appear on the screen Use the Direction and Numeric buttons to select the desired title and chapter then press the OK button to start playback Select the desired establish time of the current Title to play press the GOTO button twice the time selection table will appear on the screen Using the Direction and Numeric buttons to enter the desired esta...

Page 17: ...he record of the disc 16 STEP LCD ON OFF D During playback press the SLOW button repeatedly to set and plays the video in slow motion as desire Press the Play Pause button to resume to normal playback If USB device and or SD MMC memory card was inserted press the button repeatedly to select the playback source to DVD For disc playback USB Plays the files inUSB device or Card Plays the files in the...

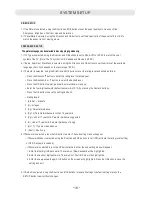
Page 18: ...is paused for approximately five minutes 6 If Last Memory is selected using the Direction and OK buttons to set it On or Off If set to On the unit will start playback from the position where the disc was stopped last time ETUP If Speaker Setup is selected press the OK button to enter Downmix setting menu will appear using the Direction and OK buttons to set it to Lt Rt or Stereo If set to LT RT th...

Page 19: ...d and above 8 Adult only 4 If Password is selected press the OK button to enter The sub setting menu will appear If Password Mode is selected using the Direction and OK buttons to set it ON activate the rating level setting or OFF Password is needed If Password is selected press the OK button twice to enter the sub setting menu will appear 1 Enter the four digit old password The column of New Pass...

Page 20: ...0 pixels Make sure correct files were saved in the USB device or memory cards before insert to the unit 2 Power on the unit press the DVD USB SD button epeatedly to select the desired playback source ait until folder file list appear on the screen Using the irection buttons to selected the desired file hen press OK button to start playback 3 Others operations are similar to DVD playback 19 DC IN O...

Page 21: ... low Rising it by press the VOL Volume button Remote control not functioning The battery is consum replace by new one Point the remote control to the remote sensor on the unit Remove the obstacles between the remote control and remote sensor Forgotten the preset rating password If the password was forgotten used the default password 7510 to release the lock and reset a new password 20 ed ...

Page 22: ... the center of the disc to the outer edge of the disc Never wipe in circular motions Discs should be stored in their cases after each use to avoid damage Do not expose discs to direct sunlight high temperatures or dust etc Prolonged exposure or extreme temperatures can warp the disc Do not stick or write anything on either side of the disc Sharp writing instruments or the ink may damage the surfac...

Page 23: ...le sided dual layer 8 cm double sided single layer 12cm disc 8 cm disc 1 Vp p 1 5Vrms 1 KHz 0dB 20Hz 20KHz 48KHz sampling 20Hz 20KHz 96KHz sampling 20Hz 20KHz 70dB DVD640 10nm CD790 15nm CLASS 1 Built in DC 7 4V Recharge by DC 12V 1A Input AC 100 240V 50 60Hz 0 5A Output DC 12V 1A Li polymer battery Main Unit Supplied AC DC Adaptor Wave length Laser power ACCESSORIES Remote control uses 2 x AAA si...

Page 24: ...use c Modified or repaired by anyone other than an authorized Craig service center d Damaged because it is improperly connected to any other equipment Note This warranty does not cover a Ordinary adjustments as outlined in the Owner s Manual which can be performed by the customer b Damage to equipment not properly connected to the product c Any cost incurred in shipping the product for repair d Da...

Reviews: