1017952-A
Page 10
INSTALLATION -
Continued
Step 4. INSTALLING HEATER
a) Locate (and mark) wall mounting bracket location on wall
using template supplied.
b) Secure wall brackets to wall, anchors
(not provided)
may be
required.
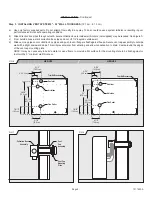
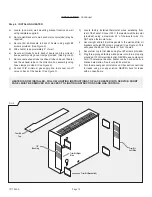
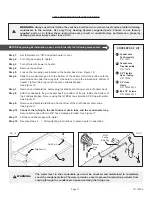
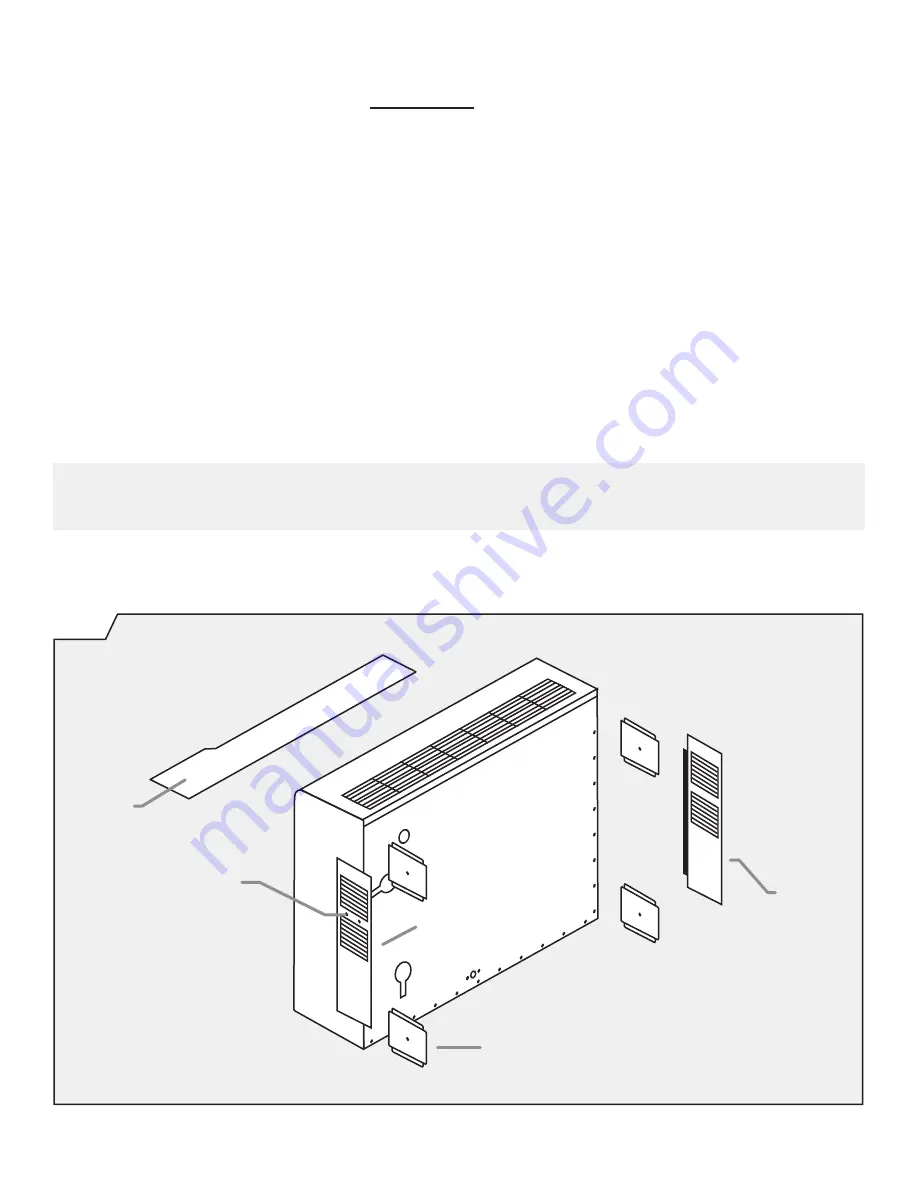
c) Secure trim kit brackets to back of heater using eight #8
screws provided.
(See Figure 9).
d) Slide heater to approximately 5” of wall.
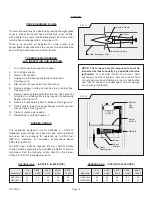
e) Secure air intake hose to back of heater and the collector
box assembly using hose clamps provided.
(See Figure 8)
.
f) Secure vent exhaust tube to exhaust tube on back of heater
and the exhaust tube on the collection box assembly using
hose clamps provided.
(See Figure 8)
.
g) Connect 3/8” minimum gas supply line to manual cut-off
valve on back of the heater.
(See Figure 5)
.
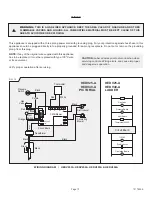
h) Locate factory installed thermostat wires extending from
rear of the heater. Connect 24 V. thermostat wall thermostat
(provided) using a maximum 20’ of thermostat wire. Do
NOT splice thermostat wire.
i) Secure right and left trim side panels to the wall and trim kit
brackets with eight #8 screws provided.
(See Figure 9)
. This
will space the back of the heater 5” from the wall.
j) Secure trim top to trim sides using four #8 screws provided.
k) Plug three-pronged factory wired power cord into a properly
grounded 115 Volt electrical outlet. NEVER use an extension
cord. If homeowner desires, heater can be hard wired by a
licensed electrician. See local electrical codes.
l) Turn the manual gas control valve on. Check all connections
for leaks using a soapy solution. NEVER check for leaks
with an open flame.
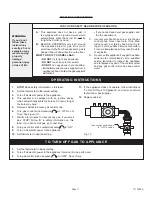
HEATER IS NOW INSTALLED, FOLLOW LIGHTING INSTRUCTIONS TO PLACE HEATER INTO SERVICE. FRONT
PANEL MUST BE REMOVED FOR ACCESS TO LIGHTING INSTRUCTIONS AND GAS CONTROL.
FIG. 9
Trim Kit Right
Side
Trim Kit Bracket (x4)
Trim Kit
Left Side
Trim Kit
Top
1/2”
Bushing


