background image


Do not operate the conveyor unless you have read and understood the instructions. 

The operating instructions section provides instructions for the safe use of the conveyor. It 
is the responsibility of the operator to follow all the safety rules and instruction provided in 
this manual. 

Only trained personnel should use the conveyor. 


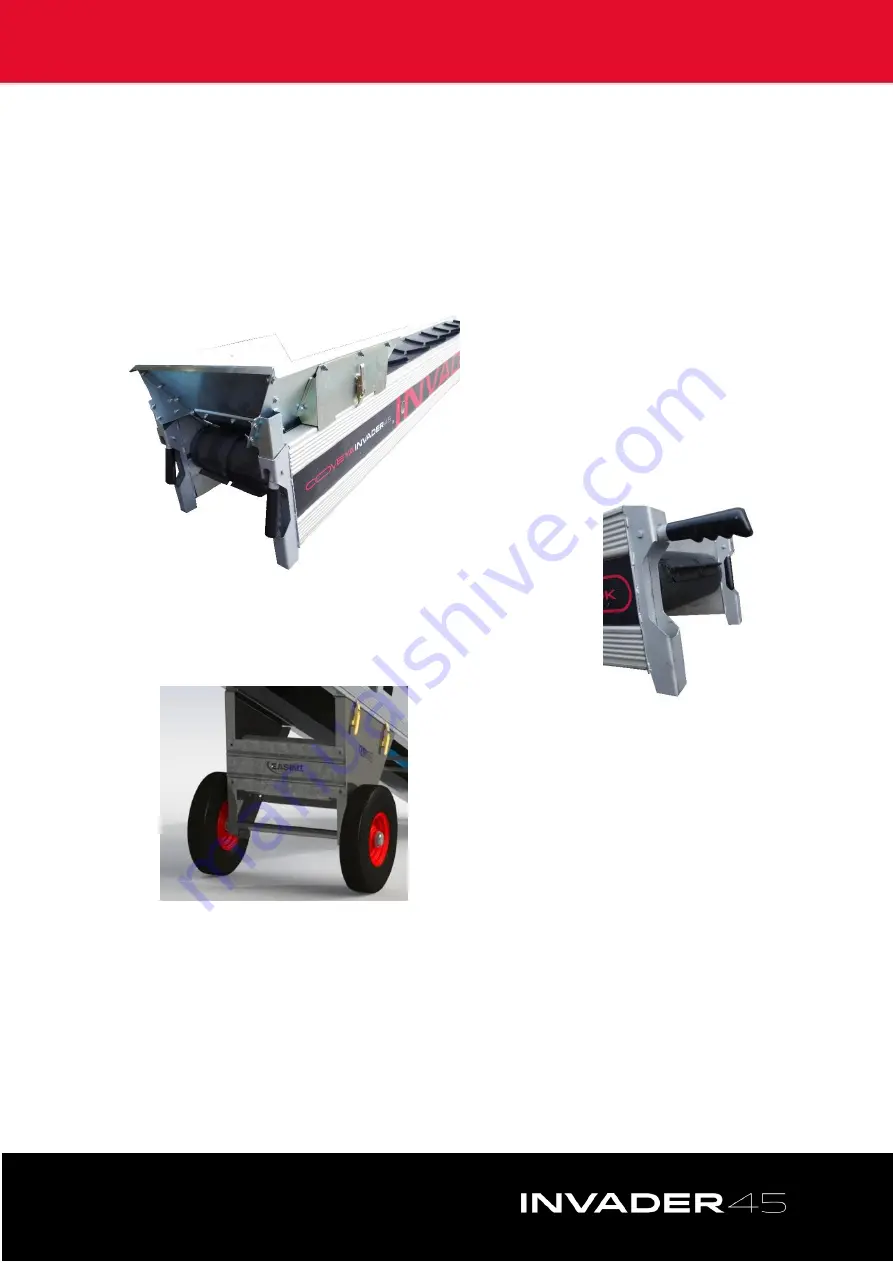
1. Fit the hopper to the loading end of the 
conveyor.  Align  the  locating  posts  and 
secure  the  hopper  to  the  conveyor  by 
means of the two over-centre catches.  


2  Lift  the  loading  end  of  the  conveyor  using  the  two  carrying 
handles and position the wheeled undercarriage in the centre of 
the conveyor.   


3. Secure in place tightening the 
four over-centre catches.   


4. Wheel the conveyor in to place using the handles at the top of the conveyor. If lifting of 
the  conveyor  is  required,  make  sure  this  is  carried  out  using  proper  manual  handling 
procedures. 

5. Subject to what voltage you are running on and the power supply, it is possible to run a 
number of conveyors linked together. 

When using more than one conveyor, setup the first conveyor and work forwards. When 
you are happy with the placement, link the conveyors with the appropriate power leads.


Summary of Contents for INVADER 45

Page 1: ...OPERATION MANUAL INVADER 45 3 0m 4 0m 6 0m...

Page 2: ...personnel or any other circumstance resulting from the use of our equipment All rights reserved No part of this publication may be reproduced stored in a retrieval system or transmitted in any form or...

Page 3: ...KNOW YOUR CONVEYOR 4 2 CONTROLS 5 3 SAFETY 6 4 PRE START CHECKS INSPECTION 8 5 CONDITIONS OF USE 10 6 FUNCTIONALITY CHECKS 11 7 OPERATING INSTRUCTIONS 12 8 MAINTENANCE CHECKS 13 9 TRANSPORTATION 14 10...

Page 4: ...ng Handles 3 Scaffold Holes 4 Wheeled Undercarriage 5 Pneumatic Wheels 6 Undercarriage Release Latches 7 Forklift Holes 8 Belt Tensioning Points 9 Hopper Release Latches 10 Feed Hopper 11 Control Box...

Page 5: ...5 2 CONTROLS 1 Power Supply Out for additional conveyors 2 Start Button 3 Emergency Stop Button 4 Stop Button 5 Power Supply In 6 Control Box Fixing Screws 1 2 3 4 5 6...

Page 6: ...r prescribed medication that may affect your judgement Assess suitability of the ground surface condition prior to conveyor set up Ensure the conveyor is adequately supported and wheels are braked cho...

Page 7: ...he installation and operating the conveyor Keep hands and limbs away from moving components Always wear correct PPE HAZARDS Damage to Conveyor or Components If you are using a generator make sure it i...

Page 8: ...lectrical Components 2 Wiring 3 Power Sockets 4 Motor and Gearbox 5 Conveyor Frame 6 Conveyor Feed Hopper 7 Belt Condition 9 Any hoarding to protect public areas 10 Conveyor Wheeled Undercarriage or S...

Page 9: ...ches 2 Lift the loading end of the conveyor using the two carrying handles and position the wheeled undercarriage in the centre of the conveyor 3 Secure in place tightening the four over centre catche...

Page 10: ...eeds 0 50MPH Prohibited Applications Do not use the conveyor if any part is Submerged in water In an explosive atmosphere In a corrosive atmosphere or environment Prohibited Materials Solely Liquids R...

Page 11: ...ghtaway 3 Twist the Emergency Stop Button to reset Stop Start 4 Press the green start button the belt should move forwards 5 Press the red stop button the belt should stop straightaway Voltmeter If yo...

Page 12: ...ngly and the conveyor will work well Ineffective loading or overloading can cause material to spill off the sides of the conveyor and build up around the conveyor This can in turn get into the conveyo...

Page 13: ...lding the tail drum to increase tension 3 Apply tension evenly to each side 4 Turn on conveyor and repeat the process until the belt stops slipping 5 Observe the belt tracking 6 Tracking at the Head o...

Page 14: ...e Remove wheeled undercarriage and feed hopper and transport these separately SECURING THE CONVEYOR FOR TRANSPORT Conveyors are stackable and have locating points at each end of the conveyor Inspect t...

Page 15: ...rved End Drive 500353 Tail Drum 501452 Slider Bed Curved End Feed 501308 Tensioning Stud 500320 Drive Drum 501474 Rectangular Nut 501461 Drive Shaft 500337 Plastic Return Support 500324 Drive Plate RH...

Page 16: ...45 Hopper Side Rubber Clamp 500439 Hopper Side RH 500778 Hopper Locator 500441 Hopper Side Support 501087 Hopper Side Rubber LH 500443 Hopper Back Rubber Clamp 501088 Hopper Side Rubber RH 500444 Hopp...

Page 17: ...17 WHEELED UNDERCARRIAGE 500355 Undercarriage Frame 501077 Wheel Shaft Qty 2 501054 Undercarriage Cross brace 821217S Undercarriage Wheel EWL70 Undercarriage Latch...

Page 18: ...Size 650 x 800mm 650 x 800mm 650 x 800mm Weight 130kg 160kg 200kg Specifications Belt Speed 0 75m s 45m min Belt Width 450mm 450mm 450mm Belt Load 200kg 200kg 200kg Tons per Hour 150 t h 150 t h 150 t...

Reviews: