background image

5/7

PRODUCT ASSEMBLY

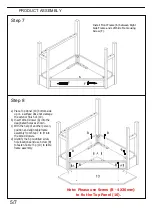
Step 7

  B 

  B 

  B 

  B 


Note: Please use Screw (B - 4X30mm)

           to fix the Top Panel (10).

Step 8

  6

  F 

  F 

a) Place Top Panel (10) bottom-side 

    up on a surface dose not damage 

    the exterior finish of (10).

b) Insert Wood Dowel (A) into the 

    designated holes as shown.

c) With the help of another person, 

    position and align table frame 

    assembly from Step 7 to fit into

    the Wood Dowels.

d) Identify the 6 pre-drilled screw

    hole locations and use Screw (B) 

    to fasten Table Top (10) to table 

    frame assembly. 

Install Front Frame (6) between Right

Side Frame and Left Side Frame using

Screw (F).

  B 

  B 

Summary of Contents for 14907563

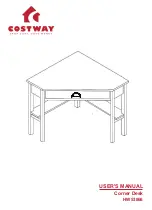
Page 1: ...USER S MANUAL Corner Desk HW53866...

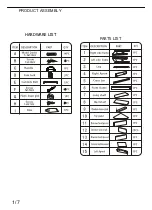
Page 2: ...1 7 PRODUCT ASSEMBLY HARDWARE LIST PARTS LIST 6 8 6 5x35mm 4x30mm 3x12mm 5 8x30mm Short shelf...

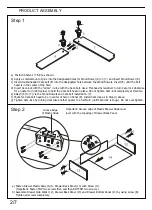
Page 3: ...tighten Cam lock completely at this time e Attach 8 to 7 via the Wood Dowels and Cam bolt installed on 7 f Check for Cam bolt head to be in center of hole on Panel 8 Install Cam lock as in Step d abo...

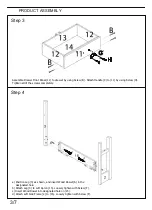
Page 4: ...le C to 11 by using Screw H Tighten all of the screws completely a Position Leg 3 as shown and insert Wood Dowel A in the designated hole b Attach Leg 3 to Left Apron 15 Loosely tighten with Screw F c...

Page 5: ...owel A to designated holes on Leg 3 as shown b Insert Wood Dowel to Right Side Frame 1 c Attach Cross Bar 5 to 1 and fasten with Screw B d Connect the Left Subassembly 15 2 Leg 3 to Cross Bar 5 and Ri...

Page 6: ...finish of 10 b Insert Wood Dowel A into the designated holes as shown c With the help of another person position and align table frame assembly from Step 7 to fit into the Wood Dowels d Identify the 6...

Page 7: ...se Screw B to loosely attach 9 to 10 Fully tighten Screw B only when both screws are in place a With the help of another person position Shelves 7 8 completed in Step 1 under and against Cross Bar 5 a...

Page 8: ...b Tilt the drawer upward slightly and slide in the drawer at an angle to allow the Plastic Drawer Glide to connect into the groove of the Wooden Drawer Glide on the underside of Top Panel c Gently sli...

Page 9: ...ou could kindly do so like below February 24 2018 Great product so far Fast delivery easy setup and working without any issues Great products so far With your inspiring rating Costway will be more con...

Reviews: