20
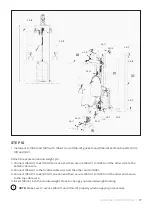
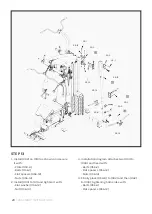
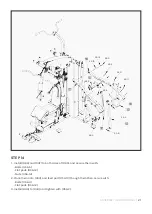
1. Install (#32) on (#13) as shown, and secure
it with:
- Plate (#53-3)
- Bolts (#56-1)
- Flat spacers (#56-12)
- Nuts (#56-14)
2. Install (#40) to (#1) and tighten it with:
- Flat washer (#56-12)
- Nut (#56-14)
STEP 13
| ASSEMBLY INSTRUCTIONS
3. Installation diagram attaches two (#41) to
(#40) and fixed with:
- Bolts (#56-2)
- Flat spacers (#56-12)
- Nuts (#56-14)
4. Finally place (#53-8) to (#42) and then (#42)
to (#40), tightening both sides with:
- Bolts (#56-3)
- Flat spacers (#56-12)
32
40
41
42
56-12
56-1
53-3
53-3
56-1
56-12
56-14
56-14
53-8
56-3
56-2
56-14
Summary of Contents for GS7
Page 27: ......
Page 28: ...WWW LIFESPANFITNESS COM AU ...


