586002TP227F User’s Manual
8
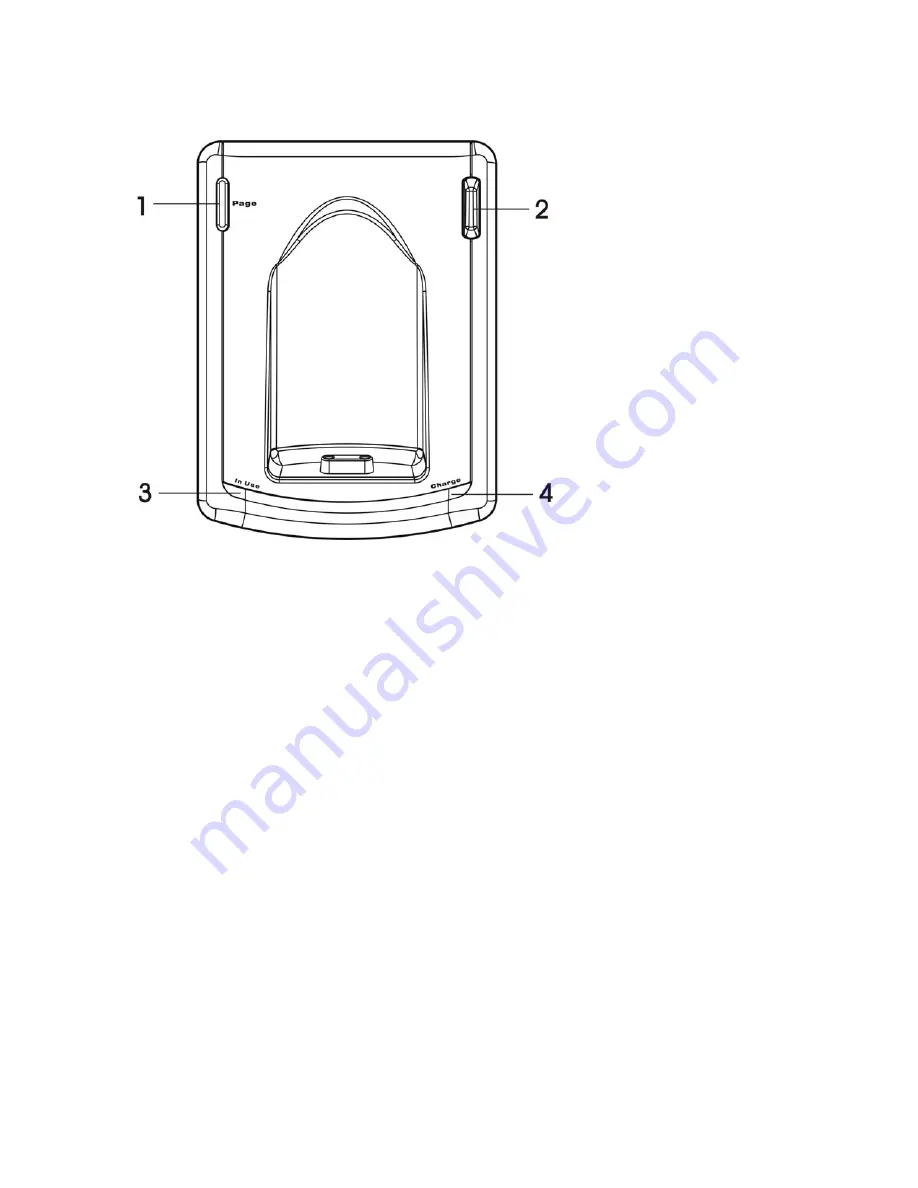
Layout of Base Functions
1. Page
2. Antenna
3. In Use/Message Waiting
4. Charge
2
Getting Started
Install and Charge the Battery Pack
1.
Open the battery cover by gently pressing down on the top of the cover while sliding it down.
2.
Plug the Battery Pack connector into the Handset socket, and then place the battery pack and wires in the
compartment. The printing on the pack should be upright and facing you, with the battery wires coming from the
upper right edge of the battery pack.
3.
Tuck the wires between the right side of the pack and the wall of the compartment. Replace the battery cover by
lining up the four tabs with the corresponding slots, and sliding it up until it locks into place.
4.
Attach the belt clip, if desired. If you are wall mounting the Base, connect the DC power cord and telephone line
cord to the Base, and then attach the wall mount bracket. Run the two cords through the rectangular hole located
on the back of the bracket, or through the channel located on the bottom of the bracket.
5.
Connect the power adapter to the Base and a live outlet. Make sure a switch does not control the outlet. The
outlet should be near the Base Unit, and easily accessible. DO NOT connect the telephone line cord to your live
telephone jack until the Handset is fully charged.
6.
Place the Handset in the Base cradle. The Handset and Base communicate with each other automatically. This is
the Registration process, and it may take up to 60 seconds.
7.
Allow the Handset to charge for a day for the first time charging. The CHARGE indicator on the Base will glow
while the Handset is charging.


