Installation Guide
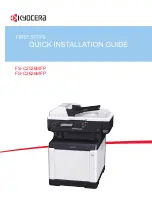
Clearance
• Temperature: 10 to 32.5 °C (50 to 90.5 °F)
• Humidity: 15 to 80 %RH
• Power Supply: 120 V AC, 60 Hz, 7.7 A / 220 to 240 V AC, 50/60 Hz, 4.3 A
Environment
Important:
Do not install the printer where temperature or humidity is outside the
recommended range. Print quality may suffer and there will be an increased chance of paper
jams.
300 mm
(11-13/16")
100 mm
(3-15/16")
200 mm
(7-7/8")
600 mm
(23-5/8")
List of Shipped Components
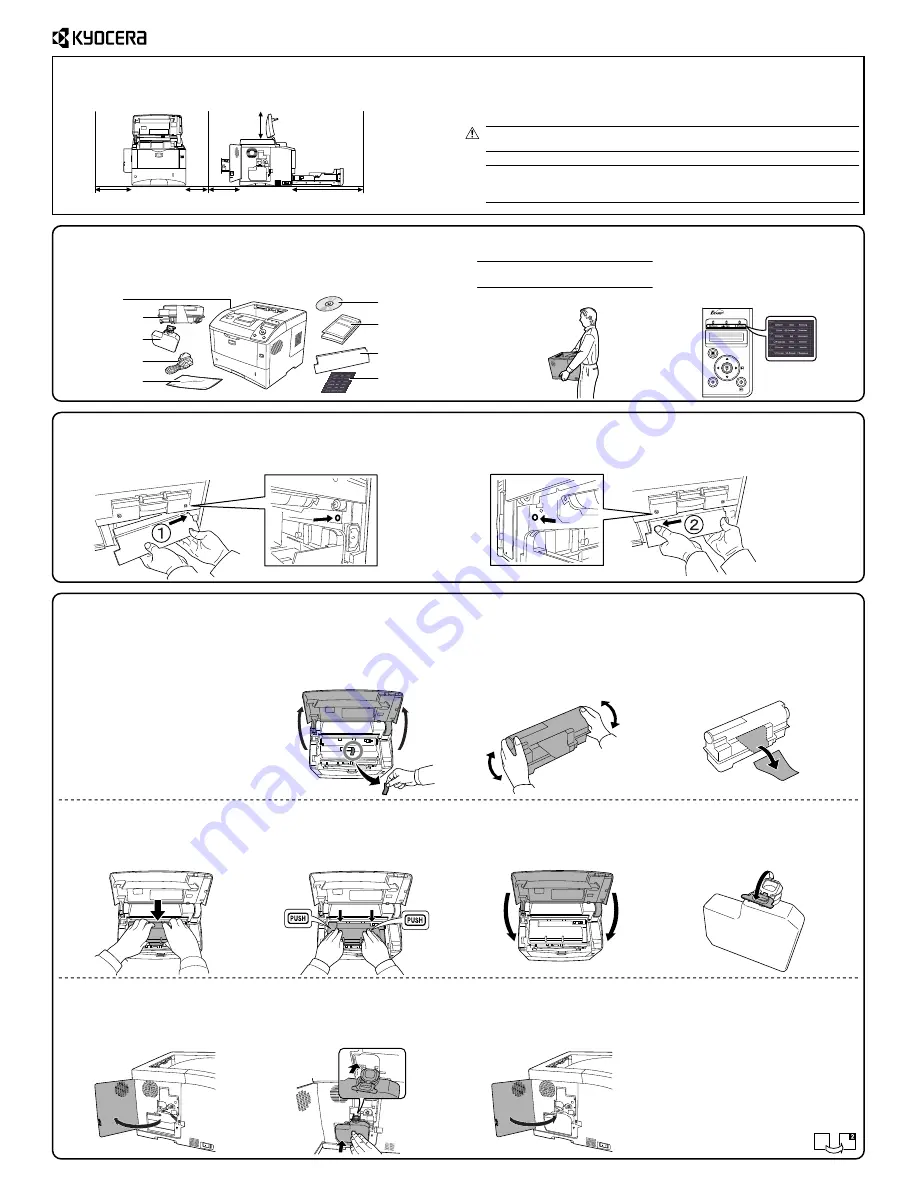
Installing the Toner Container and Waste Toner Box
Open the top cover and remove the
fixing tape.
Take the toner container from the bag.
1
300 mm
(11-13/16")
Important:
When carrying the printer,
always hold the right and left sides as shown.
Insert the protrusion at the left of the rear cover into the hole in the printer. The rear
cover is fixed.
1
2
Installing the Rear Cover
CAUTION: Be sure to provide enough space around printer. Prolonged use
without sufficient clearance may cause overheating.
Shake the new toner container at least
10 times as shown in the figure in order
to distribute the toner evenly inside the
container.
3
2
Install the toner container into the
printer.
5
Push on the
PUSH
marks on the toner
container until the container clicks into
place.
6
Close the top cover.
Open the cap of the waste toner box.
8
Open the left cover.
9
10
Close the left cover.
11
Carefully remove the printer and other items from the box.
Check that nothing is missing against the list of shipped components.
Make sure that the place of installation meets the following requirements.
1
3
2
Remove the label from the toner
container.
4
Before you can use the printer for the
first time, you must prepare it by
installing the toner container and waste
toner box.
CD-ROM
Manual and Other
Printed Materials
Rear Cover
Printer
Toner Container
Waste Toner Box
Plastic Waste Bag
Language Label
Sheet
Attach the included language label
sheet on the indicator as shown in the
figure.
Attaching the Label
Power Cord
FS-2020D/FS-3920DN/FS-4020DN
Insert the protrusion at the right of the rear cover into the hole in the printer.
7
Insert the new waste toner box as
shown in the figure. When the box is
set correctly, it will snap into place.