22
3. Operation
15-VP04-HDD2 & 15-VP04-CDRW
6. RECORD SETUP
RECORD SETUP
HDD CLEAR
HDD FULL
RECORD MODE
RECORD TYPE
RECORD SPEED
PRIORITY MODE
SELECT , PRESS
: NO
: OVERWRITE
: TIMER
: FIELD
: 60FPS
: NONE
1
2
3
4
5
6
1
2
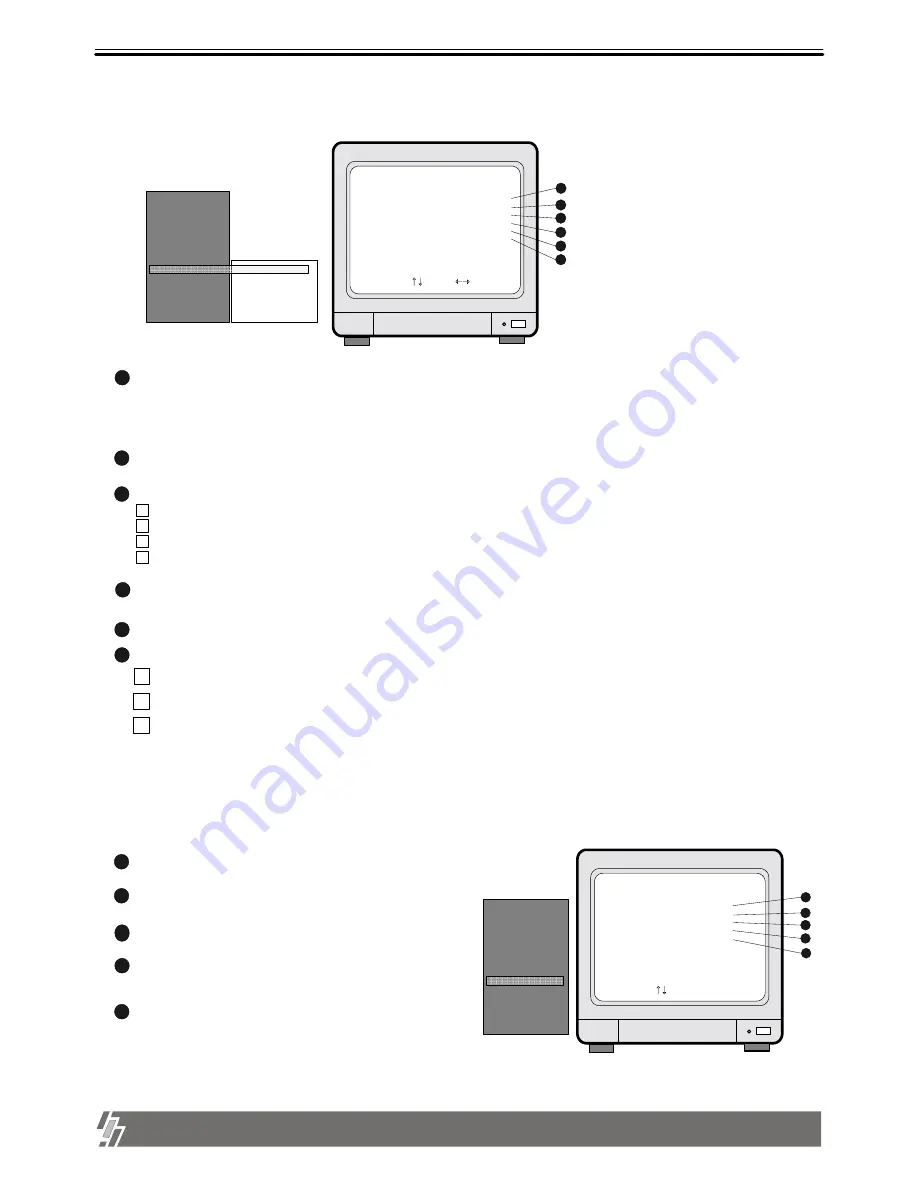
HDD CLEAR : If YES is selected, it deletes content of the HDD.
RECORD MODE
3
1 TIMER : Records by time.
TIMER+ALARM : Records by time or when the ALARM comes in. (POST-ALARM Functionality)
2
ALARM : Records by MOTION or when the ALARM comes in.
MOTION : Records only when MOTION is detected.
4
3
RECORD TYPE
RECORD SPEED : Adjusts recording frame rate : 0.1 indicates 1 field per 10 seconds. (60/30/15/10/5/2/1/0.5/0.2/0.1 FPS)
PRIORITY MODE : Assigns recording priority of a specific channel.
6
5
4
FIELD : Records images from each camera in rotation. 60 fields/sec at 720X240 resolution.
NONE : Each of 1,2,3,4 does not have priority.
1 : Gives priority to #1 camera, and records in the sequence of 1-2-1-3-1-4-1-2
…
.
1
2
3 1,2 : Gives priority to #1 and #2 cameras, and records in the sequence of 1-2-3-1-2-4-1-2-3.
HDD FULL : Select OVERWRITE or STOP RECORD. If OVERWRITE is selected, it delete previous contents on HDD to overwrite
when HDD is full.
SYSTEM SETUP
DISPLAY SETUP
CAMERA TITLE
TIME/DATE SETUP
ALARM/MOTION
SETUP
RECORD SETUP
TCP/IP SETUP
MISCELLANEOUS
FACTORY DEFAULT
HDD CLEAR
HDD FULL
RECORD MODE
RECORD TYPE
RECORD SPEED
PRIORITY MODE
Notice
: All contents of the HDD is deleted and cannot be restored.
As times go by, HDDs in a unit will have bad sectors one after the other.
Pictures to be recorded in bad sectors shall be damaged, and you will see incomplete pictures whenever you replay.
However, our unit operates normally even though there is some bad sectors in hard disk drives.
Display of RECORD SETUP
7. TCP/IP SETUP
TCP/IP SETUP
IP ADDRESS
GATEWAY
SUBNET MASK
MAC ADDRESS
DHCP SETUP
SELECT , PRESS ENTER
1
2
3
4
4
3
MAC ADDRESS : It is unique ID number provided by the
manufacturer, and the user should not change under any
condition.
TCP/IP option of this system enables user to see live pictures and recorded pictures via internet line, far apart from unit. To see live pictures
or recorded pictures of , users must input IP address, Gateway, and Subnet mask in TCP/IP SETUP in first, and then input IP, PORT number
and PASSWOR(ADMIN password in unit) in Remote Viewer Program installed on client PC.
For detail procedure for installing Remote Viewer Program and setting up, refer to manual for Remote Viewer program included in the package.
SUBNET MASK : Enter numbers using direction buttons and
press [MENU] button.
SYSTEM SETUP
DISPLAY SETUP
CAMERA TITLE
TIME/DATE SETUP
ALARM/MOTION SETUP
RECORD SETUP
TCP/IP SETUP
MISCELLANEOUS
FACTORY DEFAULT
5
DHCP SETUP : In case you connect unit to LAN network
under router/Gateway/IP sharer which has DHCP server function,
set DHCP SETUP at DHCP, and unit automatically gets IP
data automatically during the process of booting. In case you connect
unit to leased line with static IP or Router/Gateway connected
(A)DSL line (with static IP or dynamic IP), you are requested to set DHCP at MANUAL and input IP data manually. For details,
refer to Remote Viewer manual.
5
TCP/IP SETUP
IP ADDRESS : Enter numbers using direction buttons and press
[MENU] button.
GATEWAY : Enter numbers using direction buttons and press
[MENU] button.
1
2


