


www.cool-icam.com
© 2001 TCG.
EN FL Version 3 0801
Page 11
Important Note:
• Do not remove the backup battery located under the 2 x AAA batteries. Also see Section 6.2
• Please change the 2 x AAA batteries after the LCD display is blank as to save the power of the backup battery.
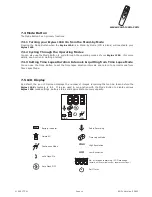
Important Note:
• Upload any images stored in your
Stylus 1500
to your computer before removing the backup battery.
• If is displayed on your LCD this means the backup battery power is low or the backup battery is missing.
1.
2.
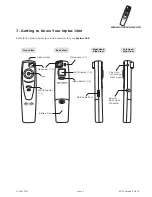
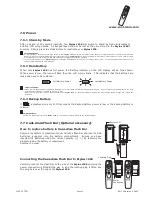
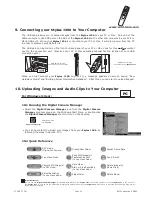
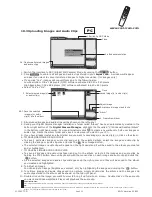
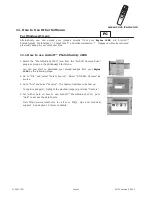
6. Battery Installation
Press and slide the battery door downwards (as shown on the diagram below). Insert the 2 fresh AAA
alkaline batteries into the battery compartment (Make sure you follow the correct polarity (+) (-) as
indicated.)
Push and slide the battery door upwards to close the battery door.
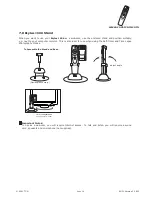
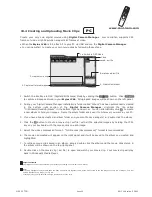
6.1 Batteries Replacement
1.
2.
3.
4.
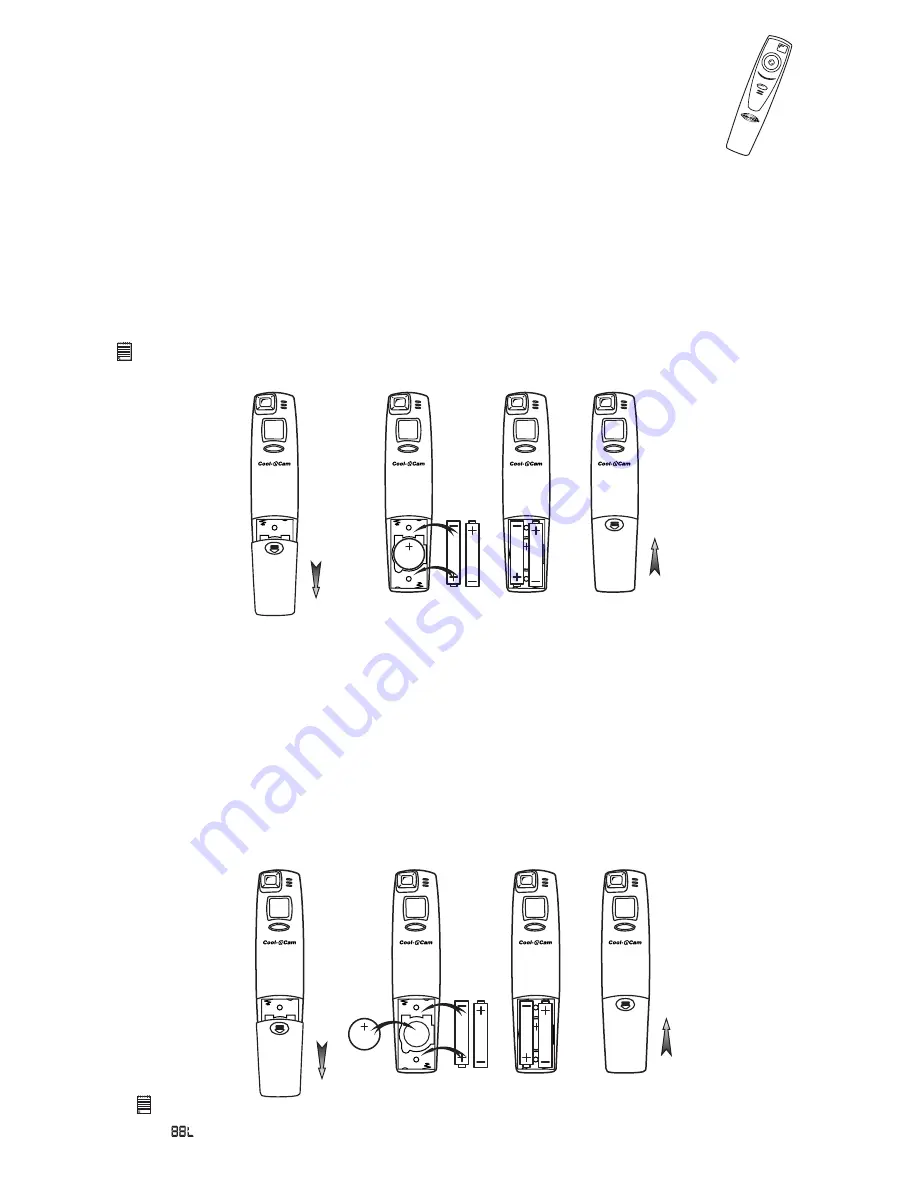
Press and slide the battery door downwards (as shown on the diagram below). Remove the 2 AAA
alkaline batteries from the battery compartment.
Remove the button cell CR2032 from the backup battery compartment and insert a fresh one back.
Insert the 2 AAA alkaline batteries back into the battery compartment (Make sure you follow the correct
polarity (+) (-) as indicated.)
Push and slide the battery door upwards to close the battery door.
The backup battery is designed to be used only for short intervals whilst you are replacing the 2 x AAA
batteries. The backup battery maintains the memory of your
Stylus 1500
when you want to replace your
batteries and when you have images stored in your
Stylus 1500
and you are not able to upload to your
computer. Removal of this battery will mean the loss of any images currently stored in your
Stylus 1500
.
6.2 Backup Battery Replacement
AAA
AAA
CR2032
CR2032
AAA
AAA
AAA
AAA
CR2032
CR2032
AAA
AAA


