16
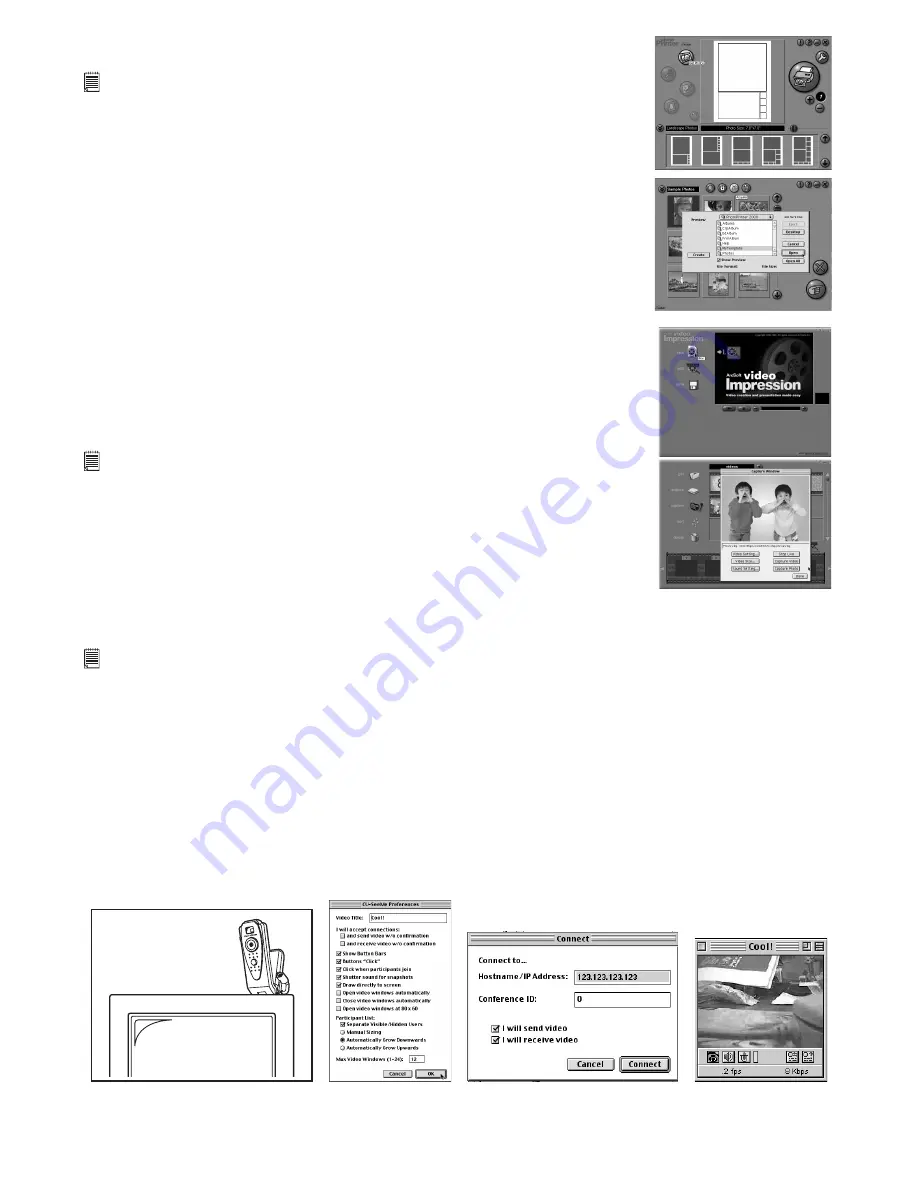
6.21 How to use ArcSoft PhotoPrinter
®
2000
1. Double click the “PhotoPrinter” icon from the PhotoPrinter.
Important! Make sure the “Digital Camera” CD-ROM is in the CD-ROM Drive.
2. Choose the “Page Layout”. The selected page layout will on shown on the right panel.
3. Click “Get Photo” and then “add photo”. Find the image you want which you have already
saved in your hard disk and click “Open”.
4. The selected images will be shown on the photo library panel. Select the image you want
and click “OK”.
5. The selected image will be shown on the chosen template. Click “Print” when nish placing
the images.
6. For further help on how to use ArcSoft PhotoPrinter
®
2000, click the “?” on the top right
hand corner to access the Help Topics.
Visit http://www.arcsoft.com for all your FAQ’s, tips and technical support. See Section 8
for more details.
6.22 How to use ArcSoft VideoImpression™ 1.5
1. Double click the “VideoImpression™ 1.5” icon from the VideoImpression™ folder.
2. Choose the “new” icon.
3. Click “get” icon. The capture window will show up.
Important Note: make sure your
Pocket C@m
is connected to your Mac.
4. Click the “Capture Video” to start recording. Hit “Stop Capture” button to stop recording
and then click “Done”.
The movie le will appear in the album and when you click “save”, the movie clip will be
saved in the “Movie Folder” under the “VideoImpression Folder”.
If you want to get an existing movie le, and to “get” and nd the movie le which
already saved in your hard disk.
5. For further help on how to use ArcSoft VideoImpression™ 1.5, click the “?” at the top
right hand corner to access the Help topics.
6.23 How to use CU-SeeMe™
Warning! Using CU-SeeMe™ will erase all images stored in your
Pocket C@m
. Make sure you upload all
wanted images before using CU-SeeMe™.
1. Connect your
Pocket C@m
to the USB cable on one end.
2. Connect your USB cable to an available USB port on your Mac on the other end.
3. Put your
Pocket C@m
on top of your Mac monitor or another at surface.
4. Connect your microphone (not included) to your audio card’s external microphone connector.
5. Double click the “CU-SeeMe™” icon from the Cu-SeeMe™ folder.
6. Go to “Edit” and then “Preference”. Edit your settings, e.g. video title, connection settings, etc.
7. Go to “Conference” and click “Connect”. Type in the Hostname and IP address for the person you want to call and
press “Connect”.
8. To nd your own IP address, go to “Control Panel” and then “File Sharing”. You will be able to see your IP address
under the “Start/Stop” partition.
9. For further help on how to use CU-SeeMe™, you can visit the following website: http://www.cuseeme.com
Place the
Pocket C@m
on top of your monitor


