


™
Installation
IMPORTANT!
The remote needs to be on OS
2.4.0 or later to properly indicate the battery
level; otherwise, a “Low Battery Warning” alert
will appear on the System Remote Control SR-
150 (if your dealer sets up an alert for you) or
in the SR-250 window.
Whether your recharging station came
with
or
without
a System Remote Control SR-150 or SR-250,
follow the steps below as indicated.
Remove the Old Batteries from Your
New or Existing Remote
1
Turn the remote upside down. On the bottom
of the remote, pull the battery cover toward
you with your thumb and lift it off of the remote
(Figure 1).
Figure 1. Remove Battery Cover
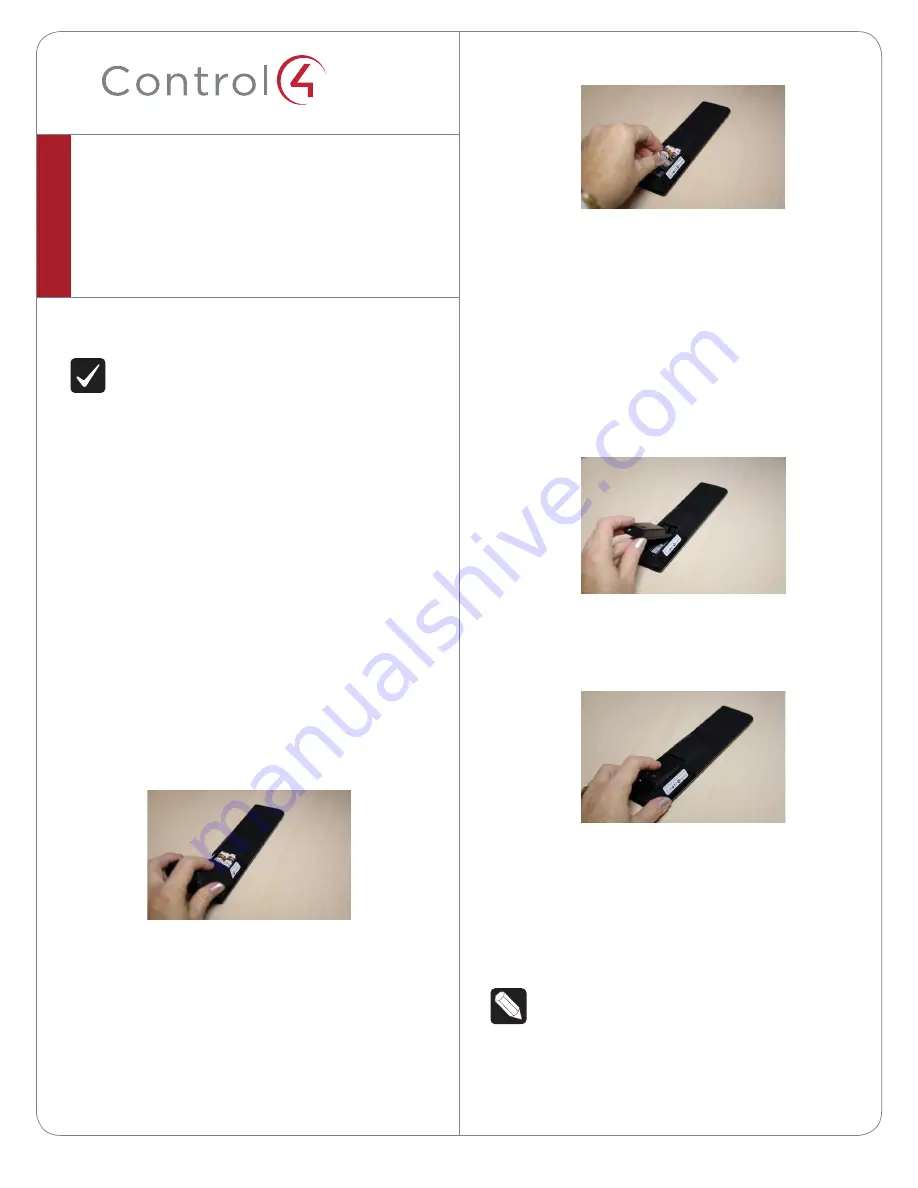
2
With your fingertip, pull out the old batteries
(Figure 2).
System Remote Control
Recharging Station
Setup Guide
Figure 2. Remove Old Batteries
Insert the Rechargeable Battery into
Your New or Existing Remote
1
On the bottom of the remote (with the cover
off and the old batteries taken out), insert the
rechargeable battery by sliding the small end into
the slot first (Figure 3). Note the orientation of +
and - symbols for proper battery insertion.
Figure 3. Rechargeable Battery
2
Seat the battery securely into the slot and push
down (Figure 4).
Figure 4. Battery Installed
Place the New Cover on Your Existing
Remote
If you’ve purchased a
new
remote with your
recharging station, follow Step 2; otherwise, follow
both steps.
NOTE:
If you are using an existing remote with
the new battery cover, it will appear that the
paint color and texturing may be different.
With normal usage, the new battery cover
color and texture will blend to match the
2


