background image


Maintenance 


50


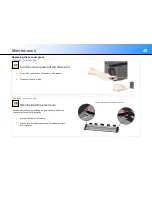
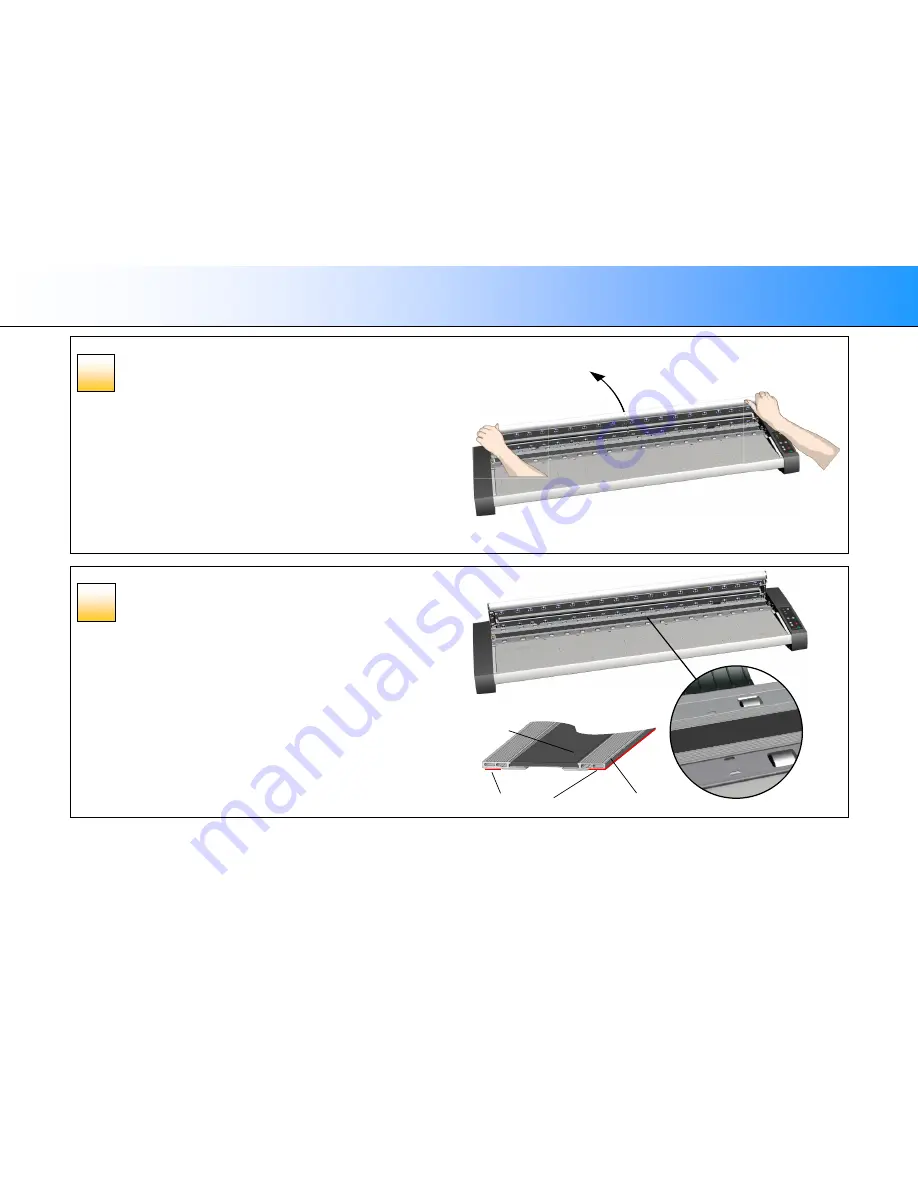
Replacing the scanner glass


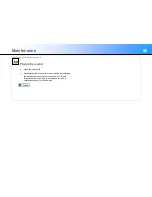
Push the lid up and backwards


The lid will begin to move upwards when the levers are released 


Open the lid all the way back to expose the internal scan area 


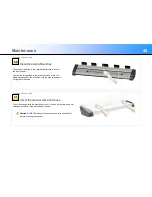
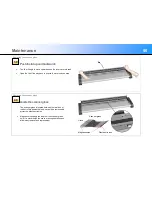
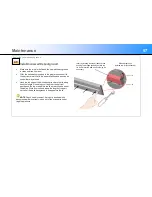
Replacing the scanner glass 


Locate the scanner glass


The scanner glass is located between the two lines of 
rubber rollers behind the feed tray inside a removeable 
protective plastic extrusion


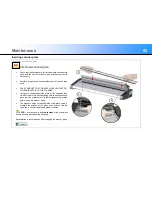
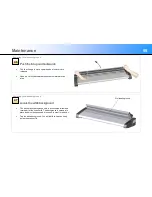
Magnetic strips along the length of the scanner glass 
hold it in place inside the scanner during operation and 
allow easy removal and replacement 


Scanner glass

Magnetic strips

Plastic extrusion

Glass

39


40


Summary of Contents for HD Ultra X 6000 Series

Page 1: ...User Guide Wide Format Scanners Model HD Ultra X 6000 Series UG13774 1D JUN 2018...

Page 2: ...l scanner activation 20 Scanner calibration 22 Network connection 24 Turning Power ON OFF 25 Main power switch 25 Scanner Self Test 25 Scanner ready to scan 25 Wake and Sleep modes 26 Automatic Sleep...

Page 3: ...hite background 54 Downloading New Firmware 59 Scanner firmware 59 Upgrading firmware 59 Identifying scanner firmware 59 Installing new firmware 59 Troubleshooting 60 Error reporting 60 Correcting com...

Page 4: ...ner The guide assumes basic knowledge of your computer and operating system and does not repeat information covered in the documentation provided to support these technologies by their own manufacture...

Page 5: ...dpi Thick media 16mm 0 6 inch two button OTAC Optimized Thickness Adjustment Control Accuracy 0 1 1 pixel Optical sensing with LED illumination 7 x CCD Charge Coupled Devices Size detection 6 data re...

Page 6: ...e scanner to another site Do not leave empty packaging where it can block a right of way or a fire exit Always dispose of the packing material responsibly if it is no longer required Remove the access...

Page 7: ...and It is recommended a third person helps during assembly by removing the packaging and guiding the scanner onto the stand Make sure that you or your helpers do not trip over any packing material whi...

Page 8: ...for opening the scanner lid for maintenance to clean the glass and or remove obstructions Release Lever for opening the scanner lid for maintenance to clean the glass and or remove obstructions Paper...

Page 9: ...er installation operation and maintenance Scanner Error Warning POWER ON OFF RED warming up self test GREEN ready Increase Scan Speed STOP Abort Scan SCAN Wake scanner Paper Loaded Ready Thick Media A...

Page 10: ...Paper Return Guide 5 Paper Pressure Selector Portable Device not included Slot in scanner lid for portable device Thick media raise and lower buttons ATAC Keypad end Paper Return Guide removed for cl...

Page 11: ...mpatible third party software Grounded earthed power outlet NOTE Published speed tests use Nextimage software and an Intel Core i5 2500 Quad processor with 8GB of memory NOTE Computer USB3 sockets can...

Page 12: ...nd scanner drivers Reboot the PC if asked to do so to complete the installation When successfully installed the WIDEsystem icon will show in the pc system tray Remove the USB thumb drive Now install C...

Page 13: ...vent it being transported by the document into the scan area where it might spoil the scan Cleaning the scanner Openthelidwithreleaselevers Access the scan area by releasing the levers at each side of...

Page 14: ...antheinternalscanarea Lightly wipe the glass plate area using a dry lint free cloth If there is contamination on the glass that will not wipe free refer to the section covering cleaning the scan area...

Page 15: ...nner Connect power cable Connectthescannertoapoweroutlet Connect the power plug end of the scanner power cable to a power outlet CAUTION The scanner comes with a power cord that has a three wire groun...

Page 16: ...er on the left side The USB socket on the scanner is colored blue inside 2 Connect the squarer step shaped B connector end of the cable to the USB socket NOTE The installation wizard will guide you th...

Page 17: ...flat A connector end of the USB cable to a USB3 socket on the PC NOTE USB3 sockets on the back of PCs are often faster than ones on the front Software installation wizard Scanner installation TheInst...

Page 18: ...sure to select YES if Windows asks you to allow the software to access the network Energy saving settings Scanner Installation Setenergy staridletimepreference The scanner is set for automatic entry i...

Page 19: ...codes Online activation needs the License Key that came with your scanner and for the scanner to be connected to the internet Contact your dealer if you do not have a license key Manual activation nee...

Page 20: ...method the wizard screen shown at the top right will appear 1 Enter you license key in the designated field 2 The license key will be authenticated online and if valid a green tick will appear as sho...

Page 21: ...l display this for you You can use this or the Serial Number S N found on the back of the scanner SEPARATE INTERNET DEVICE PHONE OR OTHER PC Go to www licenseactivate com 1 Enter the Hardware ID or Se...

Page 22: ...ame Changethescannernetworkname optional NOTE This step only appears with licensed Ethernet supported scanners as detected during activation You may wish to change the default name of the scanner to c...

Page 23: ...wizard instructions to start camera alignment NOTE If you did not clean the internal scan area and scanner glass in the previous installation steps please clean them now 3 Insert the calibration shee...

Page 24: ...Installation 23 Scanner Installation Completetheinstallation The scanner has been installed correctly when you see this message 21...

Page 25: ...gabit cable to your network LAN 4 If not already open display the WIDEsystem user interface by double clicking the WIDEsystem icon in the system tray 5 Press the Refresh Scanner button Wizard finds th...

Page 26: ...ress I for ON and 0 for OFF Scanner Self Test When the scanner power is turned ON it runs a short self test As part of this test all of the LED lights on the keypad will light up All LEDs are lit duri...

Page 27: ...peration The scanner will go into Sleep mode Automatically after a set idle time see Automatic Shutdown Manually by holding down the power button down for 3 seconds The scanner will go into Wake mode...

Page 28: ...icon and select the Timer tab 2 Check the Enter Sleep mode automatically option 3 Enter the Idle time in minutes minutes of scanner inactivity before entering the sleep mode 4 Press Apply Sleep Mode o...

Page 29: ...anner will detect the document and begin feeding it At the same time release your grip on the media For more information on load settings see later in this guide The scan area paper size can be determ...

Page 30: ...eft adjustable guide to Support the left edge of the paper to ensure a straight feeding path Set up easy paper guidance for rapid batch feeding Adjusting paper width Place your document against the ri...

Page 31: ...ngle scans of fragile or difficult to handle documents Check that Paper Handling software is set for Manual Move the original into the funnel area and against the keypad paper guide until you feel it...

Page 32: ...loading Fast loading is a batch scanning time saving option that stops the document at the first roller It is selected from within the Nextimage scanning software and can be used with automatic loadin...

Page 33: ...original then select this size in the Nextimage input size dialog Manual input for irregular sizes and non square originals Measure or estimate the width of the original then type this as the width s...

Page 34: ...the speed indicator It overrides the setting in the software by reducing it in stages Speedometer A green led nearest button B represents a high speed setting This is the setting when the scanner is...

Page 35: ...e and hardware revisions by opening the Info tab Install new firmware Download new firmware to a folder on your machine then right click on the scanner icon select Advanced Options Update Scanner Firm...

Page 36: ...OTAC Remove all of the paper return guides by lifting them off Place them away from the scanner Lift the small lever underneath the larger button on the back of the scanner lid nearest the keypad The...

Page 37: ...lly Scan input size Set the input size dimension in the software large enough to accept the area of the thick original required After scanning completes remove or eject the thick document manually usi...

Page 38: ...w more time for the operator to manage the document Modifying stitch for OTAC Originals that do not bend are imaged above the surface of the glass This can cause image overlap stitching problems unles...

Page 39: ...ion in the quality of the images Particles of dust in the scan area will show up as streaks in the image Calibration and camera alignment Calibration sets the camera alignment and black and white leve...

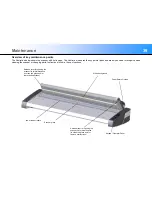
Page 40: ...when cleaning the scanner or changing parts Instructions follow in the next sections Paper Return Guides White background Lower rubber rollers Keypad Operator Panel Scanner glass Release lever for op...

Page 41: ...eas Scanner feed area Scanner glass White background Upper and lower rollers Caution Do not use abrasives acetone benzene or any fluids that contain these chemicals Do not spray liquids directly onto...

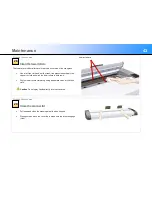
Page 42: ...he lid upwards Stand at the front of the scanner Place a thumb or finger under each lid release lever and pull it upwards Cleaning the scan area Pushthelidupandbackwards The lid will begin to move upw...

Page 43: ...he scanner glass plate Cleaning the scan area Cleanthewhitebackgroundplateandupperrollers The white background plate white metal area is between the upper rollers inside the lid of the scanner Apply a...

Page 44: ...r Apply the cleaner to cloth and wipe the lower rollers in both rows Dry the lower rollers completely using a separate clean dry lint free cloth Caution Do not spray liquids directly into the scan are...

Page 45: ...any dirt and prevent it being transported by the document into the scan area where it might spoil the scan Cleaning the scan area Coverthescannerwhennotinuse Cover the scanner with the plastic dust co...

Page 46: ...Other than that scanner calibration is completely automatic NOTE Cleaning and calibration depend on each other A calibration made with a dirty scanner will affect the output until a new calibration is...

Page 47: ...ystem tray to open the WIDEsystem program Press the Calibrate button Calibration Selectcalibrationtype Select either Camera Alignment or Full Calibration Camera Alignment will optimize camera stitchin...

Page 48: ...he midpoint arrow on the lid of the scanner Feed the sheet into the scanner Click the wizard Next button to continue Calibration Wizardcontrolledcalibration The calibration sheet will be rescanned a n...

Page 49: ...to replace a component The following parts can be replaced Scanner glass White background WIDEsystem WARNING Glass plate or white background plate replacement After replacing the scanner glass or the...

Page 50: ...anner Disconnect the power plug Replacing the scanner glass Openthelidwithreleaselevers Access the scan area by releasing the levers at each side of the scanner lid then lift the lid upwards Stand at...

Page 51: ...Replacing the scanner glass Locatethescannerglass The scanner glass is located between the two lines of rubber rollers behind the feed tray inside a removeable protective plastic extrusion Magnetic st...

Page 52: ...t one end apply moderate upwards pressure to begin separating it from the scanner body Lift each end of the glass no more than 10mm 0 5 SEE NEXT PAGE FOR FULL INSTRUCTIONS WARNING DO NOT LIFT THE GLAS...

Page 53: ...ot chipped or scratched before using it in the scanner AS REMOVAL ALWAYS LIFT THE NEW GLASS AT THE 1 3 2 3 POINTS AS SHOWN Scanner glass is symmetrical in the paper direction and can be inserted eithe...

Page 54: ...SCANNER Using both hands support the glass by the fingertips then carefully lower it into position taking care to locate each end plate up side of glass onto its four corresponding location points ins...

Page 55: ...he white background Turnscannerpoweroffanddisconnectthepower Turn off the power switch on the back of the scanner Disconnect the power plug Replacing the white background Openthelidwithreleaselevers A...

Page 56: ...pose the internal scan area Replacing the white background Locatethewhitebackground The white plastic background strip is a consumable item and forms part of the scanner lid The background is sprung i...

Page 57: ...edge of the plastic background to release it over the lower edge Work the tool along the edge towards the opposite end until it is completely released Remove the white background free by lifting it u...

Page 58: ...ong its entire length Now using your fingers or the soft tool gently push the lower edge into the lid so that it hooks under the inside Work from one end along the length of the part until all of the...

Page 59: ...d Preparethescanner Close the scanner lid Recalibrating the scanner is recommended after changing the white background to ensure that no dirt or scratch information from the old white background remai...

Page 60: ...what has been corrected or added in the new release Identifying scanner firmware Start WIDEsystem by double clicking the WIDEsystem icon Select the Info tab to display Release number of installed firm...

Page 61: ...stem to try and remedy the problem Look for a description of the error in the following troubleshooting section and try to remedy the problem that way Assistance Contact your service provider if the P...

Page 62: ...as a new device without functional drivers If this is the case the scanner will be displayed in the Windows Device Manager with a yellow error icon The scanner entry must be removed from the Device ma...

Page 63: ...n your screen Look for a description of the error in this users guide Follow the instructions provided Contact your service provider if one or more of the following cases is true The error cannot be r...

Page 64: ...e paper reverse or paper forward button on the keypad If the paper movement buttons fail to move the document open the scanner lid Raise the lid slightly using one hand then use the other hand to pull...

Page 65: ...k that the scanner is set at its normal or lowest media thickness Press the lid lowering button on the back of the scanner lid to move the lid to its lowest position then restart the alignment and cal...

Page 66: ...ur technical service provider if the problem persists Edge distortion with thick originals Image distortion caused at the edges of thick media is excluded from thick media scans by default It can be i...

Page 67: ...lots or openings in the cabinet at the back or bottom are provided for ventilation This ensures reliable operation of the product and protects it from overheating These openings must never be blocked...

Page 68: ...e and void the use s authority to operate the equipment CE Regulations EU This equipment has been tested and found to comply with the limits for a Class A product according to EN55032 VCCI Regulations...

Page 69: ...ight H and scanner length L 96 6 38 99 1 39 1016 40 1810 71 2 NOTE The stand is adjustable for three different heights See instructions included with stand for more details The low adjustable stand ac...

Page 70: ...H2 H3 L Height H and length L 766 30 1 791 31 1 816 32 1 1796 70 7 NOTE The stand is adjustable for three different heights See instructions included with stand for more details The low adjustable sta...

Page 71: ...Appendix 70 Scanner unpacked weight Scanner Weight kg lbs HD Ultra X 6000 67 148...

Reviews: