


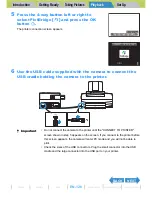

Introduction
Getting Ready
Taking Pictures
Playback
Set Up
EN-116
NEXT
BACK
Contents
Glossary
Index
Nomenclature
Menus and Settings
Troubleshooting
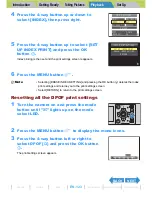
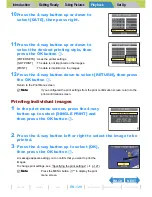
5
Press the 4-way button up or down to
select the image size, then press the OK
button
E
.
The number of resized images is displayed.
[320x240 E-MAIL(S)]
: Resizes the image to a smaller size that is
convenient for attaching to an e-mail and
sending from a computer.
[160x120 THUMB NAIL]: Resizes the image to a smaller size that is
convenient for attaching to an e-mail and
sending from a mobile phone.
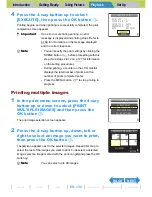
6
Press the OK button
E
to confirm.
7
Press the MENU button
K
.
B
Note
• When you are attaching images to an email to
send to a mobile phone, the number of pixels
that can be used varies depending on the
mobile phone you are using. Refer to the
instruction manual for the mobile phone you are
using for details.
• Press the MENU button
K
during resizing to
stop resizing. Only images that have already
been resized are saved.
A
Important
• You may not be able to resize images shot with another camera.
• If the memory card becomes full during resizing of all the images, resizing stops and
only the images resized up to that point are saved.
• You cannot resize a specified area (trimming).
320X240 E-MAIL(S)
SELECT IMAGE SIZE
160X120 THUMB NAIL
RETURN
OK
RESIZE DONE
18 IMGS