Troubleshooting
Ensure all power and cable connections are correct with the Camera, DVR and Test monitor
or Telemetry devices if used.
Power Voltage Check - Remove the OSD cover to see if the green correct power LED is lit. If
the red LED is lit the power voltage is too high. If the yellow LED is lit the power voltage is
not high enough. If there are no LEDs lit there is no power getting to the camera
If all power and cable connections are correct and the camera picture can not be produced or
configured then contact your supplier for technical support.
EXTERNAL LENS ADJUSTMENT
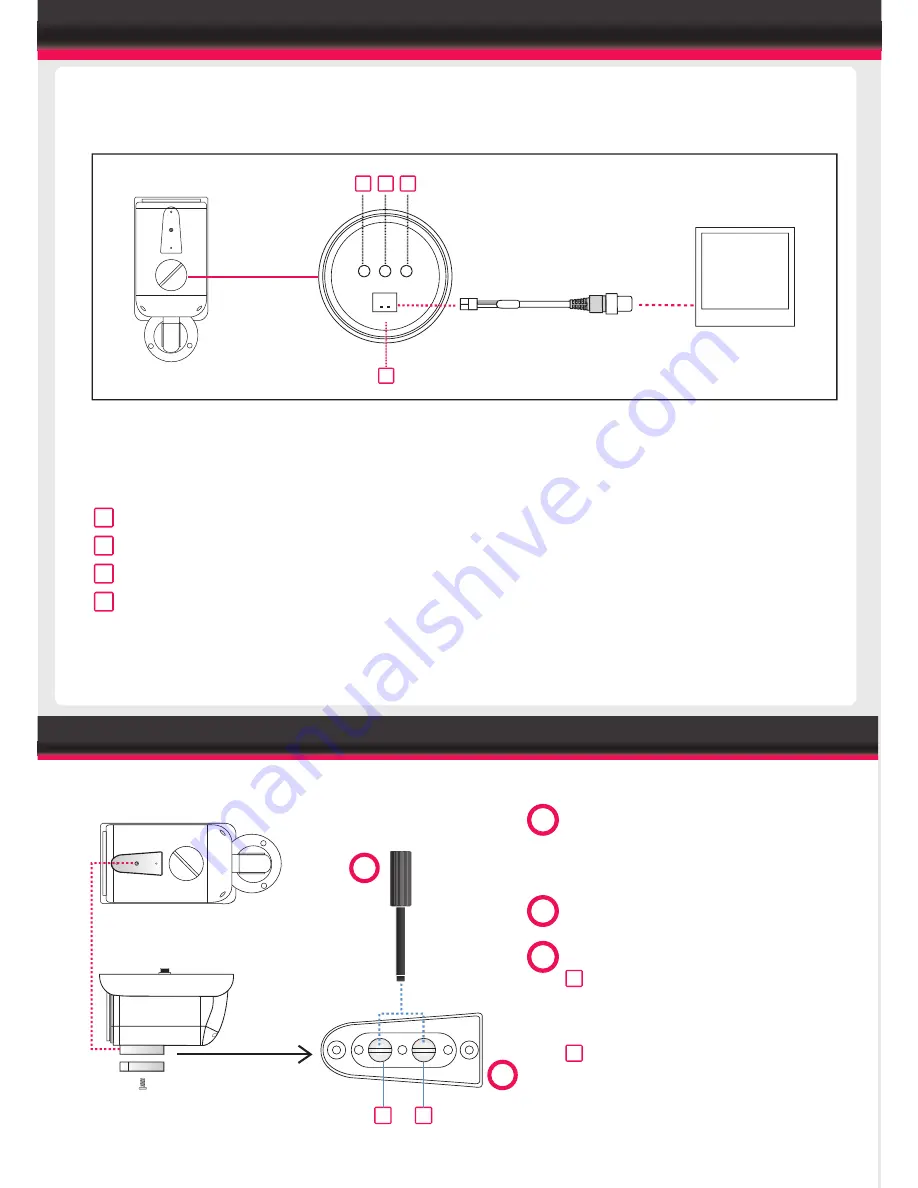
The power indicator LEDs display the power supply being fed into the camera and whether it
is too high, low or correct.
1. "PO": Red LED - Voltage is too high
2. "PN": Green LED - Voltage is correct
3. "PL": Yellow LED - Voltage is too low
4. Extra video out for testing monitor - Attach your Video test monitor with the service video
cable enclosed in your camera box. The camera footage will appear on your test monitor
and zoom/focus adjustments can be carried out as the installation requires.
The Service Video Out panel contains a power indicator and test monitor connection for
ease of adjusting the camera settings during installation.
PO
PN
VIDEO
PL
1 2 3
4
SERVICE VIDEO OUTPUT CABLE
AIR3016 / AIR3026
SEE OVERLEAF FOR AIR3026HG ON SCREEN DISPLAY
TEST MONITOR
2
3
A
B
1 Open the lens adjuster cover and
adjust focus and zoom. Loose the
screw on the lens adjuster cover.
2. Lens Adjustment Tool
3 Focus and Zoom Adjustments
Zoom
Turn clockwise to zoom wide
anti-clockwise to zoom narrow
Focus
Turn clockwise to focus far
Anti-clockwise to focus near
A
B
SERVICE VIDEO OUTPUT (AIR3016 / 3026 MODELS ONLY)
Summary of Contents for AIR3016
Page 14: ......


