background image

CONNECTION

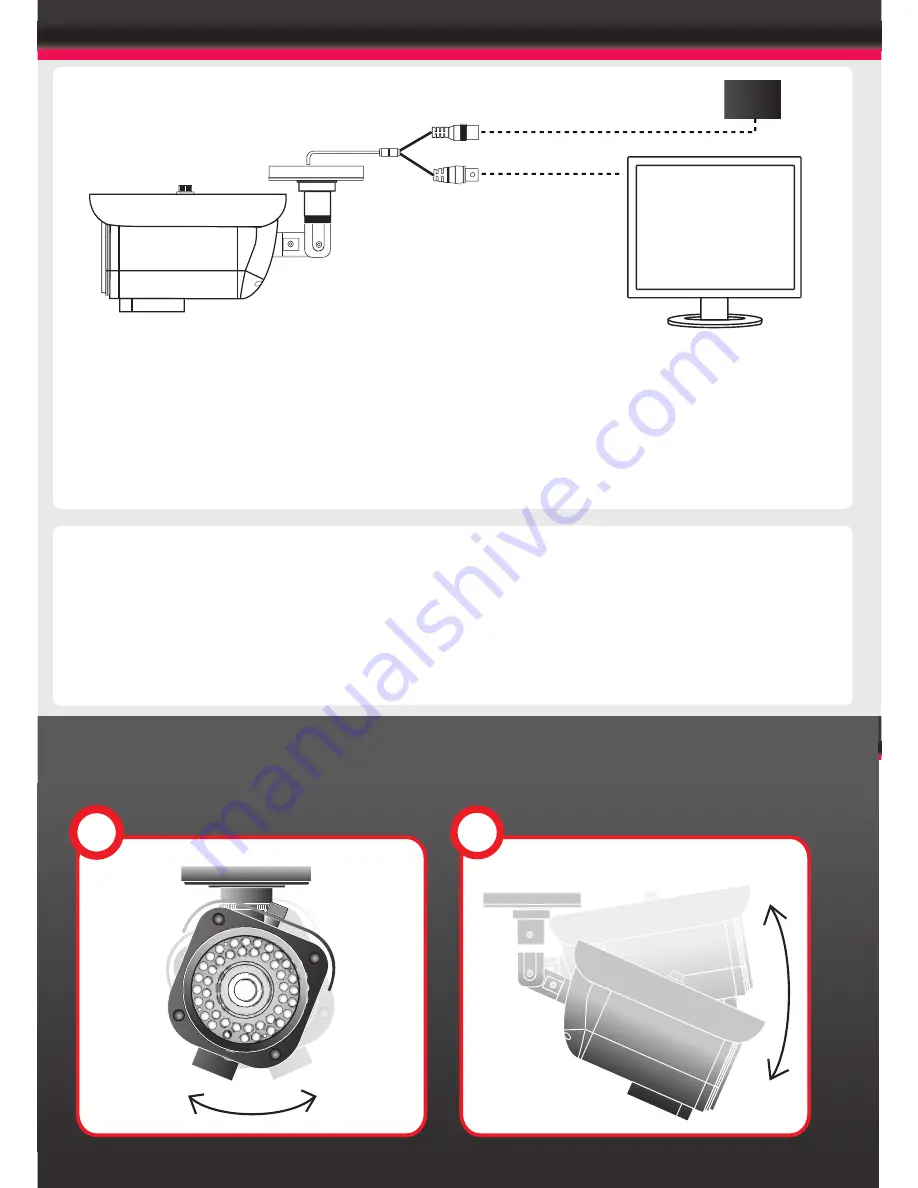
  Connect the video out port to your video cable  

  running to the monitoring recorder.  

  Check the power supply is of the correct level  

  and connect your power supply into the power  

  port on the Camera. 

  View the picture on a monitoring device to  

  check the power and video connection is  

  working properly.

PSU

Troubleshooting


Ensure all power and cable connections are correct with the Camera, DVR and  Test monitor


or  Telemetry devices if used.


Power Voltage Check - Remove the OSD cover to see if the green correct power LED is lit. If  


the red LED is lit the power voltage is too high. If the yellow LED is lit the power voltage is  


not high enough. If there are no LEDs lit there is no power getting to the camera


If all power and cable connections are correct and the camera picture can not be produced or  


configured then contact your supplier for technical support.

Point the Camera towards the intended area to be monitored.  

2

3

Summary of Contents for AIR3016

Page 1: ...AIR30 Range Weatherproof Colour Mono IR Camera USER MANUAL TECHNOLOGY ADVANCED INFRARED P o w e r e d b y...

Page 2: ...t your service provider 8 Do not install the camera under unstable lighting conditions Severe lighting change or flicker can cause the camera to work improperly 9 Never use the camera close to a gas o...

Page 3: ...w light USER MANUAL X1 X1 X1 MOUNTING DRAWING PAPER X1 DC CONNECTOR X1 _ 1 2 3 4 5 6 7 8 1 Fixing Bolt for Sunvisor 2 Photo Sensor 3 IR LED 4 Sunvisor 5 Mounting Bracket 6 Tri Axis Points 7 12V DC Con...

Page 4: ...uity of effective CCTV monitoring You may find the use of an ND filter helpful Use the supplied drill mounting template to mark the spacing for drilling Following drilling securely attach the bracket...

Page 5: ...le connections are correct with the Camera DVR and Test monitor or Telemetry devices if used Power Voltage Check Remove the OSD cover to see if the green correct power LED is lit If the red LED is lit...

Page 6: ...an be carried out as the installation requires The Service Video Out panel contains a power indicator and test monitor connection for ease of adjusting the camera settings during installation PO PN VI...

Page 7: ...85mm 3 35 92mm 3 62 202mm 7 95 130mm 5 12 118mm 4 65 DC12V IN VIDEO OUT 070mm 2 76 056mm 2 20 3 05mm 0 20 DIMENSIONS...

Page 8: ...cable enclosed in your camera box The camera footage will appear on your test monitor and zoom focus adjustments can be carried out as the installation requires 1 Press U to navigate upwards 2 Press...

Page 9: ...000 X256 0 100 OFF LOW MIDDLE HIGH OFF AUTO X2 X256 OFF BLC GAIN LOW MIDDLE HIGH LEFT RIGHT 0 7 WIDTH TOP BOTTOM HEIGHT RETURN HSBLC LEVEL 0 8 LEFT RIGHT WIDTH TOP BOTTOM HEIGHT RETURN OFF INDOOR OUTD...

Page 10: ...R CAM TITLE OFF ON D EFFECT FREEZE OFF ON MIRROR OFF MIRROR V FLIP ROTATE D ZOOM OFF ON D ZOOM X1 0 32 0 PAN TILT RETURN GAMMA NEG IMAGE RETURN PRIVACY OFF ON AREA SELECT AREA 1 AREA 8 AREA DISPLAY ON...

Page 11: ...RPNESS 0 31 BLUE 0 100 RED 0 100 RETURN FACTORY RETURN RESET FUNCTION STATUS EXPOSURE SHUTTER AUTO BRIGHTNESS 44 AGC MIDDLE SENS UP OFF BLC OFF D WDR OFF WHITE BALANCE AWB DAY NIGHT AUTO 3DNR ON LEVEL...

Page 12: ...ns Service Video Output Option On Screen Display Option External Lens Zoom Adjustments 340 x 219 x 100mm WxHxD AIR IR It is possible to extend the IR range of the AIR 45 50 range with an easy to attac...

Page 13: ...Colour Monochrome Removable IR Cut Filter PAL 50Hz 15 625KHz 28 375MHz 2 1 Interlace 1 50 1 100 000s 3 5 8mm Varifocal IR Lens 0 45 1V p p 75 DC12V 10 202 85 118mm 7 95 3 35 4 65 1300g 45 86oz 30 60 2...

Page 14: ......

Reviews: