6
Installing the DeviceMaster 500 and the SICK LMS Scanner (Windows):
2000472 Rev. C
Attaching the Network and Serial Cables
3.
Use one of the following methods to ground the DeviceMaster 500.
•
Through the
power supply
by connecting the ground wire on the power
cable using plastic or metal stand-offs.
•
Through the
chassis
, using metal stand-offs. If plastic stand-offs are used
to mount the board, then you must ground the DeviceMaster 500 using the
power cable.
Note:
The maximum diameter of the metal stand-offs should be 0.175” with a
4-40 machine screw. Metal stand-offs are not provided with the
DeviceMaster 500.
4.
Optionally, attach the light pipes. The following light pipes have been tested
and found to function; Bivar, Inc. (P/N:LP-230) and Ledtronics, Inc.
(P/N:LTP003-0CW-001).
After mounting the DeviceMaster 500, you are ready to connect the cables.
Attaching the
Network and Serial
Cables
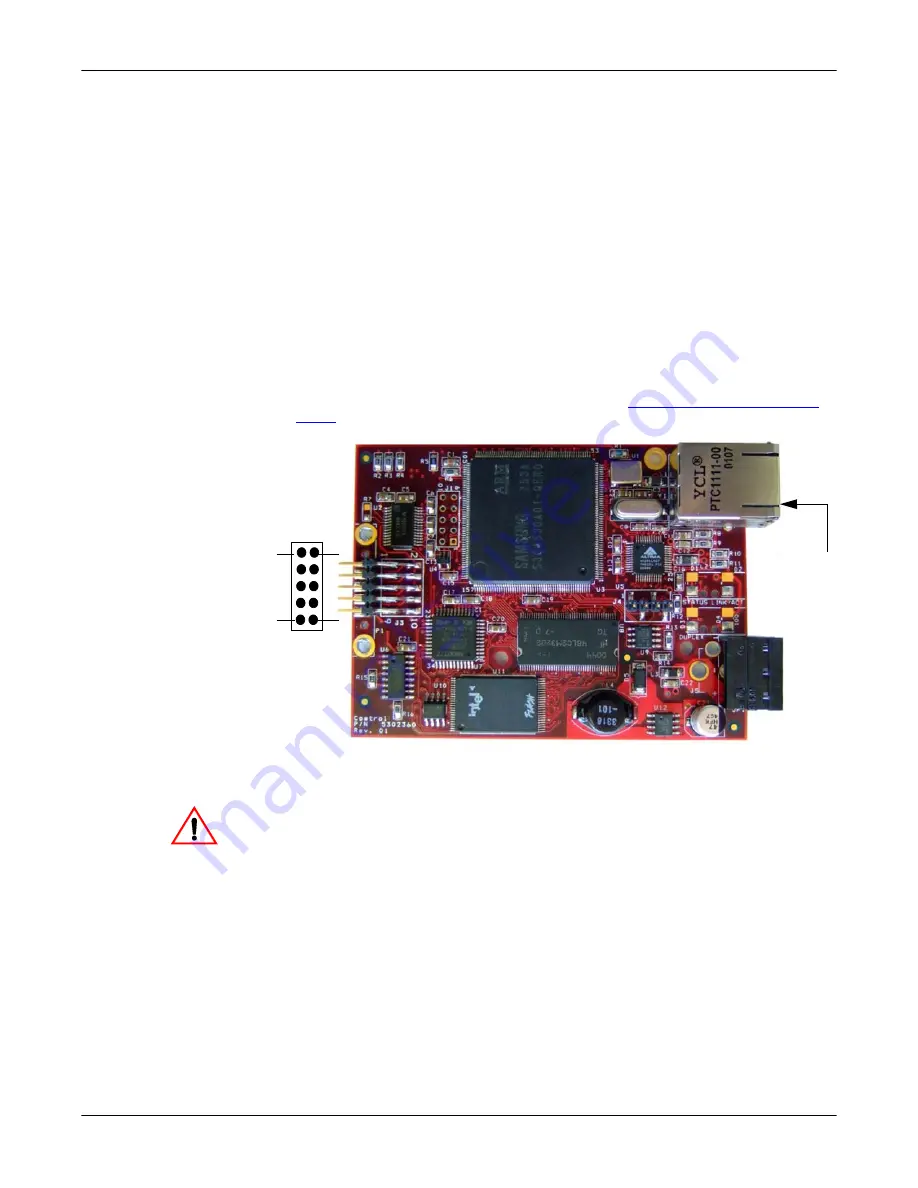
Use the following procedure to attach the serial ribbon and Ethernet cables.
1.
If using a ribbon cable, attach the cable built in
on Page 4 to the header labeled
J3
.
2.
Connect a standard Ethernet cable from the RJ45 port on the DeviceMaster
500 to your Ethernet hub or a crossover cable to a server NIC.
The NS-Link device driver’s default port setting is RS-232. Make sure
that you do not connect RS-422/485 devices until the appropriate port
interface type has been configured in NS-Link.
Use the next subsection to wire the power terminal connector and verify the
hardware installation.
Ethernet
10/100
Connector
J3
1
2
9
10
Caution


