Chapter 2 Installation
2.1 Hardware
Installation
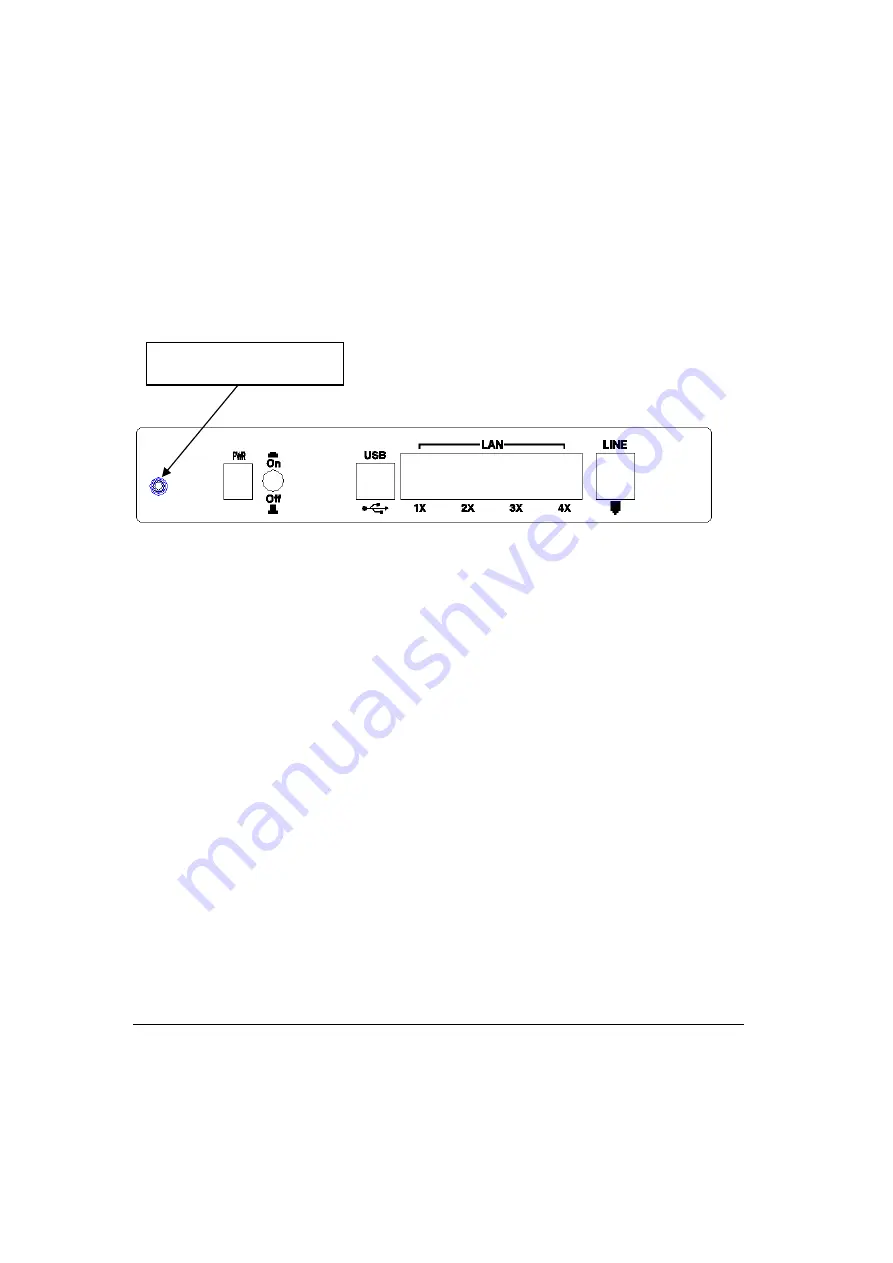
In the rear panel, there is a reset button. To load the factory default settings, hold
the reset button down for at least
5 seconds.
Follow the instructions below to complete the hardware connections.
Connection to LINE port
If you wish to connect both the router and a telephone, connect the LINE port to a
POTS splitter with a RJ11 connection cable.
Connection to LAN port
To connect to a hub or PC, use a RJ45 cable. You can connect the router to up to four
LAN devices. The ports are auto-sensing MDI/X and either straight-through cable
or crossover cable can be used.
Connection to USB port
Connect the USB port to a PC with a standard USB cable.
Connection to (PWR) Power
Connect the
Power
jack to the shipped power cord. Attach the power adapter to
the wall outlet or other AC source. After all connections have been made, press
the power button to the on position. After powering on, the router performs a
self-test. Wait for a few seconds until the test is finished, then the router will be
ready to operate.
Reset button
Caution 1:
If the router fails to power up, or it malfunctions, first verify that the
power supply is connected correctly. Then power it on again. If the
problem persists, contact our technical support engineers.
Caution 2:
Before servicing or disassembling this equipment always disconnect all
power cords and telephone lines from the wall outlet.
7
Summary of Contents for CT-5621
Page 1: ...CT 5621 ADSL2 Multi Port Router User s Manual Version A1 7 November 9 2007 261055 016...
Page 5: ...APPENDIX C SPECIFICATIONS 100 APPENDIX D SSH CLIENT 102 3...
Page 7: ...1 2 Application The following diagram depicts the application of the CT 5621 5...
Page 16: ...STEP 6 When the screen displays as below click the NEXT button 14...
Page 31: ...4 2 7 DHCP Click DHCP to display the DHCP information 29...
Page 52: ...This screenshot is for Bridge encapsulation 50...


