108
II. NETWORK AUTHENTICATION
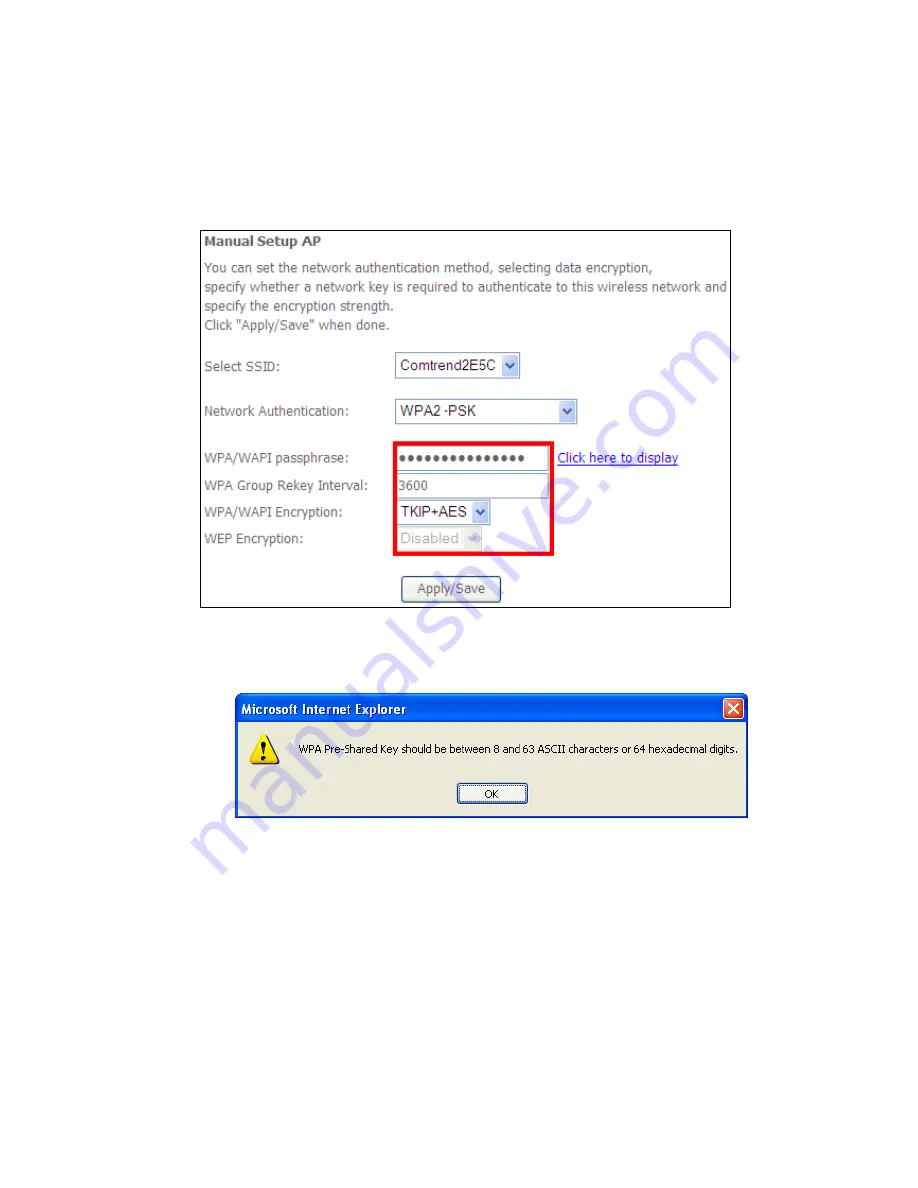
Step 3: Select Open, WPA-PSK, WPA2-PSK, or Mixed WPA2/WPA-PSK network
authentication mode from the Manual Setup AP section of the Wireless
Security screen. The example below shows WPA2-PSK mode.
Step 4: For the Pre-Shared Key (PSK) modes, enter a WPA Pre-Shared Key. You
will see the following dialog box if the Key is too short or too long.
Step 5: Click the Apply/Save button at the bottom of the screen.
IIIa. PUSH-BUTTON CONFIGURATION
The WPS push-button configuration provides a semi-automated configuration
method. The WPS button on the rear panel of the router can be used for this
purpose or the Web User Interface (WUI) can be used exclusively.
The WPS push-button configuration is described in the procedure below. It is
assumed that the Wireless function is Enabled and that the router is configured as
the Wireless Access Point (AP) of your WLAN. In addition, the wireless client must
also be configured correctly and turned on, with WPS function enabled.
Summary of Contents for AR-5389
Page 1: ...74ok AR 5389 ADSL2 WLAN Router User Manual Version A1 0 February 5 2014...
Page 16: ...15 STEP 3 After successfully logging in for the first time you will reach this screen...
Page 31: ...30 4 7 IGMP Proxy Displays a list of IGMP Proxy entries...
Page 57: ...56 5 5 6 SIP ALG This page allows you to enable disable SIP ALG...
Page 100: ...99 Enter a certificate name and click Apply to import the CA certificate...
Page 117: ...116 6 6 Site Survey The graph displays wireless APs found in your neighborhood by channel...
Page 119: ...118 6 8 WiFi Button This page allows you to enable or disable the WiFi Button...
Page 132: ...131 NOTE Passwords can be up to 16 characters in length...
Page 157: ...156 The settings shown above are described below...


