Rev H
4
of 6
Fibers must have a quality cleave before
terminating to the jacks. To ensure that the
cleave tool is producing quality cleaves, it is
STRONGLY RECOMMENDED to inspect at least
one fiber cleave per day according to the
following:
1. Fit the bare fiber adapter onto the universal adapter;
then assemble the universal adapter onto the microscope.
2. Using the microscope, inspect the fiber for a quality
cleave. Refer to the instructions packaged with the
microscope kit) for operating procedures and safety
precautions concerning the microscope.
DO NOT attempt to clean the fiber after it has
been cleaved.
IMPORTANT
—
F
ibers must be terminated as soon as
the cleaving and inspection process is complete;
otherwise, damage to the fibers could result.
Procedd to Paragraph 3.3.
3.3. Termination
DO NOT use build--up tubes, fan--out kits, or
breakout kits on the fibers, and DO NOT use
loose tube fiber easy--strip fiber.
IMPORTANT
—
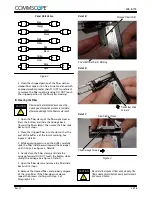
For correct system polarity, Channel “A”
must be connected to Channel “B” and Channel “B”
must be connected to Channel “A” on any cable run
or cable assembly (including fiber optic equipment).
Refer to Figure 2.
Proceed as follows:
1. Holding the jack or placing the jack on a clean,
flat surface (the protective cover helps to keep the
jack stabilized), slide the fiber guide onto the back
of the jack. See Figure 4.
The fiber guide is marked with the fiber size.
Make sure that the marking on the fiber guide
corresponds with the fiber size being used.
Figure 4
Fiber Guide
Jack
Protective Cover
2. With the handle of the actuation key pointed
toward the top of the jack, insert the key (pointed
end first) into the key hole for Channel A until it
stops (the entire key portion must be inside the
hole). See Figure 5. DO NOT force the key. With
the key in this position, the fiber hole is “closed.”
3. Slide the prepared fiber onto the slot of the fiber
guide and into the fiber hole until the fiber stops.
Refer to Figure 5.
4. While lightly holding the fiber in place,
SLOWLY
rotate the key handle 90 (one--quarter turn)
toward the outside of the jack. See Figure 6,
Detail B. With the key in this position, the fiber hole
is “open.”
Ensure that the key is rotated ONLY one--quarter
turn; otherwise, the fiber hole will be partially
open, and the fiber cannot be inserted.
Figure 5
Protective
Cover
Fiber on Slot
of Fiber Guide
Key in Position—
Fiber Hole is “Closed”
Key Handle
Key Hole
Fiber Hole
Top of Jack
Key Handle
“Closed”
Key
Improperly
Positioned—
Fiber Hole Partially Open
Fiber in Fiber Hole
Detail
Detail A
CAUTION
!
CAUTION
!
NOTE
i
NOTE
i
CAUTION
!
408- 8718
º


