4
Battery note:
1.
“Low battery” will appear on the LCD when battery power is lowand your needs to be recharged.
2.
Please remove the battery when you do not intend to use your camera for an extended period of time to
prevent leakage and corrosion.
3.
Your digital camera will power off with the battery has been completely depleted.
Micro SD memory card note:
This camera supports Micro SD memory cards up to 8GB. The internal memory is for you to take one some test
photos. Please insert a compatible memory card to begin using your camera.
Locate the Micro SD memory card slot, and insert the memory card until you feel and hear an audible “click”
sound. When the
icon appears on the LCD screen, this indicates that your SD card is installed correctly.
1.
Formatting will delete all the data on the SD memory card including protected data.
2.
Do not remove the memory card during formatting as this may permanently damage the card and render it
unusable.
3.
Once you download your photos/videos to your computer, you can delete the photos/videos from your
memory card in order to free up some space and continue using your camera.
Charging the Battery
1.
Insert the battery into your camera.
2.
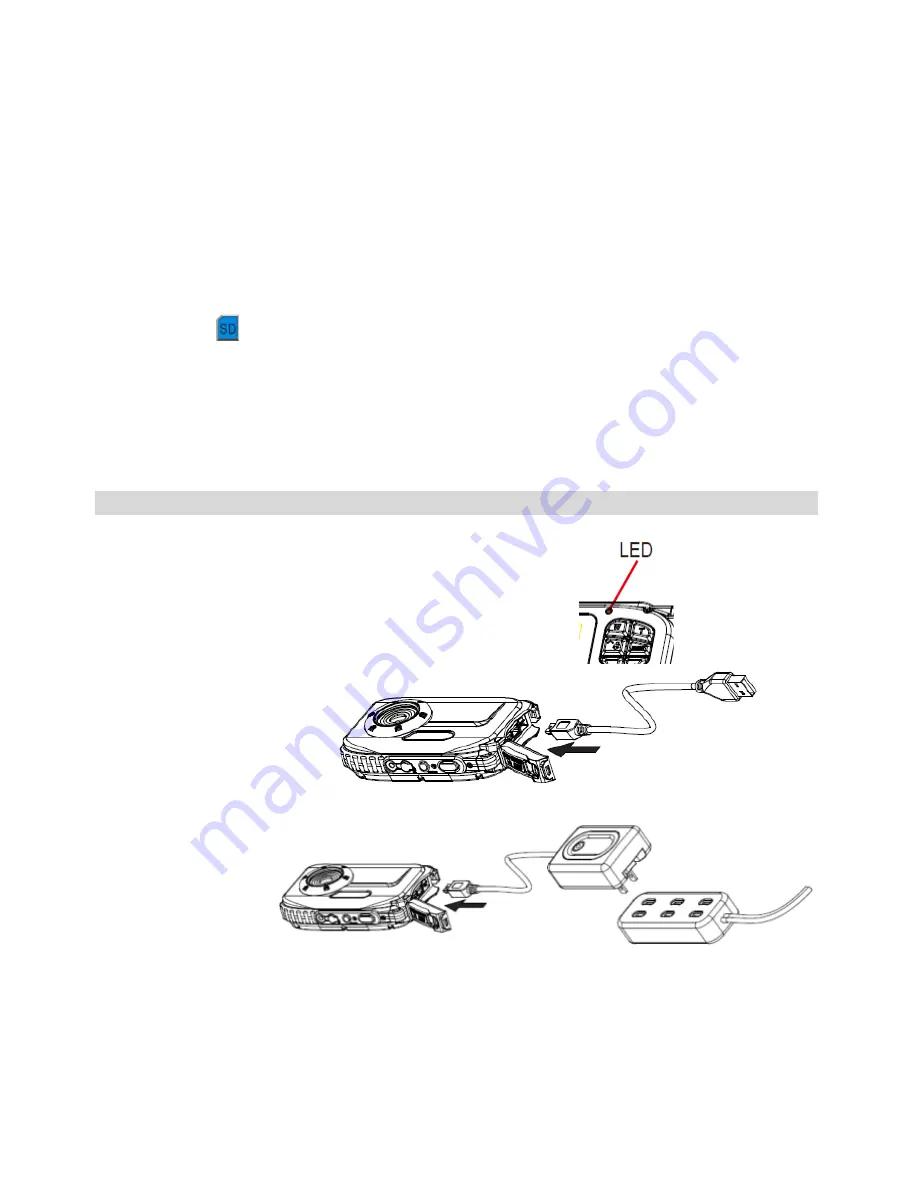
Please use the supplied USB cable to connect your
camera and computer or USB charger for charging.
When the battery is charging, the LED will light up.
[1] Via the computer:
[2] Via the USB charger:
Please follow the above illustration for charging.
Notice: The specification of the charger: INPUT:100~240VAC/ OUTPUT: 5VDC. Do not use any other charger
to charge your camera. Using a charger other that the one supplied will cause permament damage and will
void your warranty.


