background image

Nothing 

Comes Close to a Cobra

®

Installation

Intro

Operation

Customer

Assistance

Warranty

Notice

Main Icons

Secondary Icons

Your Detector

3

Installation

Intro

Operation

Customer

Assistance

Warranty

Notice

Main Icons

Secondary Icons

Your Detector

2 English

Installation 

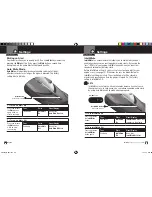
Where to Mount Your Unit

You will get optimum performance from your detector if you Mount it at 

a point approximately in the center of the vehicle, as low as possible on  

the front windshield without obstructing the unit’s view of the road either  

to the front or rear. Make sure the unit is level with the road. You can also  

mount it directly on the dashboard. 

The unit’s lens must not be blocked and the LaserEye should have a clear 

view out the back window to allow 360° detection.

Radar and laser signals pass through glass but not through other materials 

and objects. Objects that can block or weaken incoming signals include: 
  

n

  Windshield wiper blades


n

  Mirrored sun screens


n

  Dark tinting at the top of the windshield


n

   Heated windshields currently available on some vehicles 

(Instaclear for Ford, Electriclear for GM.) Consult your dealer  

to see if you have this option.


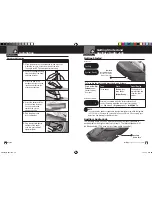
1.

  Attach the rubber 

cups to the bracket.

2.  Make sure the rubber cups and your windshield are clean.
3.  Push the bracket firmly 

onto the windshield.

4.  Attach the detector to 

the bracket. Check the  

angle of the unit.

5.  To adjust the angle if 

necessary, gently push or 

pull on the bracket to bend 

it. DO NOT use the detector 

to bend the bracket.

6.  Plug the power cord 

into the detector.

7.  Plug the cigarette lighter 

adapter on the power  

cord into your vehicle’s 

cigarette lighter.

8.  You can temporarily remove the detector whenever you 

wish by pressing the bracket release button and sliding  

it off the bracket.

Windshield Mounting

The LaserEye Should Have a Clear View

Windshield Mounting

Dashboard Mounting

XRS950_MANL.indd   2-3

1/12/10   8:42 AM

Summary of Contents for XRS 950

Page 1: ...problems with this product or not understand its many features please refer to this owner s manual If you require further assistance after reading this manual Cobra Electronics offers the following customer assistance services For Assistance in the U S A Automated Help Desk English only 24 hours a day 7 days a week 773 889 3087 phone Customer Assistance Operators English and Spanish 8 00 a m to 5 ...

Page 2: ...n Engine RPM sensing mute function which reduces false alerts Button turns IntelliMute On and Off Also enters IntelliMute setting mode LaserEye For 360 detection of laser signals Windshield Bracket Release Button Mute Button For manual mute or auto mute of audio alerts Also turns Voice Alert On and Off Press and hold for four seconds to access these functions Windshield Bracket Mount Intro Operati...

Page 3: ...ightness 7 Muting an Alert 8 Auto Mute Mode 8 IntelliMute 9 IntelliMute Pro 12 Voice Tone Setting 13 VG 2 and Spectre I IV Alert Settings 14 Radar Alert Settings 14 Pop Alert 15 Detection 16 Signals Detected 16 Audio Alerts 16 Visual Display 16 Instant On Detection 19 Responding to Alerts 19 Understanding Radar and Laser 20 Maintenance 21 Specifications 22 Warranty Limited 1 Year Warranty 22 Custo...

Page 4: ...s Objects that can block or weaken incoming signals include n Windshield wiper blades n Mirrored sun screens n Dark tinting at the top of the windshield n Heated windshields currently available on some vehicles Instaclear for Ford Electriclear for GM Consult your dealer to see if you have this option 1 Attach the rubber cups to the bracket 2 Make sure the rubber cups and your windshield are clean ...

Page 5: ...r o O p e ra ti o n C u s to m e r A s s is ta n c e W a rr a n ty N o ti c e M a in Ic o n s S e co n d a ry Ic o n s C a u ti o n W a rn in g In s ta lla ti o n C u s to m e r A s s is ta n c e To Turn On the Unit and Adjust the Audio Volume Rotate the On Off Volume control clockwise away from you Tone Voice Visual Display Three beeps Testing then three beeps System Ready The display will cycle ...

Page 6: ...giView Data Display Brightness You can choose from four 4 settings for Brightness of the display You can cycle through the settings by repeatedly pushing the Dim button The factory setting is Bright Dim Button Press and release To Change the Brightness to Dim Press and release the Dim button once Tone Voice Visual Display One beep Dim Dim blinks then display dims To Change the Brightness to Dimmer...

Page 7: ...at point IntelliMute will begin muting The activation point will be stored in memory and recalled each time the power is turned On The factory setting is IntelliMute Off NOTE IntelliMute may not work with some vehicles because it cannot sense the engine s revs In such cases you can reduce unwanted audio alerts by using Auto Mute and City mode when appropriate Intro Operation Customer Assistance Wa...

Page 8: ...erent vehicle NOTE When initially choosing your IntelliMute activation point a setting of approximately 300 to 600 RPMs above idle is recommended You can reset the activation point at any time to fit your individual preferences and driving style Setting the IntelliMute Activation Point Your detector must be installed in your vehicle CAUTION Do not attempt to set the rev point while driving Your ve...

Page 9: ...Pro Off None after IntelliMute Pro Off blinks ation Customer Assistance Warranty tice Caution Warning ation Customer Assistance CAUTION When IntelliMute Pro is On NO radar signals will be detected and NO alerts will be given at RPMs below the IntelliMute activation point NOTE The arrow up or down will continue to show that engine RPMs are above or below the user set value Intro Operation Customer ...

Page 10: ...ovide alerts when any of these or similar devices are in use near your vehicle Your detector can be spotted by Spectre IV RDDs but is invisible to VG 2 and Spectre I RDDs You can choose whether you want to be alerted to VG 2 and Spectre I IV RDD signals The factory setting for VG 2 and Spectre I IV alerts is Off Pop Alert The Pop Mode Radar Gun is a single pulse Doppler radar that is a feature of ...

Page 11: ... well as the voice and visual alerts it provides for each of them Audio Alerts In Voice Alert mode you will first hear several tones then a voice message announcing the type of signal detected followed by more tones In Tone Alert mode you will hear the tones only In both Voice Alert and Tone Alert modes a distinctly different alert tone is used for each type of signal detected including separate t...

Page 12: ...nitoring signals which can suddenly appear at full strength NOTE You should take appropriate action immediately whenever an instant on alert is given Responding to Alerts Intro Operation Customer Assistance Warranty Notice Main Icons Secondary Icons Safety Alert Signals Voice and Visual Displays Type of Signal Voice Visual Display Emergency Vehicles Emergency Vehicle Approaching Emergency Vehicle ...

Page 13: ...nd road hazards without being alerted As the number of transmitters increases these alerts will become more common When you receive such an alert please watch for emergency vehicles ahead of you on cross streets and behind you If you see an emergency vehicle approaching please pull over to the right side of the road and allow it to pass LIDAR Laser The correct name for the technology that most peo...

Page 14: ...warranties including warranties of merchantability and fitness for a particular purpose are limited in duration to the length of this warranty Cobra shall not be liable for any incidental consequential or other damages including without limitation damages resulting from loss of use or cost of installation Some states do not allow limitations on how long an implied warranty lasts and or do not allo...

Page 15: ...nsured using a traceable carrier such as United Parcel Service UPS Federal Express or Priority mail with delivery confirmation Ship to Cobra Factory Service Cobra Electronics Corporation 6500 West Cortland Street Chicago IL 60707 U S A 6 Please allow three to four weeks before contacting us about the status of your service Call 773 889 3087 for assistance If your unit is under warranty it will eit...

Reviews: