


iGate2.0 User Manual
C r e a t e d : D e c e m b e r 3 , 2 0 2 1
G e o t h e r m a l H e a t i n g a n d Co o l i n g
6
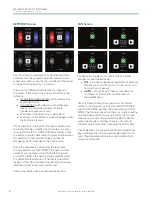
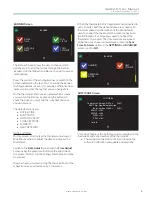
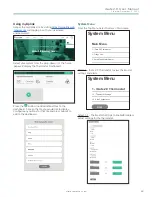
SETPOINT Screen
Use this screen to view, adjust, or hold heat and cool
setpoints . Use the wheels to adjust setpoints . Drag a
wheel up or down or tap the top or bottom of the wheel
to increase or decrease by 1 increment .
There are two different buttons that can appear in
the center of this screen. Press to switch buttons and
functions.
•
OCCUPIED/UNOCCUPIED
button (commercial
applications only) .
•
PLAY/PAUSE
button allows you to either play
(use as is) or alter the program schedule .
(residential applications only)
• Text above the button is the current state.
• Text beneath the button is what will happen when
the button is pressed .
If the schedule is running, the Occupancy button and
the text will display whether the schedule is currently
running OCCUPIED or UNOCCUPIED setpoints. Press
the button to switch heat and/or cool setpoints between
Occupied and Unoccupied settings and then the
Occupancy button changes to the PLAY button.
When the schedule is not running, the text above
the Play button says OCCUPIED if the heat and cool
setpoints are the same as the OCCUPIED setpoints
or UNOCCUPIED if the heat and cool setpoints match
the UNOCCUPIED setpoints. If neither is true, HOLD
displays . When the schedule is paused, the remaining
hold time shows in the lower right corner .
Commercial Screen has a Schedule pause button .
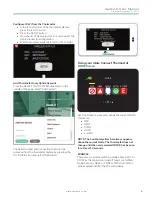
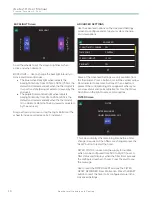
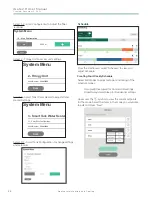
FAN Screen
Configure the supply fan for ON or AUTO, in either
occupied or unoccupied mode .
•
ON
– Fan runs continuously regardless of demand.
Options are to run the fan for: 15 min, 30 min, 45
min, per hour or always .
•
AUTO
– Fan cycles with heat or cool demand
or if there is a demand for humidification or
dehumidification.
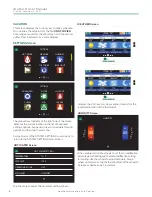
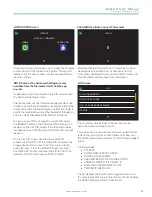
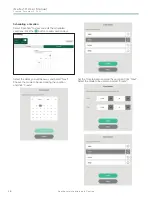
Use this screen to adjust fan operation. The default
setting for fan operation is AUTO for both OCCUPIED
and UNOCCUPIED periods. When operating in AUTO
MODE, the fan only runs when there is an active heating
or cooling demand. When you select ON, the fan runs
continuously, except during the BLOWER ON DELAY
when a heat cycle is starting . There is a 30-second
minimum on/off timer when changing the FAN MODE.
These selections are not available if the thermostat has
been configured for non-programmable operation. To
enter Programmable mode, press and hold the FAN
screen for 5 seconds.


