


iGate2.0 User Manual
C r e a t e d : D e c e m b e r 3 , 2 0 2 1
G e o t h e r m a l H e a t i n g a n d Co o l i n g
12
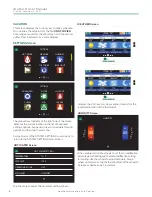
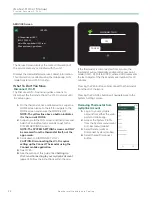
SERVICE Screen
SERVICE
El Conquistador HVAC
(555) 555-5555
www.ElConquistadorHVAC.com
[email protected]
The Service Screen displays the contact information of
the service company associated with the unit.
Displays the dealer/installer service contact information.
This information is editable using the mobile app, LAN
mode transfer and Wi-Fi transfer.
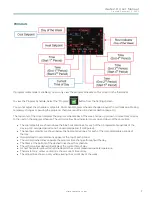
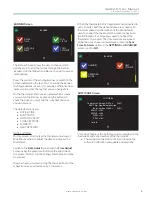
What To Do if You Move
Disconnect Wi-Fi
The Disconnect Wi-Fi option provides a means to
disconnect the thermostat from the Wi-Fi network until
it is setup again .
1.
On the thermostat, not a mobile device, swipe the
HOME screen twice to the left to navigate to the
MODE screen and ensure the MODE is OFF.
NOTE: The yellow line above a button indicates
it is the current MODE.
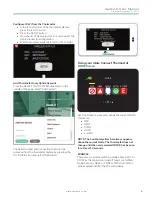
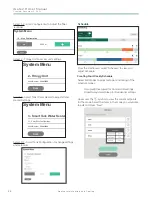
2.
Swipe to go to the FAN screen and then press and
hold the Fan Button for 5 seconds to get to the
SYSTEM SETTINGS screen.
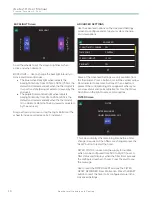
NOTE: The SYSTEM SETTINGS screen can ONLY
be accessed from the thermostat itself, not the
app or web.
3.
Scroll down to DISCONNECT Wi-Fi.
CAUTION: Disconnecting the Wi-Fi requires
setting up the Connect Thermostat using the
Connect mobile application.
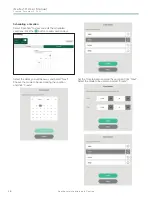
4.
Select YES .
6.
See the section of this guide titled
Setting Up
Wi-Fi and Connecting to your myUplink Account
(page 4) . Follow the instructions within the app .
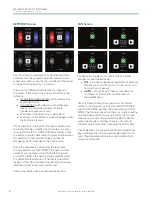
YES
DISCONNECT WIFI
CANCEL
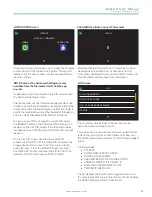
If the thermostat is disconnected from a router, the
thermostat will automatically enable soft access point
mode (SSID - CLM-tstat-XXXX, where XXXX represents
the last 4 digits of the thermostat serial number) for 10
minutes .
Pressing the YES button will disconnect the thermostat
from the Wi-Fi network.
Pressing the CANCEL button will navigate back to the
System Settings screen .
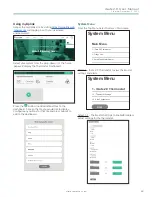
Removing Thermostat from
myUplink Account
1.
Log in to your myUplink
account from either the web
portal or mobile app .
2.
Access the System Profile
from the System menu (web)
or 3-bar menu (mobile) .
3.
Select Delete (web) or
Disconnect System (mobile) .
4.
Select the red Disconnect
button


