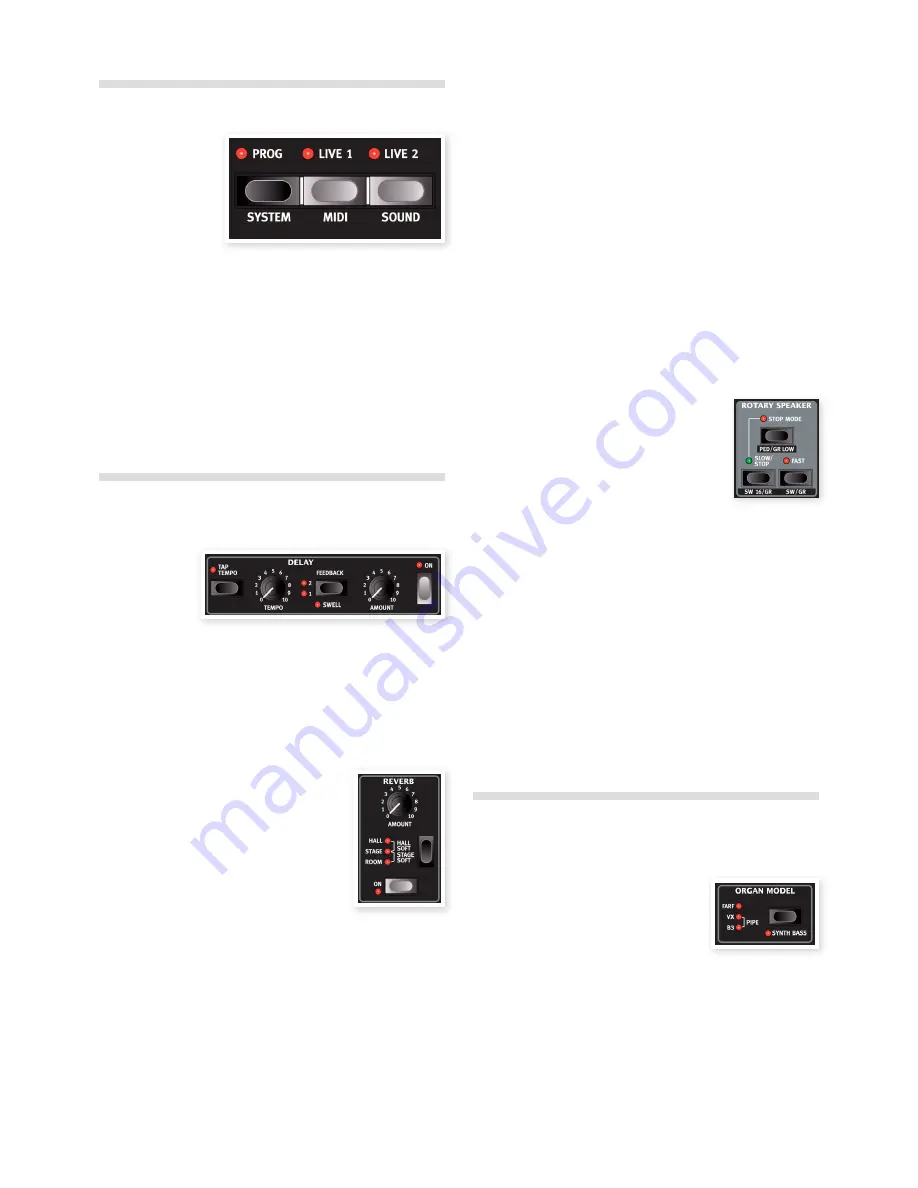
The Live buffers
The special
Live buf-
fers
can be described
as a “live program
memory” . If you acti-
vate the Live button, all
changes to the panel
settings you make will
be continuously saved .
If you switch the power off, or select another program, the settings
are still stored in a Live memory, so when you power up next time (or
return to a Live memory) all settings will be exactly as they were when
you left them . The dot that appears when a Program is changed is not
applicable when a Live buffers is active
If a Live memory is selected and you decide you wish to store the
settings permanently as a program you can do so using the stan-
dard methods (see above) . You can also store programs into the Live
memory location, in which case the program settings will replace the
current Live memory settings .
Adding effects
Select a program and play some notes on the keyboard while
1
you . . . .
. . . turn on the
2
Delay
(the On LED should be lit) and then press
repeatedly on the Feedback selector .
The feedback options are indicated with the selector LEDs and chang-
es in a cyclical fashion for each time the selector is pressed . When both
LEDs are lit you have the maximum amount of feedback .
Turn the
3
Amount
and the
Tempo
knobs while playing .
This changes the amount and the time between the repeats.
Turn on the Reverb with its On button .
4
Hold
5
Shift
and press repeatedly on the
reverb selector .
This allows you to reverse through the reverb
selections .
Holding Shift while pressing any selector
(except the Organ Model) will cycle through
the selections in a counter clockwise fashion.
Turn
6
off
the effect .
If you now continue to press on the effect selector after the effect is
turned off, the effect setting will change even though the effect is not
active .
This method can be used to select a certain effect setting while
playing, without affecting the sound until you actually activate the
effect.
Activate an amplifier emulation
Press the
1
Speaker Model
button to activate the Amp emulation .
The Speaker Model LED will be lit.
Press repeatedly on the selector to cycle through the various options .
2
The Drive knob at the upper right of the panel controls the drive
3
for the amps and the rotary simulator . Make sure that Drive is On,
and then turn the knob to get the desired amount of overdrive .
The Rotary effect
The rotary effect adds some great sonic drama to the sound . The Nord
C2 rotary has three available speeds:
fast
,
slow
and
stop
. Stop does
not disengage the effect; it only stops the rotating speakers
Make sure that the
1
Speaker Model
is activated and select the
Rotary
by pressing the effect selector .
The drive knob now controls the overdrive of the rotary amplifier.
Press the
2
Slow/Stop
and
Fast
buttons in
the
Rotary Speed
section to the left on the
panel, to cycle between the
Fast
and
Slow
speeds of the rotary .
The rotors will speed up and slow down, producing
a nice swirly effect .
Press the
3
Stop
mode button to activate this one-speed mode .
The Stop Mode LED will be lit.
Press repeatedly on the
4
Slow/Stop
button to cycle between
Fast
and
Stop
.
The rotary will now emulate the functionality of an early, one speed
original rotary speaker that had only the fast and the stopped rotary
speed options .
If you connect a foot switch to the rotor pedal input, you can
control the rotary speed with this pedal.
The Speaker Models cannot be used when the Pipe organ
M
selected.
Selecting an organ model
Press repeatedly on the
1
Organ Model
selector to cycle through
the four types - the B3, Vox, Farfisa emulations and the sampled
Pipe organ .
The settings for the organ sounds are made
using the digital drawbars . The Farfisa and the
PIpe organ uses these in a switch mode, with
only two settings for each .
Make a setting with the drawbars and then press one of the
2
Drawbar/Preset
buttons
Make a new preset setting, in order to be able to quickly change
3
from one to the other during a performance .
4gettiNgstarted
| 9
Summary of Contents for Nord C2
Page 25: ......


