


4
E
n
g
li
s
h
Getting started
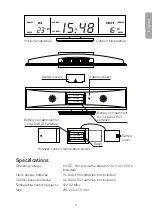
Inserting the batteries
Clock
The backup batteries prevent the clock settings from being lost in case of power cuts.
1. Open the battery compartment on the back of the clock by sliding it straight up,
and insert 3 x AAA/LR03 batteries.
Make sure to insert the batteries according to the markings in the battery
compartment.
2. Replace the battery cover by sliding it straight down.
Outdoor sensor
1. Open the battery compartment on the back of the outdoor sensor by sliding it
straight down. Insert 3 x AAA/LR03 batteries into the battery compartment.
Make sure to insert the batteries according to the markings in the battery
compartment.
2. Replace the battery cover by sliding it straight up.
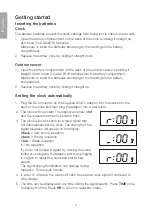
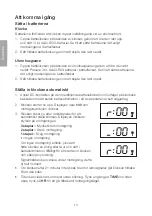
Setting the clock automatically
1. Plug the DC connector on the supplied AC/DC adaptor into the socket on the
back of the clock and then plug the adaptor into a wall outlet.
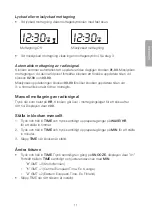
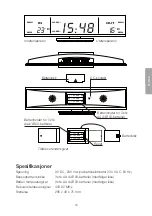
2. The clock will now start. The display will show
r:00
and the reception symbol will start to flash.
3. The clock will now search for a radio signal that
will automatically set the clock. The strength of the
signal reception will appear on the display.
3 bars
= Very strong reception
2 bars
= Strong reception
1 bar
= Weak reception
r
= No reception
If you do not receive a signal, try moving the clock
a little or unplugging the adaptor and then plugging
it in again to restart the clock and start a new
search.
The signal strength indicators can change during
reception. This is quite normal.
4. If, after 21 minutes, the clock still hasn’t received a radio signal it will revert to
time display.
5. The time can be displayed at any time during the signal search. Press
TIME
once
to display the time. Press
HR
to return to reception mode.
:00
:00
:00
Summary of Contents for E0060
Page 27: ......


