


17
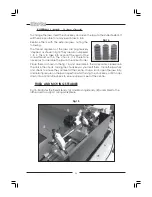
B. SIMPLE TURNING WITH POWER FEED
The same basic setup is used as described above, except that, before starting, the
Leadscrew F/N/R Lever (25) is set to the ‘Forward’ position and the Auto Feed Lever
(15), is operated in order to drive the saddle.
As mentioned previously, the rotational speed of the leadscrew, and hence the
rate of feed of the tool, is dependant upon the gear configuration of the gear
train.
The feed rate for normal turning is considerably less than that used for screw cutting.
The lathe is factory configured for normal turning, however, if you have been screw
cutting, always remember to reset the gear configuration to that for normal turning.
Please refer to the chart on page 19 which shows the gear configuration, and the
explanation of how to change the gears on the same page.
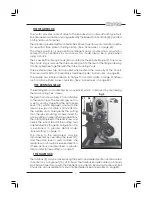
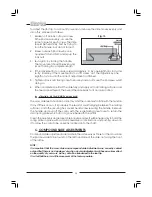
1.
Taking all precautions previously mentioned, position the cutting tool a short
distance to the right of the workpiece with the appropriate depth of cut set on
the cross-slide.
2.
Ensure the leadscrew F/N/R lever is set to ‘Forward’ and select ‘Forward on the
Forward/Off/Reverse switch on the main control panel. Release the Emergency
Stop and switch ‘ON’ the speed control knob.
3.
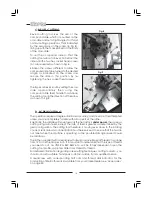
Turn the knob to achieve your desired spindle speed, and with your right hand,
push down on the auto feed lever until the nut becomes firmly engaged with
the leadscrew.
IMPORTANT: Your left hand should always be free in order to hit the emergency stop
should it become necessary.
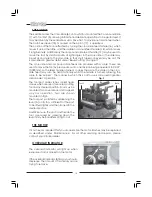
4.
Carefully observe the movement of the tool and as it approaches the mark on
the surface, denoting the end of cut, pull the Auto Lever UP sharply and ensure
it stays UP. If a degree of accuracy is required, it is recommended that you
finish the cut by hand.
NOTE: If you require a shoulder with perfectly clean corners,then you need to use an
appropriately shaped tool.
5.
Retract the tool one or two complete turns on the cross-slide feed, then wind
the saddle so that the tool is at the start point once again. Advance the tool
the same number of turns, plus the depth of cut, and when ready, push down
the auto feed lever and procede to take another cut.
Summary of Contents for MetalWorker CL300M
Page 1: ...1 OPERATING MAINTENANCE INSTRUCTIONS 300mm VARIABLE SPEED METAL LATHE Model No CL300M 1008...
Page 4: ...4...
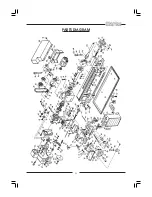
Page 29: ...29 PARTS DIAGRAM...
Page 30: ...30 WIRING DIAGRAM...
Page 31: ...31 NOTES...
Page 32: ...32...


